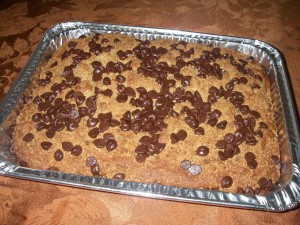
Gooey Chocolate Chip Cookie Bars

Looking for a fun and simple kid-friendly recipe? These gooey chocolate chip cookie bars easily fit the bill.

The great thing about this recipe is that it gives you a huge batch of cookie bars with minimal work. If you have a stand mixer, the dough is really a snap. And because these babies are really sweet, you can cut them into small pieces and serve a decent-sized crowd.

gooeyccbars

Gooey Chocolate Chip Cookie Bars

Recipe from RecipeGirl

Ingredients:

For the filling:

2 cups semi-sweet chocolate chips
One 14-ounce can sweetened condensed milk
2 teaspoons vanilla extract

For the cookie dough:

1 cup (2 sticks) unsalted butter, at room temperature
1 cup light brown sugar
1/2 cup granulated white sugar
1 large egg
1 large egg yolk
1 tablespoon vanilla extract
2 cups all-purpose flour
1 cup quick-cooking or old-fashioned rolled oats
1 teaspoon baking powder
1 teaspoon baking soda
1 teaspoon kosher salt
3 cups semi-sweet chocolate chips

Method:

  1. Preheat your oven to 350 degrees. Lightly butter a 9×13-inch pan with parchment paper, allowing enough overhang to lift the bars from the pan.
  2. Prepare the filling by placing the chocolate chips and condensed milk in a small saucepan over the lowest possible heat. Cook for about 5 minutes, stirring constantly, until the chocolate has melted and the mixture has thickened. Turn off the heat, add the vanilla, and stir until smooth. Set aside to cool to room temperature.
  3. Prepare the cookie dough by combining the butter and sugars in a large bowl. Beat with an electric mixer until smooth and creamy. Add the egg, egg yolk and vanilla, and beat well.
  4. Whisk together the flour, oats, baking powder, baking soda and salt in a medium bowl. Add to the butter mixture and beat until well-incorporated, scraping down the sides of the bowl as needed. Stir in chocolate chips.
  5. Pour half of the cookie dough into your prepared pan. Pour the cooled chocolate mixture over the dough and then add small dollops of the remaining cookie dough on top. Don’t worry if the dollops don’t completely cover the chocolate mixture; just spread it together as much as you can, and let some chocolate peek through.
  6. Bake for about 25 minutes, at which point the tops should be lightly browned. (The toothpick method won’t really work here because the gooey chocolate layer will still come out pretty runny even once the bars are done.)
  7. Let the bars cool for at least two hours before cutting and serving. I recommend sticking them in the fridge for 30 minutes or so – they’ll be much easier to slice that way.


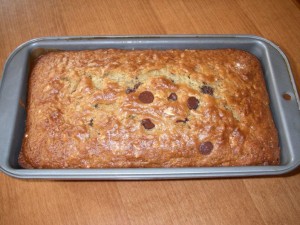
Oatmeal Chocolate Chip Bread

I’ll admit it: Sometimes I like eating sweets for breakfast. I think that’s called being human. At the same time, I don’t like my breakfast sweets to be too sweet (in other words, you usually won’t find me chowing down on a heavily iced chocolate fudge cupcake along with my morning coffee). So when I found myself craving a breakfast treat the other day, I decided to try a recipe that I’d recently seen on one of my favorite baking blogs.

Although you could serve this oatmeal chocolate chip bread after dinner or as an afternoon snack, to me, it’s just perfect for breakfast. The chocolate chips add just the right amount of sweetness, and the dense yet moist nature of the bread makes it perfect for dipping in coffee (confession: I’m a bit of a serial dunker). Best of all, it’s really a cinch to make, and if you have any left over, it’ll probably keep for the better part of a week as long as you keep it tightly wrapped.

oatmealccbread

Oatmeal Chocolate Chip Bread
Recipe from Bake or Break

Ingredients:

2 cups AP flour
1 cup rolled oats
1/2 cup granulated sugar
1/2 cup packed light brown sugar
2 teaspoons baking powder
1 teaspoon baking soda
1/2 teaspoon ground cinnamon
1/2 teaspoon salt
1/2 cup chopped pecans
1/2 cup semisweet chocolate chips
1 and 1/2 cups buttermilk
2 large eggs
1/4 cup butter, melted and cooled to room temp

Method:

  1. Preheat your oven to 350 degrees. Generously grease a 9×5 loaf pan with cooking spray.
  2. In a large bowl, mix together the flour, oats, sugars, baking powder, baking soda, cinnamon, and salt. Stir in pecans and chocolate chips.
  3. In a separate bowl, whisk together the buttermilk, eggs, and butter. Stir into dry ingredients just until-combined. Your batter may be a little lumpy, and that’s fine.
  4. Pour your batter into the prepared pan and bake for 50-55 minutes, or until an inserted toothpick comes out clean.
  5. Let the bread cool in its pan for at least an hour before slicing and serving.

Caramel Cookie Dough Shortbread Bars

The other day, my 16-month-old locked me in my pantry. No, I’m not kidding.

I was standing in the doorway of my walk-in pantry, whose knob was set as locked to prevent my sneaky child from busting into my closed pantry behind my back and helping himself to whatever goodies he can reach. As I was combing the shelves looking for some caramel candies, the baby decided to sneak up behind me and start pushing the door into me. Now in all fairness, I didn’t try very hard to resist, thinking there was no way my little 16-month-old could possibly exert enough force to shove my body all the way into the pantry via the door. But lo and behold, I was wrong, ‘cause about eight seconds later, the child managed to push me all the way into the pantry, thus locking me in.

My husband, who was on hand for most of this scene, found it extraordinarily funny. Me, not so much. Actually, that’s not true. I laughed about it after the fact, but was also quite thankful that my husband was on hand to immediately bust me out.

Of course, this incident has caused me to rethink my strategy of keeping the child out of the pantry, and so going forward, I will not lock the door, but rather will use one of those annoying but necessary baby-proof knobs that makes opening things unbelievably difficult (for me) but will most likely do the job of keeping my junk food stash safe and out of my child’s mouth.

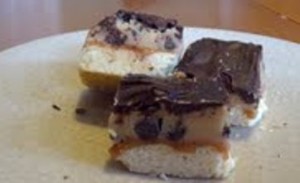
Anyway, once I recovered from my very brief moment of pantry incarceration, I got to work making these amazing shortbread cookie bars. I’ve done something similar in the past along the lines of classic Millionaires’ Shortbread, which is basically a shortbread base, caramel center, and chocolate glaze. But when I saw this recipe on Brown Eyed Baker, one of my absolute favorite baking blogs, I decided I had to go for it.

These bars are nothing short of amazing. I was actually worried that the cookie dough layer would make them a bit too sweet, but they turned out perfectly. The original recipe is enough for an 8×8 pan, but I wanted extra to bring in to work, so I made one and a half times the recipe to fill a 9×13. In hindsight, I could’ve stuck with the 8×8. These bars are wonderful, but they’re also incredibly rich, and believe it or not, you really only need a small piece to come away satisfied.

Although you do have the option of storing these beauties at room temperature, I decided to keep mine in the fridge and found that I enjoyed them cold—so much so, that my once-ample supply is now rapidly dwindling.
bilbarsjpg

Caramel Cookie Dough Shortbread Bars
Original recipe from Brown Eyed Baker

Ingredients:

For the shortbread base:
1/3 cup unsalted butter, at room temperature
1/3 cup granulated sugar
1/2 teaspoon vanilla extract (I used a little more to bring out the vanilla flavor)
1/4 teaspoon salt
1 cup AP flour

For the caramel layer:
7 ounces soft caramel candies (about 25 candies), unwrapped (I used Kraft caramels)
2 tablespoons heavy cream

For the cookie dough layer:
1/2 cup unsalted butter, at room temperature
1/2 cup light brown sugar
1/4 cup granulated sugar
2 tablespoons heavy cream
1/2 teaspoon vanilla extract
3/4 cup AP flour
Pinch of salt
1/2 cup semisweet chocolate chips

For the chocolate glaze:
4 ounces semisweet chocolate, chopped
1 tablespoon unsalted butter

Method:

To make the shortbread:
1. Preheat your oven to 350 degrees. Line an 8×8 inch baking pan with parchment paper, leaving some overhang on two sides.
2. Beat the butter and sugar with an electric mixer on medium speed until the mixture is light and fluffy, about 2-3 minutes.
3. Add the vanilla and salt, and beat until combined.
4. Add the flour and mix until just incorporated; the dough may appear slightly crumbly.
5. Firmly press the dough into your prepared pan. Bake for 18 to 22 minutes (22 to 25 minutes if you’re making enough for a 9×13 pan), or until the edges are lightly golden.
6. Remove pan from the oven and set on a wire rack to cool slightly.

To make the caramel layer:
1. Place the caramel candies in a small saucepan over medium heat. Add the heavy cream and stir until completely melted. (Disclaimer: I totally cheated and melted these together in the microwave. It turned out just fine, but I made sure to watch it carefully.)
2. Pour the caramel mixture over the shortbread crust and spread into an even layer.
3. Refrigerate until set, about one hour.

To make the cookie dough:
1. Combine the butter and sugars in a large mixing bowl and beat on medium speed until light and fluffy, about 2 to 3 minutes.
2. Add the heavy cream and vanilla and mix well.
3. Add the flour and salt, and mix on low until incorporated.
4. Stir in the chocolate chips.
5. Spread the cookie dough on top of the set caramel layer, using a spatula to smooth the dough into an even layer.
6. Refrigerate the pan while you prepare your glaze.

To make the chocolate glaze:
1. Combine the chocolate and butter in a microwave-safe bowl. Heat the mixture on 50% power in 30-second increments, stirring well after each, until it’s completely melted and smooth.
2. Spread the glaze over the cookie dough layer and chill in the fridge until set, about one hour.

To remove the bars from the pan, grasp the edges of the parchment paper and lift out the entire block. Place on a cutting board and use a sharp knife to cut into squares.

The original recipe says that these can be stored at room temp in an airtight container for up to three days. As I said, I opted to keep mine in the fridge. Don’t struggle with the decision too much; they’re delicious either way.

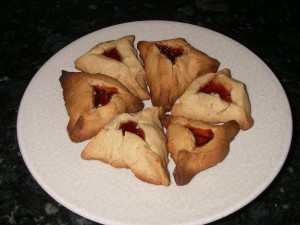
Hamentashen

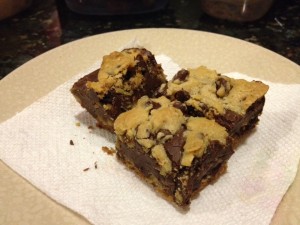
As part of last weekend’s baking extravaganza, I made several batches of hamentashen. For those of you who don’t know (and you wouldn’t be alone), hamentashen are triangular-shaped cookies that are typically filled with prune, apricot, or raspberry jam. They also happen to be one of my favorite things ever.

Now I will warn that hamentashen are fairly time-consuming as far as cookies go. The classic dough recipe I use is easy enough and takes no time to throw together, but the process of rolling out the dough, filling it, and shaping it requires a decent amount of time and patience. And the dough sometimes doesn’t like to cooperate. And the cleanup is atrocious (imagine sticky, caked-on dough particles all over your countertop and flour everywhere). But the end result is undeniably delicious, so if you’re up for the challenge, go ahead and make these one day. If anything, the people you share them with will get a kick out of the fun shape.

I like to make a variety of hamentashen, including some non-traditional variations. This year’s batch included classic prune, Nutella, apple-caramel, peanut butter and jelly, peanut butter and chocolate chip, and pumpkin. To create this assortment, I used three separate dough recipes, the most challenging of which is by far the classic one.

As far as my favorite version of the hamentashen goes, that’s hard to say. I really enjoyed the peanut butter and jelly combination, but there’s just something about classic prune-filled hamentashen that makes me keep going back for more. It’s a good thing I made almost 200 of these bad boys over the weekend. No, I’m not kidding. I gave most of them away but kept a few dozen on hand for myself…most of which are already gone…

IMGP1700          IMGP1717

Classic Hamentashen (my mom’s recipe)
Ingredients:
5 eggs, plus one more for brushing on the dough
1 and ½ cups vegetable oil
3 tsp baking powder
1 and ½ cups granulated sugar
¾ cup orange juice
6 cups AP flour
1/8 tsp salt
Water as needed, up to ¾ of a cup

Method:
1. Combine eggs, oil, baking powder, sugar, orange juice, flour, and salt in a large mixing bowl. Use a spoon and then your hands to form a dough that is soft but not too sticky. Add water as needed if the dough is too crumbly. If you end up incorporating too much water, you’ll need to compensate by adding more flour.
2. Cover the dough with plastic wrap and refrigerate for 30 minutes.
3. Preheat your oven to 350 degrees once the dough has come out of the fridge. Prepare as many baking sheets as you can by lining with aluminum foil and lightly greasing. (This recipe makes anywhere from four to six dozen hamentashen depending on big you make them, so unless you’ve got an endless supply of cookie sheets, prepare to bake these in several batches.)
4. Divide the dough into four sections and roll it out on a well-floured surface to ¼ inch thickness.
5. Cut the dough into circles using either a cookie cutter or a regular drinking glass (the latter is my preferred method). Place the circles on the prepared baking sheets.
6. Place a small amount of your desired filling in the center of each circle. Be careful not to overfill your hamentashen.
7. Form the circles into triangles by folding the dough over one side at a time. Lightly pinch each corner to seal the hamentashen.
8. Lightly brush each formed hamentashen with beaten egg.
9. Bake for 20-30 minutes, or until the tops are golden brown. Baking times can vary based on the size of your hamentashen as well as your oven, so be sure to check on them frequently once you hit the 20-minute mark.
10. Let the hamentashen cool on their baking sheets for 2-3 minutes, then transfer them to a rack to cool completely.

I used this classic recipe to make my prune, Nutella, and caramel-apple hamentashen. For the caramel apple, I simply used apple pie filling for the cookies and then drizzled them with a caramel sauce I made by heating about 15 Kraft caramel squares with a few teaspoons of milk.

IMGP1696

Peanut Butter Hamentashen

Ingredients:
2 sticks of unsalted butter at room temperature
3 cups Ap flour
1 and 1/2 cups granulated sugar
2 large eggs
2 and 1/2 cups smooth peanut butter
1 and 1/2 teaspoons salt
1 teaspoon baking powder
1 teaspoon pure vanilla extract

Method:
1. Using a hand or stand mixer, beat the butter and sugar on medium until the mixture is light and fluffy. Beat in the eggs one at a time. Add in the peanut butter and beat on medium for 2-3 minutes, or until well-combined.
2. Whisk together your flour, salt, and baking powder; then add to the peanut butter mixture and beat at low-medium speed until well-combined. Add your vanilla and mix well.
3. Cover the dough and refrigerate for 30-60 minutes. Then follow the steps above to roll it out and form it into triangles. (No need to use an egg wash for this dough).
4. Bake for 18-22 minutes at 350 degrees, or until the tops are golden brown. Follow the instructions above for cooling.

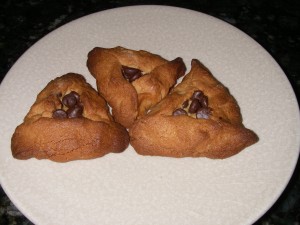
I filled my peanut butter hamentashen with grape jelly, strawberry jelly, and chocolate chips. I also threw in a couple of smashed-up Butterfinger bars as a filling. Feel free to get creative by adding raspberry jam, Nutella, white chocolate, or your favorite crushed-up candy bar.

IMGP1697

Pumpkintashen (Pumpkin Hamentashen)
Recipe from allrecipes.com

Ingredients:
3/4 cup unsalted butter
1/2 cup packed brown sugar
1 tablespoon orange zest
1/2 cup pumpkin puree
1 egg yolk
1 tsp vanilla extract
2 and 1/4 AP flour
1/4 teaspoon ground cinnamon
1/4 teaspoon ground ginger
1/4 teaspoon ground nutmeg
Pinch of salt

Method:
1. Cream together the butter, brown sugar, and orange zest.
2. Stir in the pumpkin.
3. Add the egg yolk and vanilla; mix well.
4. Sift together the flour, cinnamon, ginger, nutmeg, and salt; stir into the pumpkin mixture.
5. Cover the dough with plastic wrap and chill in the fridge for 30 minutes.
6. Follow the steps above to roll out the dough and form it into triangles. (No need to use an egg wash for this dough).
7. Bake at 375 for 20-25 minutes.
8. Follow the instructions above for cooling.

I filled my pumpkintashen with chocolate chips, white chocolate chips, and butterscotch chips. I think a sweet cinnamon-cream cheese filling would taste fantastic with these, but I kept things simple and stuck to the chips.


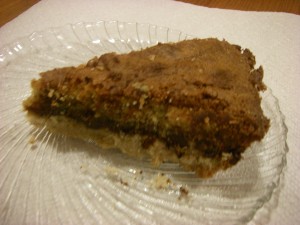
Chocolate Chip Cookie Pie

It seems like every year around this time, I start to get a little stir crazy…and more than a little tired of winter. I’m just one of those people who really, really doesn’t like being cold. Now I can deal with December. For some reason, I’m a total sucker for all that holiday spirit jazz, and it helps keep my mind off the dropping temps. And I’m usually okay with January, mostly ‘cause at that point we haven’t been dealing with winter for too long. But come February, I’m usually ready to either escape to someplace warm (which is not going to happen with a baby) or otherwise resign myself to hibernation until the cold subsides.

This weekend, I opted for the latter and decided to spend as much time as possible curled up on the couch with a warm blanket and a book. Of course, a night much like the one I had planned for Saturday (when the forecast warned of a winter weather advisory complete with ample amounts of snow) wouldn’t be complete without some killer dessert to accompany the couch-blanket-book extravaganza, and so I decided to make a chocolate chip cookie pie.

Now I’m not usually the biggest fan of chocolate chip cookies. Sure, they’re a classic dessert, but they’re also kind of on the boring side. But take the chocolate chip cookie and serve it up to me in pie form, and I’m golden.

This pie is exceptionally delectable when served warm, though room temperature also works. I especially love the way the chocolate chips form their own gooey layer of deliciousness. For those of you who are just as tired of winter as I am, I recommend baking this super easy pie, carving out a nice, fresh-out-of-the-oven slice, scooping up a generous serving of vanilla ice cream on the side, curling up on the couch with your favorite book/movie/form of entertainment, and letting each sweet bite help whisk away those winter blues.

IMGP1631

Chocolate Chip Cookie Pie
Slightly adapted from Serious Eats

Ingredients:

For The Crust:
1 and 1/2 cups AP flour
1/2 cup light brown sugar
1/4 cup granulated sugar
1/2 teaspoon salt
1 stick of unsalted butter, melted

For The Filling:
2/3 cup light brown sugar
1/4 cup granulated sugar
1/4 teaspoon salt
3/4 cup unsalted butter, melted
2 large eggs
1 large egg yolk
1 and ½ teaspoons vanilla extract
1/2 cup (2 1/2 ounces) AP flour
1/4 plus 1/8 teaspoon baking soda
1 and ¼ cup semisweet chocolate chips

Method:
1. Preheat your oven to 375 degrees. Butter 9-inch pie or tart plate.
2. Make the crust by combining your flour, brown sugar, granulated sugar, and salt in a large bowl. Stir in the melted butter until moist crumbs form. Press the mixture into bottom and sides of the pan.
3. Make the filling by whisking together your brown sugar, sugar, salt, and butter. Once combined, whisk in the eggs, egg yolk, and vanilla.
4. In a separate bowl, stir together the flour and baking soda until combined. Then stir the flour mixture into the egg/sugar mixture until well-combined.
5. Stir in chocolate chips, and pour the mixture into the crust.
6. Bake for 40-45 minutes, or until the top of the pie turns a nice golden brown. Cool for 45 minutes on a wire rack before serving—the pie will still be nice and warm, but it’ll be a lot easier to slice. Serve with vanilla ice cream if desired, and try not to eat the whole in one sitting.


Peanut Butter Chocolate Chip Cake

Yesterday was just one of those days—the kind of day where the phone just kept ringing, the emails just kept coming, and every time I did a little victory dance in my head for completing a task, another popped up. Oh, and then I picked the baby up from daycare and saw that he’d dirtied not only the outfit I sent him in, but a spare outfit as well. You know what that means: an extra after-hours laundry session. Fun times.

By the time I finally got around to baking (‘cause on a day like that, you’ve gotta have cake), it was late, and I needed something I could a) throw together quickly, and b) have bake while my husband and I were eating dinner.

This cake was perfect in that regard. It took about 15 minutes to prepare, and part of that included busting my stand mixer out of the cabinet and setting it up. And with a relatively short bake time, it was ready just as I finished the dishes from dinner.

I got the recipe from Bake or Break. If you haven’t visited this site yet, I highly recommend that you check it out. There are so many yummy recipes it’ll probably make your head spin—but in a good way, promise.

IMGP1505


Peanut Butter Chocolate Chip Cake

Ingredients:
2 and 1/4 cups all-purpose flour
2 cups light brown sugar
1 cup creamy peanut butter
1/2 cup unsalted butter
1 teaspoon baking powder
1/2 teaspoon baking soda
1 cup milk
1 teaspoon vanilla extract
3 eggs
1 cup semisweet chocolate chips

Method:
1. Preheat your oven to 350 degrees and spray a 9×13 pan.
2. With an electric mixer, combine the flour, brown sugar, peanut butter, and butter for a minute or two on low-medium speed. Remove one cup of the blended mixture and set aside.
3. Mix in the baking powder and baking soda.
4. Mix in the milk and vanilla.
5. Add the eggs, one at a time, and mix well.
6. Transfer the batter your pan and sprinkle the top with the cup of reserved flour mixture plus your chocolate chips.
7. Bake for 35-40 minutes, or until a toothpick inserted comes out clean.