Pear Bread

As excited as I am about the abundance of apples this time of year, there’s another fruit that I’ve also gotten pretty stoked about lately: the pear. I wasn’t always a huge fan of pears, but over the past year I’ve grown to really like them. And now that pears are in season, I’ve been trying to take advantage by incorporating them into my fall baking routine. To that end, I recently whipped up this wonderfully delicious pear bread.

If you enjoy pears, I highly recommend making this pear bread, which, really, might as well be called pear cake. The recipe couldn’t be easier to follow and the end result is a moist, light bread (er, cake) that’s perfect for breakfast or an afternoon snack. Actually, you could eat this anytime of the day. Have it for dinner, in fact. I won’t judge you…especially since that’s what I did a few nights ago.

pearbread

Pear Bread
Recipe from Bake or Break

Ingredients:

3 cups AP flour
1 teaspoon baking soda
1/4 teaspoon baking powder
1 teaspoon salt
1 tablespoon ground cinnamon
1 cup chopped pecans
3/4 cup vegetable oil
3 large eggs, lightly beaten
2 cups granulated sugar
2 cups peeled and finely grated ripe, firm pears
2 teaspoons vanilla extract

Method:

  1. Preheat your oven to 350 degrees. Lightly grease and flour a two 9×5 loaf pans.
  2. Mix together the flour, baking soda, baking powder, salt, and cinnamon. Scoop out about 1/4 cup of this mixture and combine it with the pecans to coat, and then stir back into the flour mixture.
  3. In a separate bowl, combine the oil, eggs, sugar, pears, and vanilla. Add the pear mixture to the flour mixture, stirring just until the flour disappears and the batter is evenly moistened.
  4. Pour the batter into your prepared pans and bake for 60-70 minutes, or until the bread is browned and firm on top and an inserted toothpick comes out clean.
  5. Cool completely before cutting and serving.

Oatmeal Chocolate Chip Bread

I’ll admit it: Sometimes I like eating sweets for breakfast. I think that’s called being human. At the same time, I don’t like my breakfast sweets to be too sweet (in other words, you usually won’t find me chowing down on a heavily iced chocolate fudge cupcake along with my morning coffee). So when I found myself craving a breakfast treat the other day, I decided to try a recipe that I’d recently seen on one of my favorite baking blogs.

Although you could serve this oatmeal chocolate chip bread after dinner or as an afternoon snack, to me, it’s just perfect for breakfast. The chocolate chips add just the right amount of sweetness, and the dense yet moist nature of the bread makes it perfect for dipping in coffee (confession: I’m a bit of a serial dunker). Best of all, it’s really a cinch to make, and if you have any left over, it’ll probably keep for the better part of a week as long as you keep it tightly wrapped.

oatmealccbread

Oatmeal Chocolate Chip Bread
Recipe from Bake or Break

Ingredients:

2 cups AP flour
1 cup rolled oats
1/2 cup granulated sugar
1/2 cup packed light brown sugar
2 teaspoons baking powder
1 teaspoon baking soda
1/2 teaspoon ground cinnamon
1/2 teaspoon salt
1/2 cup chopped pecans
1/2 cup semisweet chocolate chips
1 and 1/2 cups buttermilk
2 large eggs
1/4 cup butter, melted and cooled to room temp

Method:

  1. Preheat your oven to 350 degrees. Generously grease a 9×5 loaf pan with cooking spray.
  2. In a large bowl, mix together the flour, oats, sugars, baking powder, baking soda, cinnamon, and salt. Stir in pecans and chocolate chips.
  3. In a separate bowl, whisk together the buttermilk, eggs, and butter. Stir into dry ingredients just until-combined. Your batter may be a little lumpy, and that’s fine.
  4. Pour your batter into the prepared pan and bake for 50-55 minutes, or until an inserted toothpick comes out clean.
  5. Let the bread cool in its pan for at least an hour before slicing and serving.

Cookie Dough Truffles

Yesterday was just one of those days. You know, those days.

I won’t bore you all with the details, but let’s just say that every minor thing that could’ve gone wrong went wrong. In other words, nothing particularly terrible—just enough tiny doses of annoyance whose sum total rendered me frustrated and aggravated by the time I was able to finally put the baby to bed and call it a day.

Okay, vent over. See, that wasn’t so bad. And now I can talk about the cookie dough truffles I made myself to compensate for the above-referenced aggravation.

These truffles are tasty and super easy to whip up. But, you need some time to allow them to set, so if you’re craving something sweet in an instant, you’ll probably want to opt for something that doesn’t require you to wait three hours (though you could, ahem, always eat some of the cookie dough along the way…as long as nobody’s watching, your secret is safe).

cdough

Cookie Dough Truffles
Recipe from Sweet Pea’s Kitchen

Ingredients:

For the cookie dough:
1 and 1/2 sticks of butter
3/4 cup light brown sugar
3/4 cup granulated sugar
3 tablespoons milk (I used whole)
1 1/2 teaspoons vanilla
1 1/2 cups AP flour
1 1/2 cups mini semisweet chocolate chips

For the dipping chocolate:
6 ounces semisweet chocolate
2 tablespoons shortening

Method:

1. Line a baking sheet with waxed paper and set aside.
2. Beat the butter, brown sugar, and white sugar until light and fluffy, about 3 minutes. Beat in milk and vanilla until combined, about 1 minute. Mix in flour just until combined. Stir in chocolate chips.
3. Shape the cookie dough into balls, using about 2 teaspoons of dough for each ball. (I started out doing this with a spoon and after a couple of tries found that it was easier to just use my hands.)
4. Place the cookie dough balls on your lined baking sheet and refrigerate for at least an hour (I left mine in for about 90 minutes, and that did the trick).
5. Once the cookie dough balls have hardened up, melt the shortening and chocolate. I did this in the microwave on 50% power for 30-second intervals, stirring in between each.
6. Dip the cookie dough balls in the melted chocolate and return them to the baking sheet (or, do what I did and prepare a second waxed paper-lined baking sheet).
7. Let the coated cookie dough balls set in the fridge for 1-2 hours before serving.

White Chocolate Toffee Toasted Pecan Blondies

I’ve talked about my sweet tooth many times before, but let’s discuss my obsession with sweet things one more time for the purpose of sharing my latest sugar-infused creation. This concoction is actually based on the white chocolate cranberry blondies I made over the summer. But whereas the dried cranberries in that recipe cut the sweetness factor a little, the toffee and toasted pecans in this one serve the opposite purpose. In other words, you’ve been warned: These blondies are sweet. Very sweet. But if you’re like me, that’s not such a bad thing.

toastedpecanblond

White Chocolate Toffee Toasted Pecan Blondies

Ingredients:

3/4 cup butter, melted and cooled to room temp
1 and 1/2 cups packed dark brown sugar
2 large eggs
3/4 teaspoon vanilla extract
2 and 1/4 cups AP flour
1 and 1/2 teaspoons baking powder
1/4 teaspoon salt
1/4 teaspoon ground cinnamon
3/4 cup white chocolate chips
3/4 cup toffee bits
3/4 cup chopped toasted pecans

Method:

1. Preheat your oven to 350 degrees. Spray a 13×9-inch baking pan with nonstick spray and set aside.
2. In a large bowl, whisk together the butter and brown sugar until well-combined.
3. Beat or whisk in the eggs and vanilla.
4. In a separate bowl, whisk together the flour, baking powder, salt, and cinnamon.
5. Gradually add the dry mixture to the butter mixture.
6. Stir in the white chocolate chips, toffee bits, and pecans. The batter will be thick.
7. Spread your batter into the prepared pan and bake for 27-32 minutes, or until an inserted toothpick comes out clean.
8. Let the blondies cool in their pan completely before cutting and serving.

Allspice Crumb Muffins

I know I’ve already gone on and on about how much I absolutely love the flavors of fall, so bear with me as I say it once again, this time in the form of praise for these allspice muffins. If you’re a fan of cinnamon, sugar, and warm, buttery crumb-topped muffins, go ahead and make yourself a batch of these.

allspicemuff

Allspice Crumbs Muffins
Recipe from Eva Bakes

Ingredients:

For the crumb topping:

½ cup AP flour
½ cup light brown sugar
½ tsp ground allspice
5 tbsp cold unsalted butter, cut into bits

For the muffins:

2 cups AP flour
½ cup granulated sugar
1 tbsp baking powder
½ tsp ground allspice
¼ tsp salt
¼ cup light brown sugar
1 stick unsalted butter, melted and cooled
2 large eggs
¾ cup whole milk
¼ tsp vanilla

Method:

For the crumb topping:

  1. Mix the flour, brown sugar, and allspice in a small bowl. Add the chunks of cold butter and mix with your hands by pinching the mixture between your fingers until you have uneven, pea-sized crumbs. (Tip: To avoid having the mixture stick to your hands, try coating your fingers with a bit of cooking spray.)
  2. Place the topping in the refrigerator until ready to use (it can be made up to 3 days ahead and stored, covered, in the fridge).

For the muffins:

  1. Preheat your oven to 375 degrees and line a muffin pan with 12 muffin cups.
  2. In a large bowl, whisk together the flour, granulated sugar, allspice, baking powder, and salt. Add in the brown sugar and stir until no lumps remain.
  3. In a separate large bowl, mix together the melted butter, eggs, milk, and vanilla until well-combined. Pour the liquid ingredients into the dry ingredients, whisking gently but quickly to combine. The batter may be lumpy, and that’s okay.
  4. Evenly distribute the batter into the muffin cups. Sprinkle the crumb topping over each muffin, and then use your fingertips to gently press the crumbs into the batter.
  5. Bake for about 20 minutes, or until the tops are golden and an inserted toothpick comes out clean.
  6. Let the muffins cool in their pan for about five minutes before transferring them to a wire rack to cool completely.

Although these muffins can supposedly last up to five days when stored in an airtight container at room temp, I found that they started to dry out after two or three days. My advice is to cut the recipe in half if you don’t think you’ll finish yours within a couple of days. Yes, it may seem like a lot of work for such a small amount of muffins, but trust me, these are well worth it.

Apple Spice Bars

Yesterday I went apple picking for the first time this season, and while it was a touch early for some of the varieties I like to have on hand, I managed to stock up on one of my all-time favorites: the McIntosh. There’s just something about McIntosh apples that I really like. I could sit there and munch on them all day, especially if I have a nice jar of peanut butter on hand. But if there’s one thing I absolutely love about McIntosh apples, it’s the fact that they’re the perfect addition to many of my favorite fall baking recipes, including these apple spice bars.

This recipe really embraces all the wonderful flavors of fall. You’ve got cinnamon, nutmeg, and brown sugar combining with fresh, juicy apples to form one of the most perfect concoctions you could ever imagine. If you decide to make them, do yourself a favor and spend some time in your kitchen while these babies are baking up. You’ll be overwhelmed by the warm, comforting aroma of spices as you stand there anticipating how good they’ll taste fresh out of the oven.

Of course, you’ll need to wait a little while to let your bars cool. And you should be warned that once they’re ready, you may have a hard time eating just one. I find that these soft, moist cake bars pair perfectly with a nice warm beverage, be it a strong cup of coffee or a mug of chai or herbal tea. And if you happen to be lucky enough to taste them while they’re still slightly warm, you’ll pretty much be in heaven.

applespicebars

Apple Spice Bars
Recipe very slightly adapted from Beantown Baker

Ingredients:

2 cups AP flour
2 tsp baking powder
1/4 tsp salt
2 tsp ground cinnamon
1/4 tsp nutmeg
1/4 tsp allspice
1/2 cup butter, melted and cooled to room temp
1 cup packed dark brown sugar
1 cup white sugar
2 eggs
1 tbsp vanilla
2 cups diced and peeled McIntosh apples
Brown sugar for topping, optional

Method:

1. Preheat your oven to 350 degrees. Grease a 9×13 baking pan and set aside.
2. In medium bowl, whisk together the flour, baking powder, salt, and spices.
3. In a large bowl, combine the sugars and butter. Whisk thoroughly until well-combined. (Note: The original recipe suggests using a stand mixer. I didn’t want to bust mine out, and the power whisk method worked just fine for me.)
4. Add eggs, one at a time, beating or whisking well to combine. Add vanilla extract and mix thoroughly.
5. Fold in the flour mixture a little at a time until just combined. Stir in apples and mix well.
6. Spread the batter into your prepared pan and sprinkle the top with brown sugar.
7. Bake for 30 minutes, or until an inserted toothpick comes out clean. The top should be very slightly browned and springy.
8. Remove the bars from the oven and let them cool completely in their pan. Since they’re very soft, I recommend being patient and waiting a good two hours before cutting and serving. However, feel free to keep walking over and smelling them as they cool. It’ll be somewhat torturous, but trust me, the aroma is all part of the experience.

Apple Walnut Coffee Cake a/k/a Apple Disaster Cake

Last week, I discovered why it can sometimes be a problem to bake in somebody else’s kitchen. I was visiting my mom and decided that in honor of September and the fact that she’s awesome, I’d make one of her favorite cakes.

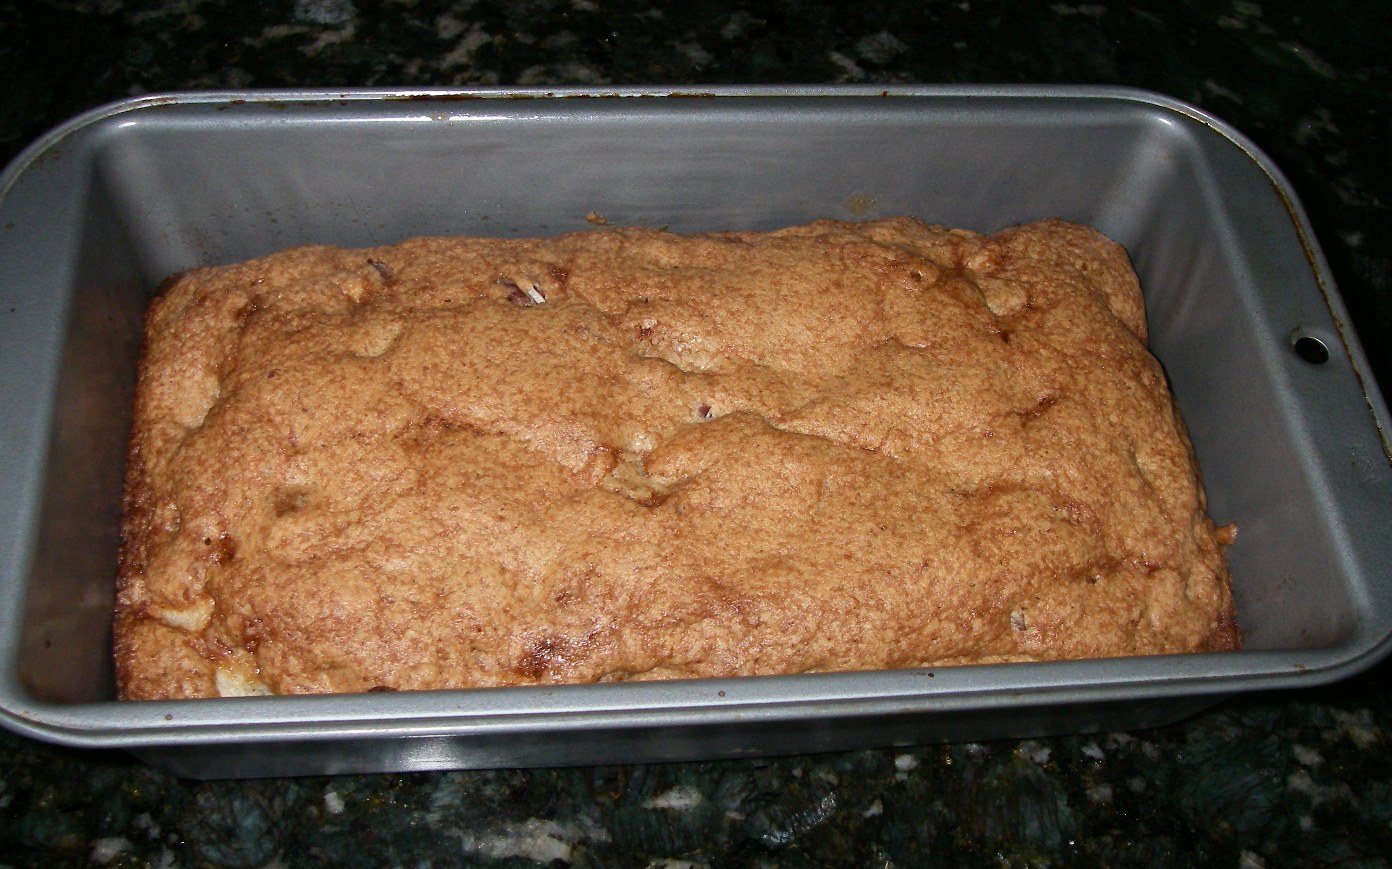
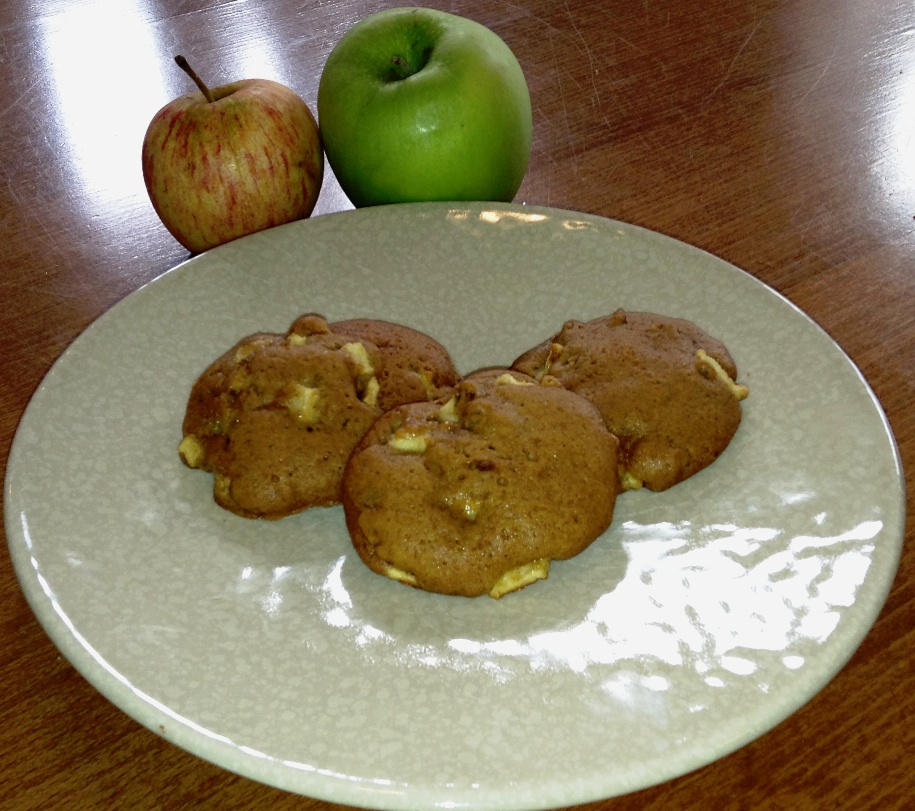
I stumbled upon this recipe several years ago and have been making it every September since then. The cake itself is moist, sweet but not too sweet, and full of so many of the fall flavors I absolutely love. And as an added bonus, when made correctly, it looks absolutely beautiful, especially with the baked apple pieces and walnuts adorning the top.

But as you can see, my most recent version of this cake didn’t turn out quite as lovely. And here’s why: When you use somebody else’s kitchen, you don’t always stop to think about how to handle equipment that’s different than yours. And whereas I have a tube pan that can be easily lifted from the top, my mom’s tube pan is the type where you insert the top into the bottom as sort of a separate, unattached piece.

Do you see where I’m going with this?

No sooner had I assembled a gorgeous, layered version of this fabulous cake when I foolishly decided to grab the tube pan from the top and bring it over to the oven. By doing so, I immediately managed to dislodge the top from the bottom, causing cake batter to spill rapidly out of the bottom of the pan and all over my mom’s countertop.

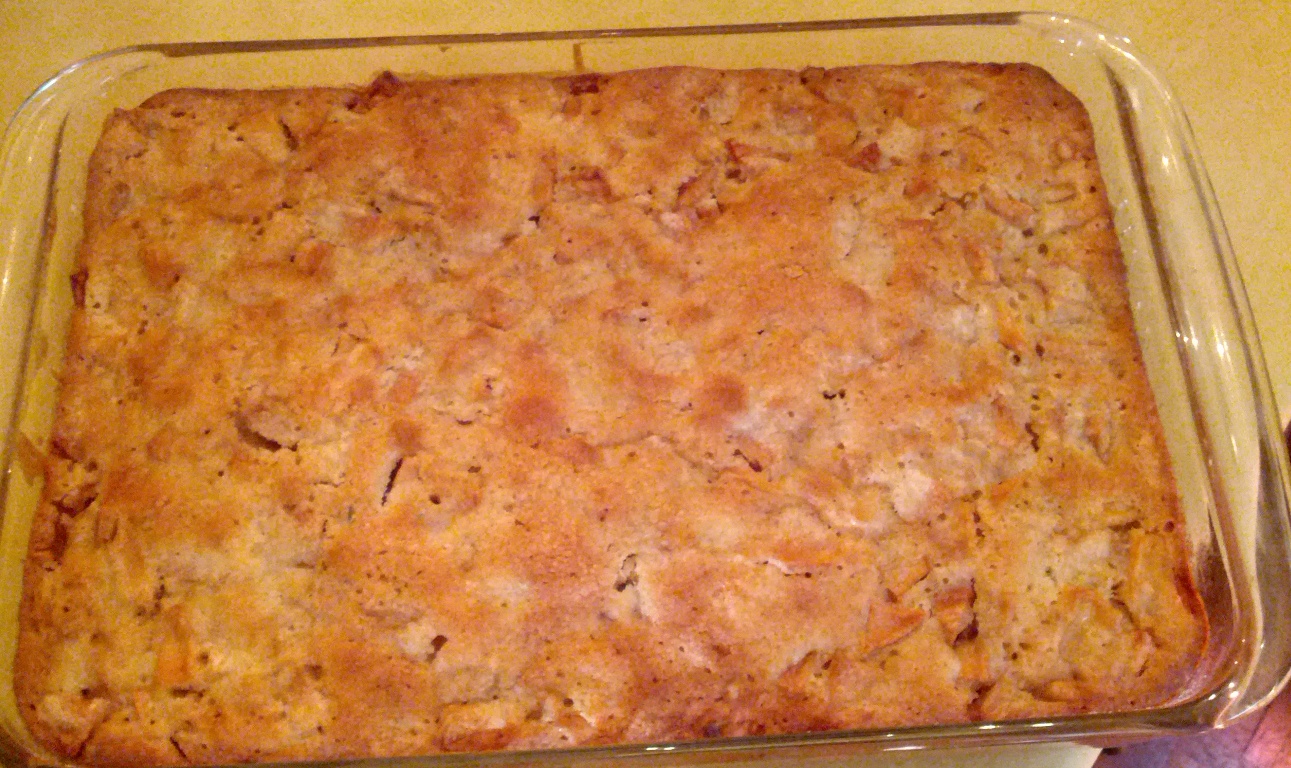
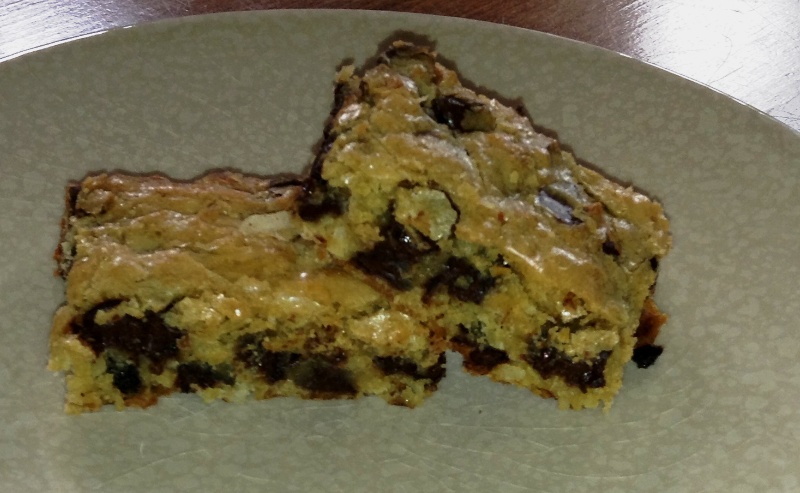
As you can imagine, I was not happy. But my mom, who’s a much sport than I am about these things, had a great idea: Instead of throwing out the spilled batter (which, by the way, constituted at least half the cake), wasting all those ingredients, and starting over from scratch, why not scoop it up, throw it into a 9×13 pan, and bake it as a non-layered, less pretty apple coffee cake?

The stubborn part of me initially tried to protest. After all, I wanted my cake in its original form, and I wanted to serve it to my mom the way she was used to having it. But not only is my mom a much better sport than I am, she can also be far more practical. And after spending several minutes consoling me (you know, her adult daughter who’s a mama herself and who was basically bordering on crying over spilled batter) and assuring me that this less spectacular version of the cake would no doubt turn out equally delicious, I agreed to proceed with Operation Cake Salvage.

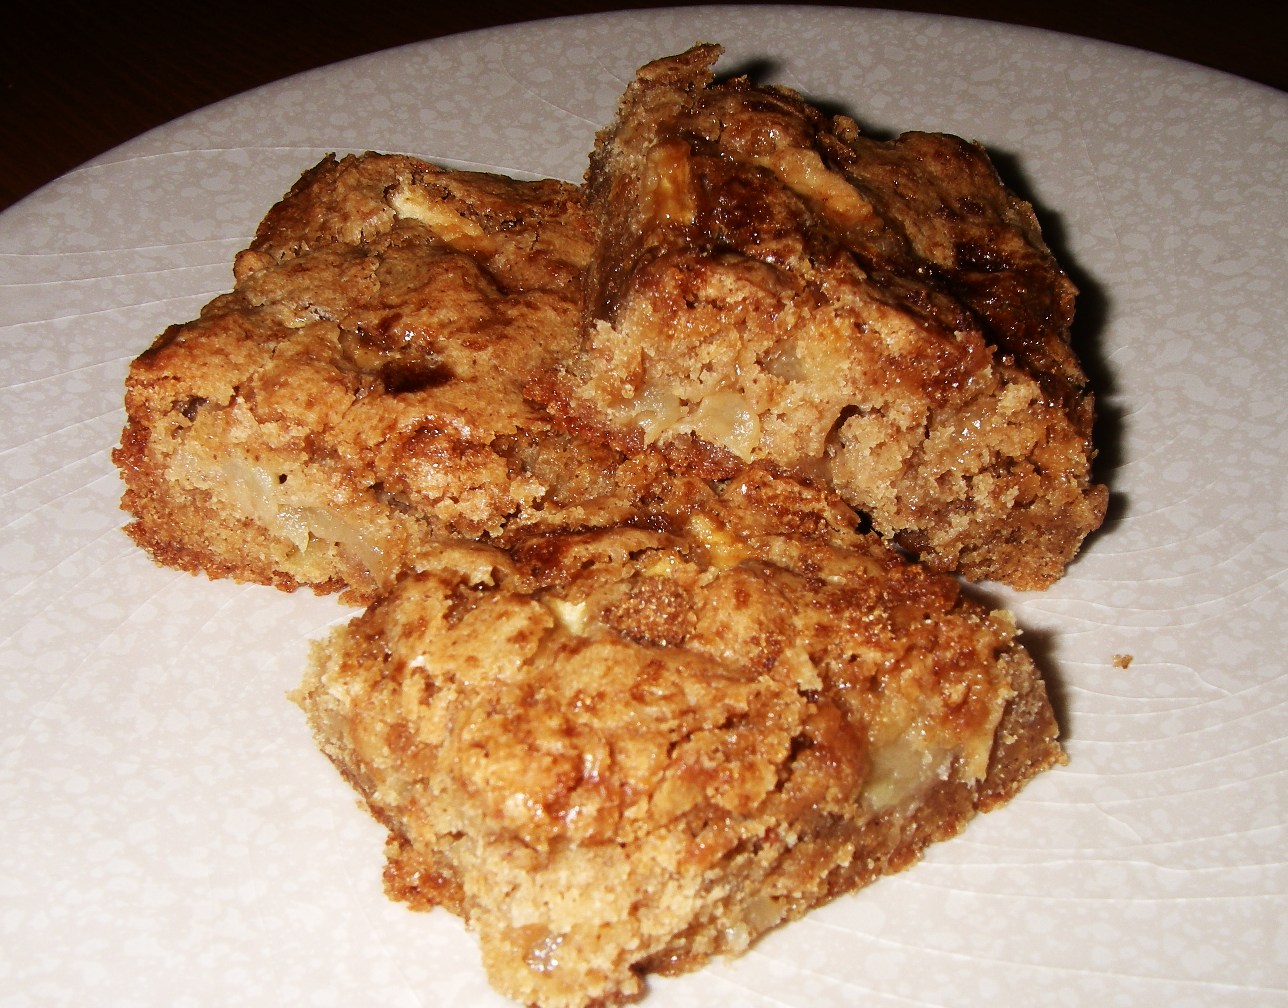
And so we scooped up the spilled batter, dumped everything into a rectangular cake pan, and hoped for the best. And sure enough, the cake tasted incredible—moist, sweet but not too sweet, and full of the fall flavors that make it a winner, even when disaster strikes. And although I still recommend baking it in a tube pan as the original recipe suggests, if you don’t have one, you could always do what I did and make a less pretty but equally yummy version.

disaster

Apple Walnut Coffee Cake
Original recipe from Smitten Kitchen

Ingredients:
6 apples (the original recipe calls for McIntosh apples; I used Cortland and Gala this time around but have used McIntosh in the past)
1 tablespoon cinnamon
5 tablespoons sugar
2 3/4 cups flour, sifted
1 tablespoon baking powder
1 teaspoon salt
1 cup vegetable oil
2 cups sugar
1/4 cup orange juice
2 1/2 teaspoons vanilla
4 eggs
1 cup walnuts, chopped

Method:

1. Preheat oven to 350 degrees. Grease a tube (or 9 x 13 baking) pan. Peel, core and chop apples into chunks. Toss with cinnamon and sugar and set aside.
2. Stir together flour, baking powder and salt in a large mixing bowl. In a separate bowl, whisk together oil, orange juice, sugar and vanilla. Mix wet ingredients into the dry ones, then add eggs, one at a time. Scrape down the bowl to ensure all ingredients are incorporated.
3. Pour half of batter into prepared pan. Spread half of apples over it. Pour the remaining batter over the apples and arrange the remaining apples on top. Bake for about 1 1/2 hours, or until a tester comes out clean.


Coconut Chocolate Chip Blondies

When it comes to fall (or early/pre-fall) baking, I’m usually all about the apples. But at the same time, I also like to mix it up a little. Since I hadn’t done anything with coconut for awhile, I decided to whip up a batch of coconut chocolate chip blondies.

This recipe is incredibly tasty and incredibly easy. You don’t need to bust out any fancy tools or spend more than 10-15 minutes putting these blondies together. Just have a couple of mixing bowls and spoons on hand, and you’ll be all set.

cocccblondies

Coconut Chocolate Chip Blondies
Recipe from Brown Eyed Baker

Ingredients:

1 cup AP flour
1/8 tsp salt
4 ounces unsalted butter, melted and cooled to room temperature
1 cup light brown sugar
1 large egg
1 and 1/2 tsp vanilla
1 cup sweetened flaked coconut
1 cup chocolate chips

Method:

1. Preheat your oven to 350°F. Grease and flour an 8×8 baking pan.
2. Combine the flour and salt; set aside.
3. Stir together the melted butter and brown sugar until smooth; beat in the egg and vanilla extract until well-blended.
4. Slowly beat in the flour mixture until blended; then stir in the coconut and chocolate chips.
5. Pour the batter into the prepared pan; use a rubber spatula (or the back of a spoon you’re already using if you’re feeling lazy, which is perfectly okay) to smooth the top.
6. Bake for 25-30 minutes, or until set in the center but still soft. Cool completely (at least one hour, but two would be better) before cutting and serving.

Apple Pie Cookies

To me, Labor Day marks the official end of summer and beginning of fall. I know the calendar might say otherwise, but there’s just something about the start of September that puts me into a fall state of mind. And the string of cooler weather in New Jersey this past week definitely contributed to that effect. We had several days of what I’d describe as perfect weather—low 70s and sunny during the day, cooler and breezy at night without actually being cold.

Being a lover of all things fall-related, I decided to bake up a batch of one of my favorite cookie recipes. I found this recipe online a long time ago and at this point, I honestly don’t remember where it came from. What I do know, however, is that it works really well with all types of apples. This year, I used a combination of Gala and Granny Smith apples to make my cookies, but in previous years, I’ve used McIntosh, Delicious, and Braeburn apples as well. The key, I think, is to include at least one tart apple (like the Granny Smith) to balance out the sweetness a little.

While these cookies do take a little time to put together, they aren’t overly complicated and are well worth the effort. I love the fact that they come out soft, cakey, and incredibly moist. If you’re a fan of apples, pecans, and fall flavors, you should definitely give this recipe a try.

applepiecookies

Apple Pie Cookies

Ingredients:

3 cups AP flour
1 tsp baking powder
1 tsp baking soda
½ tsp salt
2 tsp cinnamon
1 tsp ginger
½ tsp nutmeg
1 cup butter, at room temp
1 and ½ cups brown sugar (I like to use half dark brown and half light brown)
2 large eggs
4 tbsp maple syrup (though I prefer to stick to the quality stuff, you could use your basic pancake syrup in a pinch)
2 and ½ cups fresh apples, peeled and diced
1 and ½ cup toasted pecans, chopped

Method:

1. Preheat your oven to 350 degrees. Line several baking sheets with parchment paper (this recipe yields anywhere from four to six dozen cookies depending on how big you make them, so plan accordingly).
2. In a medium bowl, whisk together the flour, baking powder, baking soda, salt, and spices.
In a large bowl (I use a stand mixer), cream together the butter and sugar until light and fluffy. Beat in the eggs, one at a time, and then blend in the maple syrup.
3. Gradually blend in the flour mixture at a low speed. Once incorporated, stir in the apples and toasted pecans by hand.
4. Drop by ¼ spoonfuls (or your desired size) onto your prepared baking sheets.
5. Bake for 15-18 minutes, or until the cookies are browned around the edges. Let the cookies cool on the baking sheets for about 5 minutes before transferring to a wire rack to cool completely.

When stored in an airtight container at room temperature, these can last up to a week.

Chocolate Peanut Butter Pretzel Brownies

Wowsa. It’s been over a month since I’ve posted on here, so now that the weather is cooling down, I’ll have to get myself back into the swing of baking. I know I’ve mentioned before that I tend to bake less frequently during the summer, and I basically spent most of August avoiding the oven and indulging in frozen desserts instead. But just this past week, the weather suddenly turned cooler, and in a really nice way. And it was just enough motivation to get myself back into the kitchen and do a nice amount of baking.

While I tackled several different recipes over the past week, the first one I’d like to share is something simple yet tasty. These brownies are really a cinch to whip up. As is the case with most of the brownie recipes I like to make, this batch requires nothing more than a couple of mixing bowls and some basic ingredients. There’s no need to bust out the fancy tools or spend more than 15-20 minutes putting everything together. Plus, these brownies are really adaptable to a variety of mix-ins, so if peanuts and pretzels aren’t your thing, feel free to substitute something else.

Here’s to what will hopefully be a busy month of baking and a glorious start to fall.

pbpretzbrowniepic

Chocolate Peanut Butter Pretzel Brownies

Ingredients:
1 cup AP flour
1 stick of butter, melted and cooled to room temperature
½ cup light brown sugar
½ cup granulated sugar
½ cup unsweetened cocoa powder
1 egg
¼ cup peanut butter, plus more for topping
½ cup crushed pretzels
½ cup chopped peanuts

Method:
1. Preheat your oven to 350 degrees. Grease an 8×8 baking pan and set aside.
2. In a small bowl, whisk together the flour, cocoa powder, and salt. Set aside.
3. In a medium-sized bowl, whisk together the cooled melted butter and sugars until smooth. Beat in egg.
4. Mix in ¼ cup peanut butter, then slowly incorporate the flour and cocoa mixture, mixing well until fully blended into the wet ingredients.
5. Stir in the pretzels and peanuts.
6. Pour the batter into the prepared pan (it will be thick). Using the back of a spoon, swirl additional peanut butter on top of the brownie batter as desired.
7. Bake for 27-32 minutes, or until an inserted toothpick comes out clean. Let the brownies cool completely in their pan (at least 60 minutes but better to wait two hours to be safe) before cutting into them.