Chocolate Peanut Butter Fudge

Ah, chocolate and peanut butter. That classic combination draws me in every time. This week, I decided to unite my chocolate and peanut butter in fudge form. I saw this recipe on Brown Eyed Baker, one of my favorite blogs, and decided to give it a shot.

Now normally I’m not the biggest fudge fan. Well, I shouldn’t say that. I happen to think fudge is delicious, albeit kind of insanely sweet. But usually I’ll go for a brownie or cookie or (generous) slice of cake before opting for fudge. Still, something about this recipe called out to me, so I figured I’d mix things up a bit.

The fudge itself didn’t take long to prepare, but let me tell you, I got a bit of a workout while making it thanks to Step #5 below. But it was still totally worth it. And besides, this way I felt justified helping myself to an extra piece.

pbfudge

Chocolate Peanut Butter Fudge
Recipe from Brown Eyed Baker

Ingredients:

2½ cups granulated sugar
¼ cup cocoa powder
1 cup evaporated milk
1 tablespoon light corn syrup
½ cup unsalted butter, divided, with 2 tablespoons set aside
½ cup peanut butter
2 teaspoons vanilla extract

Method:
1. Butter an 8-inch square pan and line the pan with parchment paper.
2. Combine the sugar, cocoa powder, evaporated milk, and corn syrup in a saucepan over medium heat. Cook, stirring constantly, until all the sugar dissolves.
3. Add the 2 tablespoons of butter into the mixture and stir until the butter melts. Bring the mixture to a boil. Cover and boil for 3 minutes.
4. Remove the lid and continue to let the mixture cook, without stirring, until it reaches 234 degrees on a candy thermometer. Remove the mixture from the heat and, without stirring, add in the remaining butter, peanut butter, and vanilla. Let the mixture sit for 10 minutes.
5. Using a wooden spoon, beat the fudge until it thickens and begins to lose its gloss. This took me about 6-7 minutes, though the original recipe states that it can take up to 15. Um, yikes, considering that my arm felt like it was about to fall off at the 3-minute mark. You can also use a stand or hand mixture to tackle this step, but you have to be careful not to overbeat.
6. Pour the mixture into the prepared pan. Allow the fudge to come to room temperature and then cover the pan with plastic wrap and chill in the fridge until it sets (at least 2 hours).
7. Use the parchment paper to lift the fudge out of the pan. Slice and enjoy.

Almost-Fudge Gateau

I’m definitely much more of a vanilla person than a chocolate person. Take me to a bakery, and I’ll almost always order a vanilla cake or something vanilla-based. And when it comes to ice cream, I’m a vanilla girl all the way. But sometimes, depending on my mood, my hormones (yeah, I went there), or the season, I find myself suddenly craving chocolate. And when I do, it’s gotta be a rich, dense, full-on chocolate assault. So when my latest chocolate urge crept up on me out of nowhere, I decided it was time to try a recipe I had bookmarked some time ago.

A lot of food bloggers have tried this fudge cake recipe and raved about it. It’s from the famous Baking: From My Home to Yours cookbook by Dorie Greenspan, which I actually don’t have but need to get my hands on.

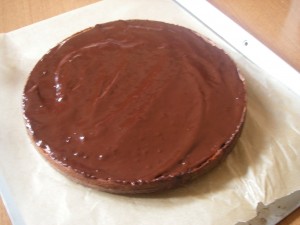
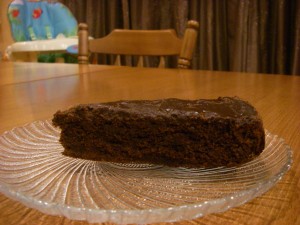
The great thing about this cake is that it’s not super complicated but incredibly decadent. The “almost-fudge” description is pretty accurate, only whereas classic fudge can take sweetness to an insane level, this cake strikes the perfect balance of intense chocolate flavor without that cloying sweetness factor. If you’re craving chocolate, this cake will definitely hit the spot. And if you have guests coming over, you’ll be sure to impress them by whipping it up. I ate a giant piece with a touch of whipped cream and a small scoop of vanilla ice cream on the side—because even when I need my chocolate, I’m still a vanilla girl at heart.

IMGP1613

Almost-Fudge Gateau

Recipe can also be found here

Ingredients:

For the cake:
5 large eggs
9 ounces of bittersweet chocolate, coarsely chopped
1 cup of granulated sugar
5 tablespoons unsalted butter, cut into chunks
2 tablespoons coffee or water
1/3 cup AP flour
Pinch of salt

For the glaze:
4 ounces of bittersweet chocolate, coarsely chopped
1/2 cup heavy cream
2 teaspoons light corn syrup

Method:

For the cake:
1. Preheat your oven to 350 degrees. Butter a 9-inch springform pan, line the bottom with parchment paper, butter the paper, dust the inside of the pan with flour, and tap out the excess. Place the pan on a baking sheet lined with parchment paper or a silicone mat.
2. Separate the eggs.
3. Set a heatproof bowl over a saucepan of simmering water and add the chocolate, sugar, butter, and coffee. Stir occasionally until the chocolate and butter are melted; the sugar may still be grainy, and that’s okay. Transfer the bowl to the counter and let the mixture sit for a few minutes.
4. Using a rubber spatula, stir in the egg yolks one by one, then fold in the flour.
5. Working with the whisk attachment of a stand mixer (or, if you don’t have one, a hand mixer will have to do), beat the egg whites with the pinch of salt until they hold firm, glossy peaks.
6. Use a spatula to stir about a quarter of the beaten egg whites into the batter; then gently fold in the rest.
7. Pour the batter into your prepared pan and gently jiggle the pan from side to side a couple of times to even it out.
8. Bake for 35 to 45 minutes, or until the cake has risen evenly (it may rise around the edges and you’ll think it’s done, but give it a few minutes more, and the center will puff too) and the top has firmed (it will probably be cracked); a thin knife inserted into the center should come out just slightly streaked with chocolate.
9. Transfer the pan to a cooling rack and let the cake rest for 5 to 10 minutes.
10. Run a knife gently around the edges of the cake and remove the sides of the pan. Carefully turn the cake over onto a rack and remove the pan bottom and the parchment paper. Invert the cake onto another rack and cool to room temperature right side up. Warning: The cake may sink a bit as it cools. Don’t worry if it does.

For the glaze:
1. Place your chocolate in a small heatproof bowl and melt over a pan of simmering water or in your microwave. The chocolate should be just-melted and not too hot.
2. Meanwhile, bring the cream to a boil in a small saucepan. Pour the hot cream over the chocolate and stir very gently with a rubber spatula until the mixture is smooth and shiny.
3. Stir in the corn syrup and let the glaze sit for a few minutes.
4. Gently place the cake on a wax paper-lined baking sheet, or on a wire rack with wax paper underneath. This will prevent excess glaze from getting all over your kitchen counter or work surface.
5. Pour the glaze over the cake and smooth the top. It’s easiest to do this using a long metal icing spatula.
6. Allow the glaze to set at room temperature or, if you’re impatient, you can stick the cake into the refrigerator for about 20 minutes. I let mine set for a couple of hours on the counter, and it was perfect.

IMGP1615