Corn Muffins

Corn muffins have been a staple at my Thanksgiving table for the past number of years. I always make too many for the actual meal, which means I have plenty of leftovers on hand for breakfast the following week.

This recipe is fairly simple and makes at least 24 muffins. Feel free to cut it in half if you don’t want that many.
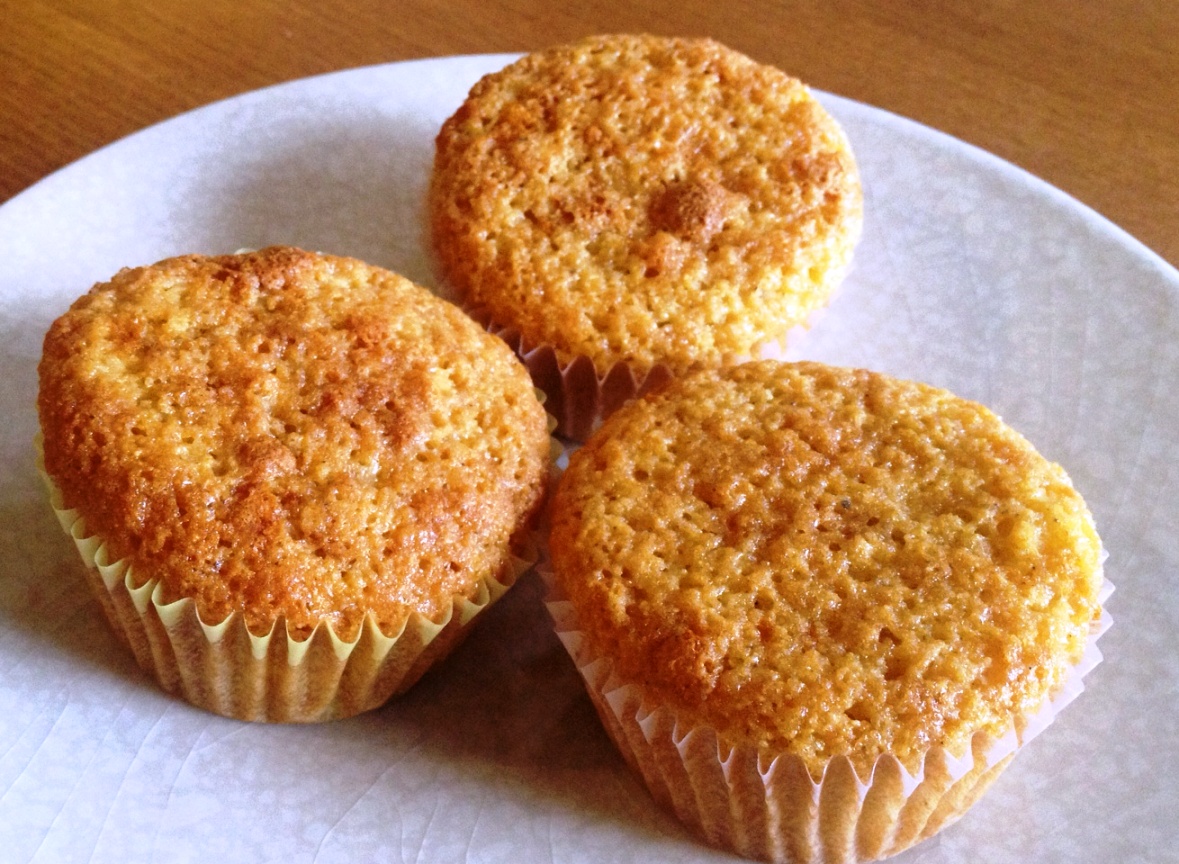
cornmuffins

Corn Muffins

Ingredients:

2 cups yellow cornmeal
2 cups AP flour
2 tbsp baking powder
1 cup granulated sugar
2 tsp salt
1 tsp pepper
2 cups milk (feel free to substitute with soy milk or non-dairy creamer for a dairy-free version)
4 large eggs
2/3 cup vegetable oil
1 cup honey

Method:

  1. Preheat your oven to 400 degrees. Line two muffin pans with liners (the recipe will yield about 24 muffins).
  2. In a large bowl, whisk together the cornmeal, flour, baking powder, sugar, salt, and pepper.
  3. In a separate bowl, whisk together the milk, eggs, oil, and honey.
  4. Stir the wet ingredients into the dry mixture until just combined.
  5. Pour the batter into your prepared muffin pans and bake for 18-20 minutes, or until the tops start to turn golden brown and an inserted toothpick comes out clean.
  6. Let the muffins cool in the pans for 1-2 minutes and then transfer them to wire racks to cool completely.

Pumpkin Nutella Bread

Pumpkin bread is one of my favorite fall treats, and I especially love it because it’s a) quick and easy to make, and b) so adaptable to a variety of additional flavors. Case in point: this awesome Nutella-swirled version. I basically just took the recipe I used for my pumpkin butterscotch bread, threw in some Nutella, and let the combination do its magic. The result? A moist, yummy version of a classic. Now if only I could pry myself away from the pan and stop eating this stuff by the plateful…

pnutellabread

Pumpkin Nutella Bread

Ingredients:

1 cup AP flour
1/2 tsp baking soa
1/4 tsp salt
1 tsp cinnamon
1/2 tsp nutmeg
1 large egg
3/4 cup granulated sugar
1/4 cup water
1/4 cup vegetable oil
1/2 tsp vanilla
1/2 cup packed pumpkin puree (canned or fresh)
1/3 cup Nutella

Method:

  1. Preheat your oven to 350 degrees. Grease a 9×5 loaf pan and set aside.
  2. In a small bowl, whisk together the flour, baking soda, salt, and spices.
  3. In a large bowl, beat the eggs, and then whisk together with the sugar, oil, water, pumpkin, and vanilla.
  4. Stir in the flour mixture until well-combined.
  5. Pour the batter into your prepared pan and then add in the Nutella. Use a knife or the back of a spoon to swirl it around.
  6. Bake the bread for one hour, or until an inserted toothpick comes out clean.
  7. Let the bread cool in its pan for at least an hour before cutting and serving.

pnutellabread_sliced

Pumpkin Butterscotch Bread

Fall is finally here. I mean, technically it’s been here for awhile, but this past week, the weather got much cooler, the leaves all around me completely changed color, and the idea of planning my Thanksgiving menu suddenly didn’t seem so silly. And so to celebrate the more in-your-face version of fall that I’ve come to love, I decided to whip up this easy recipe for pumpkin butterscotch bread.

Now I’ve had different versions of pumpkin bread, some much sweeter than others. And of course I love them all. This particular recipe makes a sweeter, dessert-type of bread. You can thank the butterscotch flavor for that.

I happen to really enjoy the combination of pumpkin and butterscotch, but if you’re not a fan, you can easily swap out the butterscotch chips for semisweet chocolate, dark chocolate, cinnamon, or even white chocolate. Or, you can omit the chips completely and just enjoy the pumpkin flavor on its own.

Whatever you decide to do, just make sure to add pumpkin bread to your list of fall baking musts. With a recipe this easy and quick, you’d be silly to miss out.

pbutterscotchbread_sliced

Pumpkin Butterscotch Bread

Ingredients:

1 cup AP flour
1/2 tsp baking soa
1/4 tsp salt
1 tsp cinnamon
1/2 tsp nutmeg
1 large egg
3/4 cup granulated sugar
1/4 cup water
1/4 cup vegetable oil
1/2 tsp vanilla
1/2 cup packed pumpkin puree (canned or fresh)
3/4 cup butterscotch chips

Method:

  1. Preheat your oven to 350 degrees. Grease a 9×5 loaf pan and set aside.
  2. In a small bowl, whisk together the flour, baking soda, salt, and spices.
  3. In a large bowl, beat the eggs, and then whisk together with the sugar, oil, water, pumpkin, and vanilla.
  4. Stir in the flour mixture until well-combined.
  5. Stir in the butterscotch chips, mixing well.
  6. Pour the batter into your prepared pan and bake for one hour, or until an inserted toothpick comes out clean.
  7. Let the bread cool in its pan for at least an hour before cutting and serving.

Apple Walnut Date Bread

So here we go again…my love affair with apples continues. In fact, I actually went apple picking yet again this past weekend and gathered up a bunch of awesome varieties to add to my collection.

It’s a good thing there are so many great ways to incorporate apples into baking. This time, I decided to whip up some apple walnut date bread. This recipe is actually based on the one I used for the pear bread I recently made (in other words, it’s super easy).

What I like about this bread is that it’s just sweet enough to border on cake, but not too sweet. You can have it for breakfast or serve it as a side dish for dinner, and you won’t go wrong either way. Personally, I could eat this stuff any time of day, but I especially like it alongside a nice cup of coffee.

appledatebread

Apple Walnut Date Bread
Recipe adapted from Bake or Break

Ingredients:

3 cups AP flour
3/4 teaspoon baking soda
1/4 teaspoon baking powder
1 teaspoon salt
1 and 1/2 tablespoons ground cinnamon
1 cup chopped walnuts
3/4 cup vegetable oil
3 large eggs
2 cups granulated sugar
2 cups peeled and diced apples
1 cup chopped dates
2 teaspoons vanilla

Method:

  1. Preheat your oven to 350 degrees. Lightly grease and flour a two 9×5 loaf pans.
  2. Mix together the flour, baking soda, baking powder, salt, and cinnamon.
  3. In a separate bowl, whisk together the oil, eggs, sugar, apples, dates, walnuts, and vanilla. Add the wet mixture to the flour mixture until well-incorporated.
  4. Pour the batter into your prepared pans and bake for 60-65 minutes, or until an inserted toothpick comes out clean.
  5. Cool completely before cutting and serving.

Pear Bread

As excited as I am about the abundance of apples this time of year, there’s another fruit that I’ve also gotten pretty stoked about lately: the pear. I wasn’t always a huge fan of pears, but over the past year I’ve grown to really like them. And now that pears are in season, I’ve been trying to take advantage by incorporating them into my fall baking routine. To that end, I recently whipped up this wonderfully delicious pear bread.

If you enjoy pears, I highly recommend making this pear bread, which, really, might as well be called pear cake. The recipe couldn’t be easier to follow and the end result is a moist, light bread (er, cake) that’s perfect for breakfast or an afternoon snack. Actually, you could eat this anytime of the day. Have it for dinner, in fact. I won’t judge you…especially since that’s what I did a few nights ago.

pearbread

Pear Bread
Recipe from Bake or Break

Ingredients:

3 cups AP flour
1 teaspoon baking soda
1/4 teaspoon baking powder
1 teaspoon salt
1 tablespoon ground cinnamon
1 cup chopped pecans
3/4 cup vegetable oil
3 large eggs, lightly beaten
2 cups granulated sugar
2 cups peeled and finely grated ripe, firm pears
2 teaspoons vanilla extract

Method:

  1. Preheat your oven to 350 degrees. Lightly grease and flour a two 9×5 loaf pans.
  2. Mix together the flour, baking soda, baking powder, salt, and cinnamon. Scoop out about 1/4 cup of this mixture and combine it with the pecans to coat, and then stir back into the flour mixture.
  3. In a separate bowl, combine the oil, eggs, sugar, pears, and vanilla. Add the pear mixture to the flour mixture, stirring just until the flour disappears and the batter is evenly moistened.
  4. Pour the batter into your prepared pans and bake for 60-70 minutes, or until the bread is browned and firm on top and an inserted toothpick comes out clean.
  5. Cool completely before cutting and serving.

Oatmeal Chocolate Chip Bread

I’ll admit it: Sometimes I like eating sweets for breakfast. I think that’s called being human. At the same time, I don’t like my breakfast sweets to be too sweet (in other words, you usually won’t find me chowing down on a heavily iced chocolate fudge cupcake along with my morning coffee). So when I found myself craving a breakfast treat the other day, I decided to try a recipe that I’d recently seen on one of my favorite baking blogs.

Although you could serve this oatmeal chocolate chip bread after dinner or as an afternoon snack, to me, it’s just perfect for breakfast. The chocolate chips add just the right amount of sweetness, and the dense yet moist nature of the bread makes it perfect for dipping in coffee (confession: I’m a bit of a serial dunker). Best of all, it’s really a cinch to make, and if you have any left over, it’ll probably keep for the better part of a week as long as you keep it tightly wrapped.

oatmealccbread

Oatmeal Chocolate Chip Bread
Recipe from Bake or Break

Ingredients:

2 cups AP flour
1 cup rolled oats
1/2 cup granulated sugar
1/2 cup packed light brown sugar
2 teaspoons baking powder
1 teaspoon baking soda
1/2 teaspoon ground cinnamon
1/2 teaspoon salt
1/2 cup chopped pecans
1/2 cup semisweet chocolate chips
1 and 1/2 cups buttermilk
2 large eggs
1/4 cup butter, melted and cooled to room temp

Method:

  1. Preheat your oven to 350 degrees. Generously grease a 9×5 loaf pan with cooking spray.
  2. In a large bowl, mix together the flour, oats, sugars, baking powder, baking soda, cinnamon, and salt. Stir in pecans and chocolate chips.
  3. In a separate bowl, whisk together the buttermilk, eggs, and butter. Stir into dry ingredients just until-combined. Your batter may be a little lumpy, and that’s fine.
  4. Pour your batter into the prepared pan and bake for 50-55 minutes, or until an inserted toothpick comes out clean.
  5. Let the bread cool in its pan for at least an hour before slicing and serving.

Allspice Crumb Muffins

I know I’ve already gone on and on about how much I absolutely love the flavors of fall, so bear with me as I say it once again, this time in the form of praise for these allspice muffins. If you’re a fan of cinnamon, sugar, and warm, buttery crumb-topped muffins, go ahead and make yourself a batch of these.

allspicemuff

Allspice Crumbs Muffins
Recipe from Eva Bakes

Ingredients:

For the crumb topping:

½ cup AP flour
½ cup light brown sugar
½ tsp ground allspice
5 tbsp cold unsalted butter, cut into bits

For the muffins:

2 cups AP flour
½ cup granulated sugar
1 tbsp baking powder
½ tsp ground allspice
¼ tsp salt
¼ cup light brown sugar
1 stick unsalted butter, melted and cooled
2 large eggs
¾ cup whole milk
¼ tsp vanilla

Method:

For the crumb topping:

  1. Mix the flour, brown sugar, and allspice in a small bowl. Add the chunks of cold butter and mix with your hands by pinching the mixture between your fingers until you have uneven, pea-sized crumbs. (Tip: To avoid having the mixture stick to your hands, try coating your fingers with a bit of cooking spray.)
  2. Place the topping in the refrigerator until ready to use (it can be made up to 3 days ahead and stored, covered, in the fridge).

For the muffins:

  1. Preheat your oven to 375 degrees and line a muffin pan with 12 muffin cups.
  2. In a large bowl, whisk together the flour, granulated sugar, allspice, baking powder, and salt. Add in the brown sugar and stir until no lumps remain.
  3. In a separate large bowl, mix together the melted butter, eggs, milk, and vanilla until well-combined. Pour the liquid ingredients into the dry ingredients, whisking gently but quickly to combine. The batter may be lumpy, and that’s okay.
  4. Evenly distribute the batter into the muffin cups. Sprinkle the crumb topping over each muffin, and then use your fingertips to gently press the crumbs into the batter.
  5. Bake for about 20 minutes, or until the tops are golden and an inserted toothpick comes out clean.
  6. Let the muffins cool in their pan for about five minutes before transferring them to a wire rack to cool completely.

Although these muffins can supposedly last up to five days when stored in an airtight container at room temp, I found that they started to dry out after two or three days. My advice is to cut the recipe in half if you don’t think you’ll finish yours within a couple of days. Yes, it may seem like a lot of work for such a small amount of muffins, but trust me, these are well worth it.

Chocolate Chip Muffins

Delicious things don’t have to be complicated. Case in point: these moist, yummy chocolate chip muffins. I was given about an hour’s notice that we were having company this past weekend (that’s what happens when you let your husband make the plans), so I needed something quick and insanely easy to offer up to our guests. This recipe totally did the trick, and by the time our company arrived, I had these wonderful little muffins all nice and ready to serve.

chocchipmuff

Chocolate Chip Muffins
Recipe from Bakerella

Ingredients:

1 and 1/2 cups AP flour
1/2 cup granulated sugar
1 and 1/2 teaspoons baking powder
1/2 teaspoon salt
3/4 cup sour cream
1/4 cup milk (whole is best, but others work)
2 eggs
2 teaspoons vanilla
1/4 cup melted butter, cooled slightly
6 ounces semisweet chocolate chips

Method:

1. Preheat your oven to 350 degrees.
2. Line a muffin tray with 12 regular baking cups.
3. In a medium bowl, whisk together the flour, sugar, baking powder, and salt.
4. In another bowl, stir together the sour cream, milk, eggs, vanilla, and melted butter.
5. Incorporate the wet ingredients into the dry ingredients, mixing well.
6. Stir the in chocolate chips and divide the batter evenly into your baking cups.
7. Bake for about 22 minutes, or until an inserted toothpick comes out clean. (If you want your muffins to get a little crispier on top, leave them in the oven for an extra couple of minutes.)
8. Let the muffins cool in the pan for 1-2 minutes, then transfer to a wire rack to cool completely.

Mom’s Carrot Loaf

Okay, I’m going to come right out and say it: I’m way overdue for a sugar detox. I blame the winter, really—the constant cold weather makes me want to spend my (limited) free time indoors, whipping up goodies and then eating them on the couch all wrapped up in a blanket. But lately I’ve been going overboard, just tossing all notions of self-control out the window in favor of frequent face-stuffing and brownies galore. It has to stop, at least for a day or two.

Of course, when I say sugar detox, I’m talking in relative terms. I mean, a girl’s still gotta eat, right? But I did decide to whip up a recipe that’s relatively light on the sugar front.

This carrot loaf is one that my mom used to make back when I was a kid. She actually used to serve it a side dish during dinner, but it’s just sweet enough to qualify as dessert. In my mind, it’s actually the perfect breakfast food. And best of all, it’s super easy to make. The toughest part is grating the carrots, and if you’ve got a food processor, that takes no time. Once your carrots are ready, it’s a simple matter of throwing the ingredients into a large bowl and mixing them together by hand.

As far as serving goes, I prefer this carrot loaf at room temperature, but I know some people like it warm. And my husband likes it cold right out of the fridge, so when I make it, I usually stick half in there for him and keep my half on the counter. In fact, another great thing about this recipe is that it’ll keep for several days stored at room temperature and up to a week in the fridge—though it never lasts that long in my house because of that self-control thing we talked about earlier. At least I’m aware of the problem.

IMGP1439

Mom’s Carrot Loaf

Ingredients:
2/3 cup butter or margarine
1/2 cup brown sugar
1 egg
2 cups grated carrots
1 1/4 cup flour
1 tsp. baking powder
1 tsp. baking soda
1 TB lemon juice
1 TB water
1 tsp. vanilla
1/2 tsp cinnamon
1/2 tsp. salt

Method:
1. Preheat your oven to 350 degrees and lightly grease a medium-sized loaf pan.
2. Whisk together flour, baking powder, and baking soda together.
3. Add egg and brown sugar; whisk to combine.
4. Stir in lemon juice, water, vanilla, cinnamon, salt, and carrots.
5. Pour into prepared pan and bake for 45-55 minutes, or until an inserted toothpick comes out clean. Cool in pan on a wire rack.


Chocolate Chocolate Chip Bread

My obsession with sweets can sometimes get out of hand. There are days where I could seriously take down half a dozen sugary frosted cupcakes in a single sitting…and then there are those days where all I want is something mildly sweet to accompany my morning coffee.

I discovered this recipe awhile back and decided to finally give it a try. It was super easy, and the result was a yummy chocolate loaf cake that’s perfect for breakfast (in other words, not too sweet). The recipe yields two loaves, so feel free to cut it in half. Or you can do what I did—make one classic chocolate chocolate chip loaf, and use the second half of the batter to get creative. I’ll explain.

IMGP1495

Chocolate Chocolate Chip Bread

From Barbara Bakes

Ingredients:
2 and 1/2 cups AP flour, plus 2 tablespoons
1/2 cup cocoa powder
1/2 teaspoon salt
1 teaspoon baking soda
1/2 teaspoon baking powder
1 cup of softened butter
2 cups of granulated sugar
3 large eggs
2 teaspoons vanilla
1 and 1/2 cups applesauce
1 and 1/2 cup chocolate chips
Optional: 1/3 cup dried cherries, cranberries, peanut butter chips, or anything else you feel like throwing into the mix that goes well with chocolate

Method:
1. Preheat your oven to 350 degrees. Grease two medium loaf pans (I used cooking spray).
2. Mix together the flour, salt, baking soda, and baking powder, and set aside.
3. Using a stand mixer, cream the butter and the sugar until it gets fluffy (about two minutes).
4. Add the eggs one at a time, mixing well after each addition.
5. Add the vanilla and applesauce, and mix until combined.
6. Add the dry ingredients and mix until just combined.
7. Coat the chocolate chips with two tablespoons of flour and stir into the batter.
8. Spoon half of the batter into one of the prepared loaf pans; add your mix-in of choice to the remaining batter, stir, and pour into the second prepared pan.
9. Bake for 55-60 minutes, or until an inserted toothpick comes out clean.