Hamentashen

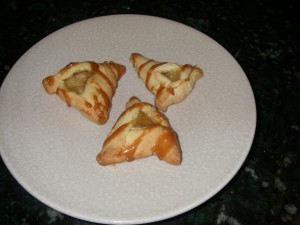
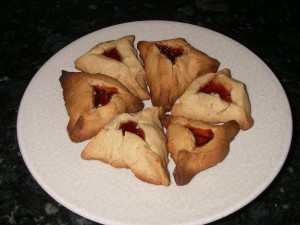
As part of last weekend’s baking extravaganza, I made several batches of hamentashen. For those of you who don’t know (and you wouldn’t be alone), hamentashen are triangular-shaped cookies that are typically filled with prune, apricot, or raspberry jam. They also happen to be one of my favorite things ever.

Now I will warn that hamentashen are fairly time-consuming as far as cookies go. The classic dough recipe I use is easy enough and takes no time to throw together, but the process of rolling out the dough, filling it, and shaping it requires a decent amount of time and patience. And the dough sometimes doesn’t like to cooperate. And the cleanup is atrocious (imagine sticky, caked-on dough particles all over your countertop and flour everywhere). But the end result is undeniably delicious, so if you’re up for the challenge, go ahead and make these one day. If anything, the people you share them with will get a kick out of the fun shape.

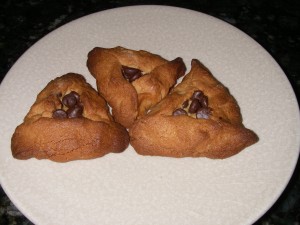
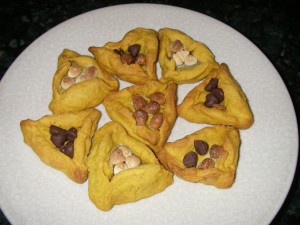
I like to make a variety of hamentashen, including some non-traditional variations. This year’s batch included classic prune, Nutella, apple-caramel, peanut butter and jelly, peanut butter and chocolate chip, and pumpkin. To create this assortment, I used three separate dough recipes, the most challenging of which is by far the classic one.

As far as my favorite version of the hamentashen goes, that’s hard to say. I really enjoyed the peanut butter and jelly combination, but there’s just something about classic prune-filled hamentashen that makes me keep going back for more. It’s a good thing I made almost 200 of these bad boys over the weekend. No, I’m not kidding. I gave most of them away but kept a few dozen on hand for myself…most of which are already gone…

IMGP1700          IMGP1717

Classic Hamentashen (my mom’s recipe)
Ingredients:
5 eggs, plus one more for brushing on the dough
1 and ½ cups vegetable oil
3 tsp baking powder
1 and ½ cups granulated sugar
¾ cup orange juice
6 cups AP flour
1/8 tsp salt
Water as needed, up to ¾ of a cup

Method:
1. Combine eggs, oil, baking powder, sugar, orange juice, flour, and salt in a large mixing bowl. Use a spoon and then your hands to form a dough that is soft but not too sticky. Add water as needed if the dough is too crumbly. If you end up incorporating too much water, you’ll need to compensate by adding more flour.
2. Cover the dough with plastic wrap and refrigerate for 30 minutes.
3. Preheat your oven to 350 degrees once the dough has come out of the fridge. Prepare as many baking sheets as you can by lining with aluminum foil and lightly greasing. (This recipe makes anywhere from four to six dozen hamentashen depending on big you make them, so unless you’ve got an endless supply of cookie sheets, prepare to bake these in several batches.)
4. Divide the dough into four sections and roll it out on a well-floured surface to ¼ inch thickness.
5. Cut the dough into circles using either a cookie cutter or a regular drinking glass (the latter is my preferred method). Place the circles on the prepared baking sheets.
6. Place a small amount of your desired filling in the center of each circle. Be careful not to overfill your hamentashen.
7. Form the circles into triangles by folding the dough over one side at a time. Lightly pinch each corner to seal the hamentashen.
8. Lightly brush each formed hamentashen with beaten egg.
9. Bake for 20-30 minutes, or until the tops are golden brown. Baking times can vary based on the size of your hamentashen as well as your oven, so be sure to check on them frequently once you hit the 20-minute mark.
10. Let the hamentashen cool on their baking sheets for 2-3 minutes, then transfer them to a rack to cool completely.

I used this classic recipe to make my prune, Nutella, and caramel-apple hamentashen. For the caramel apple, I simply used apple pie filling for the cookies and then drizzled them with a caramel sauce I made by heating about 15 Kraft caramel squares with a few teaspoons of milk.

IMGP1696

Peanut Butter Hamentashen

Ingredients:
2 sticks of unsalted butter at room temperature
3 cups Ap flour
1 and 1/2 cups granulated sugar
2 large eggs
2 and 1/2 cups smooth peanut butter
1 and 1/2 teaspoons salt
1 teaspoon baking powder
1 teaspoon pure vanilla extract

Method:
1. Using a hand or stand mixer, beat the butter and sugar on medium until the mixture is light and fluffy. Beat in the eggs one at a time. Add in the peanut butter and beat on medium for 2-3 minutes, or until well-combined.
2. Whisk together your flour, salt, and baking powder; then add to the peanut butter mixture and beat at low-medium speed until well-combined. Add your vanilla and mix well.
3. Cover the dough and refrigerate for 30-60 minutes. Then follow the steps above to roll it out and form it into triangles. (No need to use an egg wash for this dough).
4. Bake for 18-22 minutes at 350 degrees, or until the tops are golden brown. Follow the instructions above for cooling.

I filled my peanut butter hamentashen with grape jelly, strawberry jelly, and chocolate chips. I also threw in a couple of smashed-up Butterfinger bars as a filling. Feel free to get creative by adding raspberry jam, Nutella, white chocolate, or your favorite crushed-up candy bar.

IMGP1697

Pumpkintashen (Pumpkin Hamentashen)
Recipe from allrecipes.com

Ingredients:
3/4 cup unsalted butter
1/2 cup packed brown sugar
1 tablespoon orange zest
1/2 cup pumpkin puree
1 egg yolk
1 tsp vanilla extract
2 and 1/4 AP flour
1/4 teaspoon ground cinnamon
1/4 teaspoon ground ginger
1/4 teaspoon ground nutmeg
Pinch of salt

Method:
1. Cream together the butter, brown sugar, and orange zest.
2. Stir in the pumpkin.
3. Add the egg yolk and vanilla; mix well.
4. Sift together the flour, cinnamon, ginger, nutmeg, and salt; stir into the pumpkin mixture.
5. Cover the dough with plastic wrap and chill in the fridge for 30 minutes.
6. Follow the steps above to roll out the dough and form it into triangles. (No need to use an egg wash for this dough).
7. Bake at 375 for 20-25 minutes.
8. Follow the instructions above for cooling.

I filled my pumpkintashen with chocolate chips, white chocolate chips, and butterscotch chips. I think a sweet cinnamon-cream cheese filling would taste fantastic with these, but I kept things simple and stuck to the chips.

 

Vanilla Coconut Cake


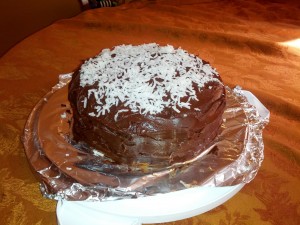
I did a whole lot of baking this past weekend—so much so that I’m only first getting around to posting some photos and recipes now. I made this cake for a family get-together and it turned out delicious. I used one of my favorite vanilla cake recipes and then added a yummy coconut frosting and filling. The frosting was pretty sweet (as frosting tends to be) but the filling wasn’t; and the classic but simple vanilla cake was a nice contrast.

As far as layer cakes go, this one was very easy to whip up. The vanilla cake itself can be thrown together in no time, and then it’s just a matter of letting it cool before assembling—and you can work on the filling and frosting in the meantime.

I recommend serving this cake the same day you make it, if possible. It’ll still be good the day after, and probably even the day after that, but it’s wonderfully moist and fresh the day it actually comes out of the oven.

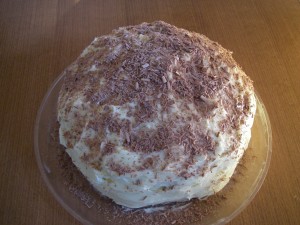
cake

Vanilla Coconut Cake
Recipe pieced together from here and here

Ingredients:

For the vanilla cake:
1 and 1/2 cups self-rising flour
1 and 1/4 cups all-purpose flour
2 sticks of unsalted butter, softened
2 cups sugar
4 large eggs, at room temperature
1 cup milk (I used half skim and half whole)
1 teaspoon vanilla extract

For the coconut filling:
6 tbsp sugar
1/2 cup sour cream
2 tbsp coconut milk
2/3 cup sweetened shredded coconut (the original recipe calls for 1/2 cup, but I found that the extra coconut helped thicken up the filling for a more substantial layer)

For the chocolate-coconut frosting:
1 stick of butter
2 oz unsweetened chocolate, chopped
1/4 cup cocoa powder
2 cups confectioners sugar
5 tbsp coconut milk
1 tsp vanilla
1/4 tsp salt
1/3 cup sweetened shredded coconut for garnish

Method:

For the vanilla cakes:
1. Preheat your oven to 350 degrees. Butter and flour two 9-inch cake pans; set aside.
2. Combine the flours and set aside.
3. Cream the butter and sugar until fluffy, about 2-3 minutes.
4. Add the eggs, one at a time, beating well after each addition.
5. Add the dry ingredients in three parts, alternating with the milk and vanilla. Be careful not to overbeat.
6. Using a rubber spatula, scrape down the sides of your mixing bowl to make sure the ingredients are well-blended.
7. Pour the batter into your prepared cake pans and bake for 30-40 minutes, or until an inserted toothpick comes out clean (I have a convection oven, and my cakes were done at about the 32-minute mark).
8. Cool the cakes in their pans for about 15 minutes; then invert them onto a wire rack and let them cool completely before assembling the cake.

For the coconut filling:
1. Beat together the sugar, sour cream, coconut milk, and shredded coconut until the mixture is smooth and well-blended; store in the refrigerator until you’re ready to assemble the cake.

For the chocolate-coconut frosting:
1. Using either a saucepan over low heat or your microwave at half-power, melt the butter and unsweetened chocolate until the mixture is smooth. Cool for 10-15 minutes, or until mixture is at room temperature.
2. Transfer the mixture to a larger bowl and blend in the cocoa powder, confectioners sugar, coconut milk, vanilla, and salt. Beat until the frosting is smooth and slightly fluffy. You can add additional confectioners sugar by the tablespoon if you want or need to thicken the frosting.

To assemble:
1. Place one of the vanilla cakes onto a serving plate. Use a knife to level off the top to make it flat, if needed.
2. Spread coconut filling on top of the first cake layer.
3. Check your second cake to make sure the top is relatively flat. If not, use a knife to carefully flatten. Gently place the second cake layer on top of the coconut filling.
4. Use a spatula to cover the top and sides of the cake with frosting.
5. Sprinkle shredded coconut on top of the cake to garnish.

I recommend storing this cake at room temperature the day you make it to keep it nice and moist. However, I’d transfer it to the fridge if it doesn’t all get eaten that same day. Plan ahead when digging into the leftovers—you’ll want about 30-60 minutes to bring the cake back to room temperature after it comes out of the fridge, though my husband ate it cold and liked it just as much as he did the first day.

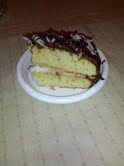
slicejpg

Mom’s Carrot Loaf

Okay, I’m going to come right out and say it: I’m way overdue for a sugar detox. I blame the winter, really—the constant cold weather makes me want to spend my (limited) free time indoors, whipping up goodies and then eating them on the couch all wrapped up in a blanket. But lately I’ve been going overboard, just tossing all notions of self-control out the window in favor of frequent face-stuffing and brownies galore. It has to stop, at least for a day or two.

Of course, when I say sugar detox, I’m talking in relative terms. I mean, a girl’s still gotta eat, right? But I did decide to whip up a recipe that’s relatively light on the sugar front.

This carrot loaf is one that my mom used to make back when I was a kid. She actually used to serve it a side dish during dinner, but it’s just sweet enough to qualify as dessert. In my mind, it’s actually the perfect breakfast food. And best of all, it’s super easy to make. The toughest part is grating the carrots, and if you’ve got a food processor, that takes no time. Once your carrots are ready, it’s a simple matter of throwing the ingredients into a large bowl and mixing them together by hand.

As far as serving goes, I prefer this carrot loaf at room temperature, but I know some people like it warm. And my husband likes it cold right out of the fridge, so when I make it, I usually stick half in there for him and keep my half on the counter. In fact, another great thing about this recipe is that it’ll keep for several days stored at room temperature and up to a week in the fridge—though it never lasts that long in my house because of that self-control thing we talked about earlier. At least I’m aware of the problem.

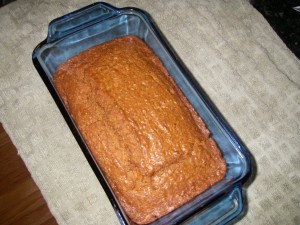
IMGP1439

Mom’s Carrot Loaf

Ingredients:
2/3 cup butter or margarine
1/2 cup brown sugar
1 egg
2 cups grated carrots
1 1/4 cup flour
1 tsp. baking powder
1 tsp. baking soda
1 TB lemon juice
1 TB water
1 tsp. vanilla
1/2 tsp cinnamon
1/2 tsp. salt

Method:
1. Preheat your oven to 350 degrees and lightly grease a medium-sized loaf pan.
2. Whisk together flour, baking powder, and baking soda together.
3. Add egg and brown sugar; whisk to combine.
4. Stir in lemon juice, water, vanilla, cinnamon, salt, and carrots.
5. Pour into prepared pan and bake for 45-55 minutes, or until an inserted toothpick comes out clean. Cool in pan on a wire rack.


Brown Velvet Cheesecake Cake

Normally I’m not a big fan of Valentine’s Day. And in all the years my husband and I have been together, I don’t think we’ve ever set foot in a restaurant on V-Day. (What can I say? We’re just not into spending extra money and being forced to order off a pre-fixed menu for no good reason.) But we do have a tradition of enjoying a nice home-cooked meal at the dining room table by candlelight on Valentine’s Day (as opposed to eating on the couch in front of the TV, which we’re definitely guilty of doing more often than we’d like to admit).

This year, I decided to make one of my husband’s favorite pasta dishes and go all out on dessert. My husband can be very picky when it comes to sweets, so I knew that if I wanted to wow him, it was going to have to be something special. Unfortunately, my hectic schedule during the week (you know, kid, job, laundry, the usual) didn’t really afford me the opportunity to spend that extra time slaving over the stove. So we decided to postpone Valentine’s Day until the weekend, which gave me the time I needed to prepare everything the way I wanted.

So about that dessert: I decided to make a brown velvet cheesecake cake. It’s basically your classic red velvet cake sans food coloring with a cheesecake layer in between, covered in cream cheese frosting. I figured it was appropriate for Valentine’s Day, but most importantly, that my husband would really enjoy it.

Why did I skip the red? For some people, that rich red color is what makes the cake special. For me, the red looks unnatural and is actually kind of a turnoff. So I decided to forego the food coloring and let the cocoa cake actually look like cocoa. And I’m glad I did, because my husband claims that the cake tasted better specifically because of that. I’m sure he’s just saying that to be nice, but I’ll take it.

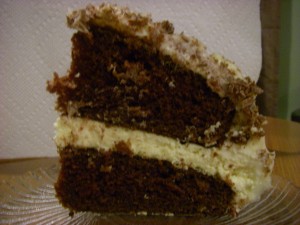
IMGP1687

Brown Velvet Cheesecake Cake
From RecipeGirl

Ingredients:

For the cheesecake:
Two 8-ounce packages cream cheese, at room temperature
2/3 cup granulated sugar
pinch of salt
2 large eggs
1/3 cup sour cream
1/3 cup heavy whipping cream
1 teaspoon vanilla extract

For the brown velvet cake:
2 1/2 cups AP flour
1 and 1/2 cups granulated white sugar
3 tablespoons unsweetened cocoa powder
1 and 1/2 teaspoons baking soda
1 teaspoon salt
2 large eggs, at room temperature
1 and 1/2 cups vegetable or canola oil
1 cup buttermilk
2 teaspoons vanilla extract
2 teaspoons white vinegar

For the cream cheese frosting:
2 and 1/2 cups powdered sugar
Two 8-ounce packages cream cheese, at room temperature
1/2 cup unsalted butter, at room temperature
1 tablespoon vanilla extract

For topping:
A bar of chunk of chocolate to make shavings or curls, optional

Method:

For the cheesecake layer:
1. Preheat your oven to 325 degrees and boil a kettle of water. You’ll need this for a water bath.
2. Spray a 9-inch springform pan with nonstick spray and line the bottom with parchment paper. Wrap a double layer of foil around the bottom and up the sides of the pan, sealing it tightly so that water can’t get in.
3. In a large bowl, use an electric mixer to mix the cream cheese until it’s nice and smooth.
4. Add in sugar and salt and mix for about two minutes, scraping down the sides of the bowl as needed.
5. Add your eggs, one at a time, blending after each addition.
6. Mix in sour cream, whipping cream, and vanilla. Beat until smooth.
7. Pour the batter into the prepared pan. Set the pan into a larger pan (I used a roasting pan) in the pre-heated oven. Pour the hot water from your kettle into the roasting pan so that there’s about an inch of water coming up the foil along the sides of the cheesecake pan.
8. Bake the cheesecake for 45 minutes until it’s set to the touch and doesn’t jiggle.
9. Remove the cheesecake from the roasting pan and let it cool on a wire rack for at least an hour. Once cooled, place the pan into the freezer and let the cheesecake freeze completely. This can be done in several hours. (I made my cheesecake the day before I made the cake and left it in the fridge overnight. I then stuck it in the freezer for about an hour the next morning.)

For the cake layers:
1. Preheat your oven to 350 degrees . Grease and flour two 9-inch baking pans.
2. In a large bowl, whisk together the flour, sugar, cocoa powder, baking soda and salt.
3. Add eggs, oil, buttermilk, food coloring, vanilla and vinegar to the flour mixture. Using an electric mixer on medium-low speed, beat until blended (about one minute). Scrape down the sides and bottom of the bowl with a rubber spatula and then beat the mixture on high for two minutes.
4. Spread the batter evenly into the prepared pans and bake for 30 to 35 minutes, or until an inserted toothpick comes out clean.
5. Cool the cakes in their pans on a wire rack for 10 minutes; then run a knife around the edge of the pans and invert the cakes onto a rack to cool completely.

For the frosting:
1. In a large bowl, using an electric mixer on medium-high speed, beat powdered sugar, cream cheese, butter and vanilla until it is smooth and creamy.

To assemble the cake:
2. Place one cake layer into the center of a cake plate or platter.
3. Remove the cheesecake from the freezer, take off the sides of the pan, and slide a knife under the parchment to remove the cheesecake from the pan. Peel off the parchment.
4. Measure your cheesecake layer against the cake layers. If the cheesecake layer is larger, which it may be, place it on a cutting board and gently shave off some of the exterior to get it to be the same size as your cake layers. (Have a small dish on hand to collect the excess cheesecake—it makes a nice interim snack, trust me.)
5. Place the cheesecake layer on top of the first cake layer. Then place the second cake layer on top of the cheesecake.
6. Apply a layer of frosting to the top and sides of the cake, and then place the cake in the fridge for 30 minutes for the frosting to set.
7. After 30 minutes, remove the cake from the fridge and apply a second layer of frosting. Top with chocolate shavings or curls if desired (I topped my cake with milk chocolate; white chocolate also works well).
8. Store the cake in the fridge until you’re ready to serve it.

IMGP1691

White Chocolate Coconut Brownies

Sometimes, if you’re me, you find yourself in the mood for something insanely sweet yet easy to whip up. These brownies totally fit the bill. They took almost no time to throw together and didn’t require me to bust out the gadgets.

Now I will warn that the sweetness factor is intense. You’ll probably want to cut these into bites more so than bars or squares…unless you’re me, in which case you’ll want to stuff your face with way too large a piece for your own good.

I got the recipe from Brown Eyed Baker. If you haven’t visited this site yet, stop what you’re doing and check it out. This is definitely one of my go-to sources when I need a new dessert idea. Take a look and you’ll see why.

badpicbrownies

White Chocolate Coconut Brownies
Ingredients:
1 and 1/3 cups all-purpose flour
1 teaspoon salt
11 ounces white chocolate, chopped
2 sticks unsalted butter, cut into 1-inch pieces
1 and ½ cups white sugar
½ cup light brown sugar
5 eggs, at room temperature
2 teaspoons vanilla extract
1 cup shredded sweetened coconut

Method:
1. Preheat the oven to 350 degrees. Line a 9×13 pan with parchment paper and set aside.
2. Whisk the flour and salt together.
3. Melt the white chocolate and butter. Since I didn’t have a ton of time, I cheated and did this by putting the mixture in a glass bowl and microwaving it for 30-second increments at 50% power until it was ready. The original recipe suggests setting the white chocolate and butter mixture over a saucepan of simmering water to melt it properly.
4. Whisk in the white and brown sugars.
5. Whisk in the eggs one at a time
6. Stir in the vanilla extract.
7. Stir in the flour mixture and coconut using a rubber spatula—not a whisk.
8. Pour the batter into the prepared pan and use the spatula to smooth the top.
9. Bake for 30 minutes until a toothpick inserted comes out clean and the top looks nice and crispy.
10. Cool in the pan on a wire rack. Once cooled completely, you can lift the brownies out using the parchment paper and then cut them into small bites or squares.


Peanut Butter and Jelly Bars

Sometimes it pays to keep things simple flavor-wise. Case in point: the classic peanut butter and jelly combination. Growing up, PB&J sandwiches were a steady part of my school lunch rotation; and while I suppose I enjoyed them, they certainly didn’t stand out at the time as anything particularly special. But as I got older, I began to develop a fondness for PB&J. Maybe it’s because your coworkers look at you funny when you’re sitting around the break room table and they’re all eating their tandoori chicken takeout while you’re eating something they haven’t tasted since 1987. Or perhaps it’s because there’s just something about the awesome flavor combination that simply brings back memories of being a carefree kid.

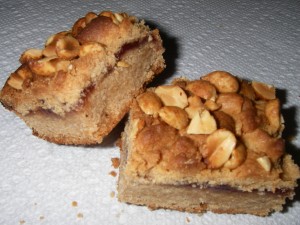
Either way, peanut butter and jelly is a winner in my book, so it was only natural take the concept one step further by turning it into dessert. I found this Martha Stewart recipe and decided to give it a go, and the result was a batch of peanut butter and jelly bars that are good enough to make any adult feel like a kid again.

For some reason, these bars took a little longer to make than I initially expected. The peanut butter dough was really thick, and so I had to keep scraping down the sides of my mixer bowl and adjusting the speed up and down. And then it took me awhile to chop up the peanuts and make the crumbly dough topping, but that’s partly because for some strange reason, I love the feeling of balled-up dough in between my fingers and probably wasn’t in a particular rush to get the process over with.

This recipe makes a nice amount of PB&J bars—which means you’ll probably have enough left over to divvy up among your coworkers in exchange for their promise to stop mocking you for your peanut butter and jelly lunches, at least for the foreseeable future.

IMGP1649

Peanut Butter and Jelly Bars
Recipe from Martha Stewart

Ingredients:
1 cup (2 sticks) of unsalted butter, room temperature, plus more to butter the pan
3 cups of AP flour, plus more for the pan
1 and 1/2 cups granulated sugar
2 large eggs
2 and 1/2 cups smooth peanut butter
1 and 1/2 teaspoons salt
1 teaspoon baking powder
1 teaspoon vanilla extract
1 and 1/2 cups of your favorite jam flavor (I used strawberry and classic grape—I’ll explain)
2/3 cup salted peanuts, roughly chopped

Method:
1. Preheat your oven to 350 degrees. Grease a 9-by-13-inch pan with butter, and line the bottom with parchment paper. Grease the parchment, and coat inside of the pan with flour; set aside.
2. Place the butter and sugar in the bowl of an electric mixer fitted with the paddle attachment. Beat the mixture on medium-high until fluffy, about 2 minutes. Add eggs and peanut butter; beat on medium until well-combined (this took me about 3-4 minutes; the original recipe estimates 2).
3. Whisk together the salt, baking powder, and flour. Add dry ingredients to mixture and beat on low-medium speed until well-combined (this took me another 3-4 minutes, alternating between speeds).
4. Add vanilla and mix until incorporated.
5. Transfer 2/3 of the mixture to your prepared pan, and spread evenly.
6. With a spatula, spread jam on top of peanut-butter mixture. **
7. Crumble remaining peanut butter mixture on top of the jam layer, and sprinkle with peanuts.
8. Bake until the tops turn golden, about 45-55 minutes. (The inserted toothpick test doesn’t really work here because the jelly layer is always going to be gooey.)
9. Transfer to a wire rack and make sure to cool these completely before cutting into them. I stuck them in the fridge to set for about an hour and then left them out on my counter for another hour before slicing them up—and that totally did the trick.

**I wanted to see what these would taste like with both strawberry and grape jelly, so I decided to put strawberry over half of the base and grape over the other half. While I don’t think the two versions taste remarkably different from one another, I do like the way the strawberry version gives you a touch of tanginess while the grape bars really take you back to that classic old-school flavor. I also wound up with a few hybrid bars as a result of the strawberry and grape jellies melting into each other in the middle of the pan during the baking process, but happily, those tasted just as good as their individual strawberry or grape counterparts.


Triple Layer Chocolate Peanut Butter Brownies

So the blizzard they predicted didn’t turn out to be a blizzard after all. It was more like a respectable snow storm, dumping a good 8-10 inches on us before making its way out. My husband was happy because he got to use his new toy—the mega snow blower—and I was happy because it meant the roads were just bad enough to give us an excuse to stay inside together all weekend long. During the day, we chased the baby around the house (he’s just starting to take his first steps) and played fun little infant games (think peek-a-boo and a really low-key version of hide and seek). And at night, once the baby went to bed, my husband and I got to cuddle up, pop in some good movies, and enjoy being stuck indoors.

Now I even though I made my blizzard brownies right before the storm, I did have to take advantage of the extra at-home time and whip up a second batch of deliciousness, this time in the form of triple layer brownies.

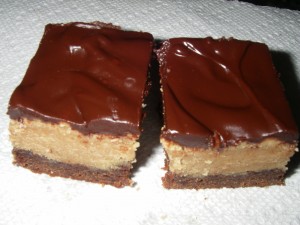
These brownies are really rich. Imagine a moist, chocolate brownie bottom with a layer of buttery peanut butter cookie dough resting above it. Top it off with a generous coating of chocolate ganache, and you’ve got a recipe for one indulgent dessert.

IMGP1657

Triple Layer Chocolate Peanut Butter Brownies

Ingredients:
For the brownie layer:
6 ounces of semisweet chocolate, chopped
One stick of butter
½ cup granulated sugar
½ cup light brown sugar
½ teaspoon salt
3 large eggs
½ teaspoon vanilla
¾ cup AP flour
2 and ½ tablespoons unsweetened cocoa powder

For the peanut butter cookie dough layer:
½ cup butter
1 and ½ cups AP flour
¾ cup granulated sugar
1 large egg
1 and ¼ cups smooth peanut butter
1 teaspoon salt
1 teaspoon baking power
1 teaspoon vanilla extract

For the ganache topping:
6 ounces of semisweet chocolate, chopped
1 and ½ teaspoons confectioners sugar
2 tablespoons creamy peanut butter
1 tablespoon milk
¼ cup heavy cream

Method:
For the brownie layer:
1. Preheat your oven to 350 degrees and grease an 8×8 baking pan. Line the pan with parchment paper, leaving enough for an overhang (you’ll need this to get the brownies out later).
2. In a microwave, heat the chocolate and butter on 50% power until melted. (I recommend doing this in 45-second intervals and stirring in between.)
3. Whisk in sugars and salt until smooth. Then, whisk in the peanut butter, eggs, and vanilla.
4. Add your flour and cocoa powder to the wet mixture and stir until well-combined.
5. Pour the mixture into your prepared pan and bake for 20 minutes. While the brownies cool, you can move on to the next step.

For the peanut butter layer:
1. Using a hand or stand mixer, beat the butter and sugar on medium until the mixture is light and fluffy. Beat in the eggs one at a time. Then, add in the peanut butter and beat on medium for 2-3 minutes, or until well-combined.
2. Whisk together your flour, salt, and baking powder; then add to the peanut butter mixture and beat at low-medium speed until well-combined. Add your vanilla and mix well.
3. Once the brownies have been cooling for about 30 minutes (they don’t need to be completely cool, just not right out of the oven), spread the peanut butter cookie dough on top of the brownie layer. The top might start to sink in, and that’s okay. Put your pan back in the oven and bake for about 25 minutes, or until the top turns a nice golden brown and an inserted toothpick comes out clean.
4. Let the brownies cool for about an hour, then make and add the ganache.

For the ganache topping:
1. Combine the chocolate, confectioners sugar, peanut butter, and milk in a bowl. Heat the mixture in the microwave at 50% until somewhat (but not totally) melted.
2. In a small saucepan or microwave, heat the heavy cream until it just starts to boil. Immediately whisk it into the chocolate mixture until it looks nice and smooth.
3. Pour the ganache over the peanut butter cookie dough layer and resist the urge to cut into these babies until the topping has enough time to set. I recommend waiting at least an hour with the brownies in the fridge, or two hours if you decide to leave them at room temperature.

Blizzard Brownies

Living in the Northeast means you have to expect snowstorms at least once in awhile. Today is apparently one of those days. They’re calling the impending storm a weather event of epic proportions,  or something ridiculously dramatic along those lines. I mean, I get it: You want people to be prepared. And that’s fine. But I just find it a touch annoying that every storm that rolls around these days is hailed as the biggest, baddest version  of anything we’ve ever known.

Now, having gotten that rant out of the way, I will say that it looks like we’ll be stuck at home for the next day or so. And based on previous experiences, we can’t really rule out the possibility of a power outage. See, most people’s power companies are equipped to handle weather-related outages. Mine isn’t. So generally, when the power goes out, it stays out for awhile. And while we did invest in a generator, we can only use it to power so many appliances at a time—which means if we do wind up with an outage, my ability to bake will be seriously hampered. And since I obviously can’t risk being cooped up for the weekend without an ample supply of sweets on hand, I decided to take a few minutes to whip up a batch of brownie goodness.

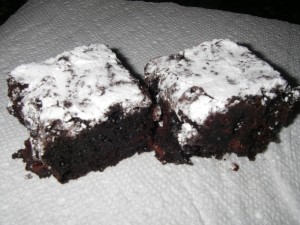
These brownies are, simply put, super yummy. They’re definitely dense and intense, but they’re not quite as sweet as your average brownie. I like how the coffee flavor really comes out and complements the rich dark chocolate without being too overpowering. And these are definitely the kind of brownies that would go well with a nice scoop of vanilla or coffee ice cream. So if you’re expecting to be stuck indoors this weekend, take 15 minutes out of your evening (yes, that’s really all you need to throw these together, including cleanup) and bake yourself some brownies. Then go grab a blanket, queue up your favorite movie, and enjoy some delightfully delicious downtime. You can worry about clearing out your driveway tomorrow.

IMGP1644

Blizzard Brownies (or, for some context, Intense Dark Chocolate Brownies)

Ingredients:
1 cup AP flour
2/3 cup unsweetened dark cocoa powder (I used Hershey’s Special Dark)
1 and ½ cups granulated sugar
½ cup confectioners sugar,plus more for dusting
1 tablespoon instant coffee
¾ teaspoon salt
3 large eggs
1/3 cup vegetable oil
1 tablespoon water
1 tablespoon milk (I used skim)
½ cup dark chocolate chips (again, I used Hershey’s Special Dark)
½ cup semisweet chocolate chips

Method:
1.    Preheat your oven to 350 degrees. Grease an 8×8 baking pan and set aside.
2.    In a large bowl, mix the flour, cocoa powder, sugars, instant coffee, and salt.
3.    Add in the eggs one at a time, and mix well (I recommend using a spoon instead of a whisk—the batter will be quite thick at this point, and it may be easier to work with a spoon).
4.    Add in the oil, water, and milk, and mix well.
5.    Stir in the chocolate chips.
6.    Pour the mixture into your prepared pan and bake for 35 to 40 minutes, or until an inserted toothpick comes out clean. Wait about 20 minutes and then dust with confectioners sugar.
7.    Let the brownies cool completely before cutting into them. Or, if you’re me, reject the notion of self-control and grab yourself a warm, gooey bite shortly after they come out of the oven. Either way works, I suppose.

Shortbread Caramel Brownie Bars

Sometimes a plain old brownie just doesn’t cut it. Or at least that was my way of thinking when I decided to go for something a little more jazzed-up on the brownie front.

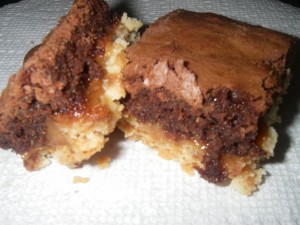
These brownies are awesome and delicious. You get a buttery shortbread crust, a gooey caramel layer, and a soft, chewy brownie on top. What more could you want? The only downside is that they do take a bit of time to prepare, as there are multiple steps involved. (I made these over the weekend…no way do I have time for multi-step baking during the week.) But if you have the time, and the patience (which is just as important), do yourself a favor and bake up a batch of these beauties. Have I mentioned how utterly delicious they are?

IMGP1590

Shortbread Caramel Brownie Bars
From myrecipes.com

Ingredients:
1 and 1/2 cups (3/4 lb.) butter
2 and 1/2 cups AP flour
1 and 1/4 cups sugar
2 tablespoons cornstarch
12 ounces individually wrapped soft caramels, such as Kraft
1/4 cup whole milk
10 ounces of bittersweet or semisweet chocolate, finely chopped
3 large eggs
1 tablespoon vanilla
1/2 teaspoon baking powder
1/4 teaspoon salt

Method:
To make the crust:
1. Preheat your oven to 325 degrees.
2. Cut up 1 cup of butter into chunks.
3. In the bowl of a food processor, combine 2 cups of flour, 1/2 cup of sugar, cornstarch, and the butter chunks.
4. Process until the dough comes together and press it evenly over the bottom of a buttered 9×13 baking pan.
5. Bake for about 25 minutes, or until the crust starts to brown.
6. Remove from oven and let cool completely before adding the next layer.
To make the caramel layer:
1. Unwrap your caramels and place them in a microwave-safe bowl with the milk.
2. Cook in a microwave oven on full power for one minute. Stir the mixture, then cook and stir at 30-second intervals until melted and smooth, about 3 minutes longer.
3. Spread caramel mixture evenly over cooled crust and chill until firm, about 20 minutes.
To make the brownies:
1. Preheat your oven to 350 degrees.
2. Pour chocolate and remaining 1/2 cup butter into a large bowl set over a pan of barely simmering water (bottom of bowl should not touch water). You can also use a double boiler. Stir the mixture until melted and smooth.
3. With a whisk or a mixer on medium speed, beat in remaining 3/4 cup sugar, eggs, and vanilla until well-blended.
4. Stir in remaining 1/2 cup flour, baking powder, and salt until well-blended.
5. Pour chocolate mixture over caramel layer and use a knife or spatula to spread level, completely covering caramel.
6. Bake for 35 to 40 minutes, or until an inserted toothpick comes out clean.
7. Cool completely before cutting into bars.

Dried Fruit and Nut Cake

The other day, I was in the mood for something a little different. And I had various containers of dried fruit in my pantry that I really wanted to use up, ‘cause, um, yeah, I needed to clear some space to accommodate my latest Costco run. (Ever been to Costco? That place is wonderful and evil at the same time—especially because whenever I go there, I just seem to get into this mode where I start thinking “yes, it is a good idea to buy three different types of chocolate chips in bulk.”) Anyway, the dried fruit (among other things) had to go, so I took the opportunity to tackle a recipe I’d seen awhile back.

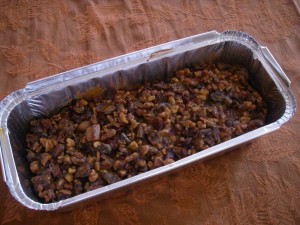
This cake is really more like a giant granola bar. And I’ll warn that it’s fairly dense—you need a pretty solid knife to cut through it. But it’s also super tasty, and incredibly quick and easy to make. The most time-consuming part was chopping up all the dried fruit, and even that only took a few minutes. And the result was an interesting concoction that I’ll happily be eating all week long.

IMGP1510
Dried Fruit and Nut Cake
Recipe from David Leibowitz

Ingredients:
7 tablespoons AP flour
7 tablespoons granulated sugar
3 large eggs
1/2 teaspoon ground cinnamon
1/4 teaspoon ground nutmeg (I like nutmeg, so I used a bit more, but not quite a half teaspoon)
1/8 teaspoon ground cardamom
Pinch of ground cloves (I omitted this)
Pinch of salt
1 and 1/2 cups of chopped up dried fruit (I used dried cranberries, apricots, dates, and prunes)
1 and 1/2 cups of chopped nuts, lightly toasted (I used walnuts and pecans)

Method:
1. Preheat your oven to 300 degrees. Grease a 9-inch loaf pan.
2. Mix the flour, sugar, eggs, salt, and spices in a large bowl.
3. Stir in the dried fruits and nuts.
4. Pour the mixture into the prepared pan and bake for 90 minutes. Cool the cake in its pan. When ready to slice, you’ll definitely want to bust out the cutting board and a sharp knife.