Pretzel-Crusted Chocolate-Peanut Butter-Caramel Blondies

Wow, that’s a mouthful. No pun intended. The great thing about blondies is that they can be pretty simple. Or not, like these bars. Want to know what inspired these? I was sort of looking for a way to emulate the taste of Chubby Hubby, one of my favorite Ben & Jerry’s ice cream flavors, in blondie form, and this is what I came up with.

These bars are pretty outrageous. You’ve got a sweet and salty pretzel crust on the bottom, a rich caramel-peanut butter blondie center packed with chocolate chips in the middle, and a generous layer of chopped peanut butter cups to top it all off. In other words, these bars are really rich. But really, really good.

Chubhub

Pretzel-Crusted Chocolate-Peanut Butter Caramel Blondies

Ingredients:

For the crust:

2 cups crushed pretzels
1/2 cup (1 stick) melted butter
1/2 cup dark brown sugar

For the blondie layer:

1/2 cup (1 stick) unsalted butter, melted and cooled to room temp
1 cup light brown sugar
1 large egg
2 tsp vanilla
1 cup AP flour
1/4 tsp salt
1/2 cup smooth peanut butter
3/4 cup semisweet chocolate chips
1/2 cup caramel sauce (store-bought is fine, or make your own by melting about 12 Kraft caramel candies with a tablespoo of heavy cream)
1 cup chopped peanut butter cups, for topping

Method:

  1. Preheat your oven to 350 degrees. Grease a 9×9 baking pan and set aside.
  2. Make the crust by combining the pretzels, melted butter, and brown sugar in a small bowl and mixing well. Press the crust into the bottom of your prepared pan and bake for 10 minutes. Remove from oven and set aside.
  3. In a medium bowl, whisk together the melted butter, brown sugar, peanut butter, and egg. Stir in the vanilla.
  4. In a separate bowl, combine the flour and salt.
  5. Stir the dry ingredients into the wet until well-combined. Then, stir in the caramel sauce and chocolate chips.
  6. Pour the batter on top of the crust. Sprinkle the chopped peanut butter cups on top of the blondie layer.
  7. Bake for 30-35 minutes, or until an inserted toothpick comes out clean. Let the blondies cool in the pan (at least one hour) before slicing and serving.

Everything Blondies

I’ve been kind of bad about posting stuff lately – we can thank my new work schedule for that. But believe it or not, I have been doing a fair amount of baking. And eating, of course. In fact, I devoured more of these blondies than I’d like to admit, but they were really just so darn good I couldn’t resist.

One of my favorite things about blondies is the fact that they’re so versatile. So when I found myself having trouble deciding what type of blondies to make for an impromptu get-together, I decided to simply cram a whole bunch of different flavors into a gooey, buttery base. The result? Another fabulous batch of treats.

everythingblond

Everything Blondies

Ingredients:

1/2 cup (1 stick) unsalted butter, melted and cooled to room temp
1 cup light brown sugar
1 large egg
2 tsp vanilla
1 cup AP flour
1/4 tsp salt
2/3 cup butterscotch chips
2/3 cup white chocolate chips
2/3 cup cinnamon chips
2/3 cup semisweet chocolate chips

Method:

  1. Preheat your oven to 350 degrees. Grease an 8×8 baking pan and set aside.
  2. In a medium bowl, whisk together the melted butter, brown sugar, and egg. Stir in the vanilla.
  3. In a separate bowl, combine the flour and salt.
  4. Stir the dry ingredients into the wet until well-combined. Stir in the various chocolate chips, reserving a small amount of each to sprinkle on top if desired.
  5. Bake for 28-32 minutes, or until an inserted toothpick comes out clean. Let the blondies cool in the pan (at least one hour) before slicing and serving.

Chocolate Chunky Peanut Butter Brownies

I just love me a good brownie. And I also happen to be a big fan of the whole chocolate-peanut butter combo. So basically, if you’re me, these brownies are a very good thing. They feature a rich, fudgy chocolate-peanut butter base with a chunky peanut butter filling. Talk about yum.

Incidentally, my work schedule recently changed (read: got more demanding) and so I haven’t been posting (or baking, for that matter) quite as regularly as I normally would. I wonder if this new schedule will have a positive effect on both my wallet and waistline…guess we’ll have to see what happens.

chunkypb

Chocolate Chunky Peanut Butter Brownies

Ingredients:

1 stick of butter, melted
1/2 cup granulated sugar
1/2 cup dark brown sugar
1 large egg
1 tsp vanilla
1 cup AP flour
1/4 tsp salt
1/2 cup cocoa powder
1/2 cup smooth peanut butter
3/4 cup chunky peanut butter

Method:

  1. Preheat your oven to 350 degrees. Grease an 8×8 baking pan and set aside.
  2. In a large bowl, whisk together the butter, sugars, egg, smooth peanut butter, and vanilla. Set aside.
  3. In a small bowl, combine the flour, salt, and cocoa powder.
  4. Mix the dry ingredients into the wet until well-combined.
  5. Pour half of the batter into your prepared pan.
  6. Spread the chunky peanut butter on top of the base layer using either the greased back of a spoon or an offset spatula.
  7. Spread the remaining brownie batter on top.
  8. Bake for 30 minutes, or until an inserted toothpick comes out clean. Let the brownies cool in the pan for at least an hour before slicing and serving.

Vanilla and White Chocolate Mousse Cheesecake

Ever have a recipe bookmarked for ages that you’re just itching to try but don’t have the time to tackle?

Such was the case with this particular cheesecake. But let me backtrack a little, only to tell you how much I love cheesecake. Whether it’s the rich and dense kind or the type that’s light and airy, put it in front of me and I’ll be sure to devour it. And then go get myself another piece. And maybe a third one after that. Yes, I like cheesecake that much. And if there’s one flavor profile I also happen to adore, it’s the vanilla and white chocolate combo. Talk about heavenly. So when I found a cheesecake recipe that incorporated several of my favorite elements into one rich, indulgent dessert, I just had to give it a try…about six months later. That’s how long this recipe has been swirling around in my mind, just begging my stomach to give in and make it. But it finally happened. And it was well worth the wait.

Now I’ll warn you: This recipe is not a quick one. There are four separate steps, though two of them are fairly simple. Usually I don’t have the luxury of making multi-layered cakes, but between my son’s birthday and the holidays, I was in such a celebratory mood that I forced myself to make the time.

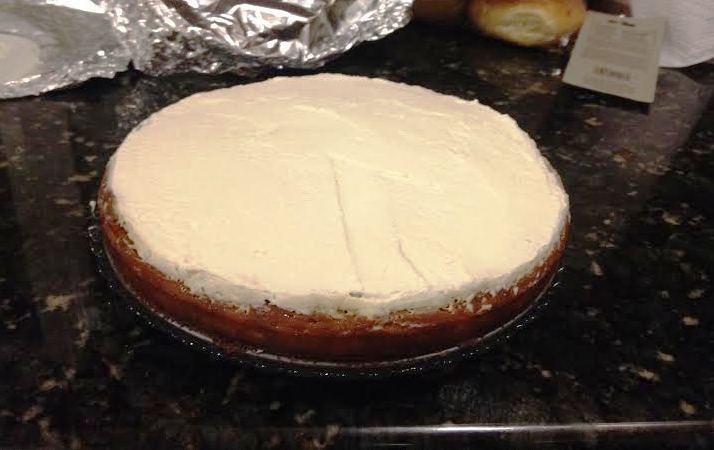
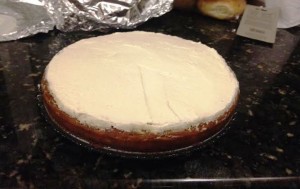
What you’ve got here is a classic, simple graham cracker crust topped with a rich layer of vanilla-flavored cheesecake. On top of that is a nice helping of white chocolate mousse, followed by a generous layer of vanilla whipped cream. In other words, pure and utter deliciousness on a plate, and well worth the multi-hour investment.

vbccake

Vanilla and White Chocolate Mousse Cheesecake

Recipe very slightly adapted from The Inner Gourmet

Ingredients:

For the crust:

1 and 1/2 cups crushed graham crackers
1/4 cup dark brown sugar
1/2 cup butter, melted
1 egg yolk, beaten
1/4 teaspoon vanilla

For the cheesecake layer:

16 ounces cream cheese, softened
1 cup sour cream
2 tablespoons corn starch
1 cup granulated sugar
1 stick unsalted butter, softened
1 stick salted butter, softened
2 teaspoons vanilla

For the white chocolate mousse:

1 cup whipping cream
3 tablespoons confectioners sugar
4 ounces cream cheese, softened
5 ounces white chocolate baking squares, melted and cooled to room temperature

For the vanilla whipped cream topping:

1 cup whipping cream
3 tablespoons confectioners sugar
2 teaspoons vanilla

Method:

To make the crust:

  1. Preheat your oven to 375 degrees.
  2. In a small bowl, whisk together the graham crackers, brown sugar, butter, egg yolk, and vanilla until well-combined. Press the mixture into the bottom of a 9-inch springform pan.
  3. Bake for 8-10 minutes, or until the edges start to turn brown.
  4. Let the crust cool completely while you make the cheesecake layer.

To make the cheesecake:

  1. Lower your oven to 325 degrees.
  2. Beat the cream cheese and butter at medium speed until smooth.
  3. Add in sugar and beat until well-combined.
  4. Add in the sour cream, corn starch, and vanilla; mix on low until smooth.
  5. Pour the mixture on top of the crust, doing your best to spread it evenly.
  6. Bake the cheesecake for one hour. After an hour, it will probably still look jiggly, but don’t worry – this is normal.
  7. Turn off the oven, open the oven door, and let the cheesecake sit in the oven for one hour.
  8. Remove the cheesecake from the oven and let it cool to room temperature, at least one hour.
  9. Place the cheesecake in the fridge to set, at least 4-5 hours or overnight.

To make the mousse (you can do this in advance and keep it in the fridge, or do it right before you’re ready to spread it and just chill it for a few minutes before applying to the cake):

  1. In the bowl of a stand mixer, whip the cream on high until soft peaks form.
  2. Gradually add in your confectioners sugar and beat until stiff peaks form.
  3. Place the whipped cream in the fridge for 5-10 minutes. Meanwhile, combine the melted white chocolate (which, by the way, should be completely cooled before you use it – make sure of this) and cream cheese and beat until smooth and fluffy.
  4. Remove the whipped cream from the fridge, fold it into the white chocolate mixture, and place the mousse back in the fridge for 15-20 minutes.
  5. Once the mousse is nice and cold, use an offset spatula to spread it on top of the cheesecake layer.
  6. Return the cheesecake to the fridge until you’re ready to top it with the whipped cream (which I recommend doing right before you serve it).

To make the whipped cream:

  1. In the bowl of a stand mixer, whip the cream on high until soft peaks form.
  2. Gradually stir in the confectioners sugar and vanilla, and beat until stiff peaks form.
  3. Chill the whipped cream for at least 20-30 minutes (or overnight) before topping off the cheesecake.

Store your leftovers, if any remain, covered in the fridge. The cheesecake will keep for 2-3 days.