So the blizzard they predicted didn’t turn out to be a blizzard after all. It was more like a respectable snow storm, dumping a good 8-10 inches on us before making its way out. My husband was happy because he got to use his new toy—the mega snow blower—and I was happy because it meant the roads were just bad enough to give us an excuse to stay inside together all weekend long. During the day, we chased the baby around the house (he’s just starting to take his first steps) and played fun little infant games (think peek-a-boo and a really low-key version of hide and seek). And at night, once the baby went to bed, my husband and I got to cuddle up, pop in some good movies, and enjoy being stuck indoors.
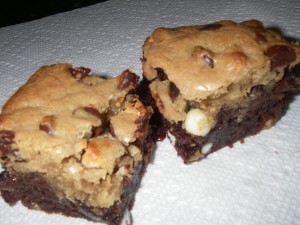
Now I even though I made my blizzard brownies right before the storm, I did have to take advantage of the extra at-home time and whip up a second batch of deliciousness, this time in the form of triple layer brownies.
These brownies are really rich. Imagine a moist, chocolate brownie bottom with a layer of buttery peanut butter cookie dough resting above it. Top it off with a generous coating of chocolate ganache, and you’ve got a recipe for one indulgent dessert.
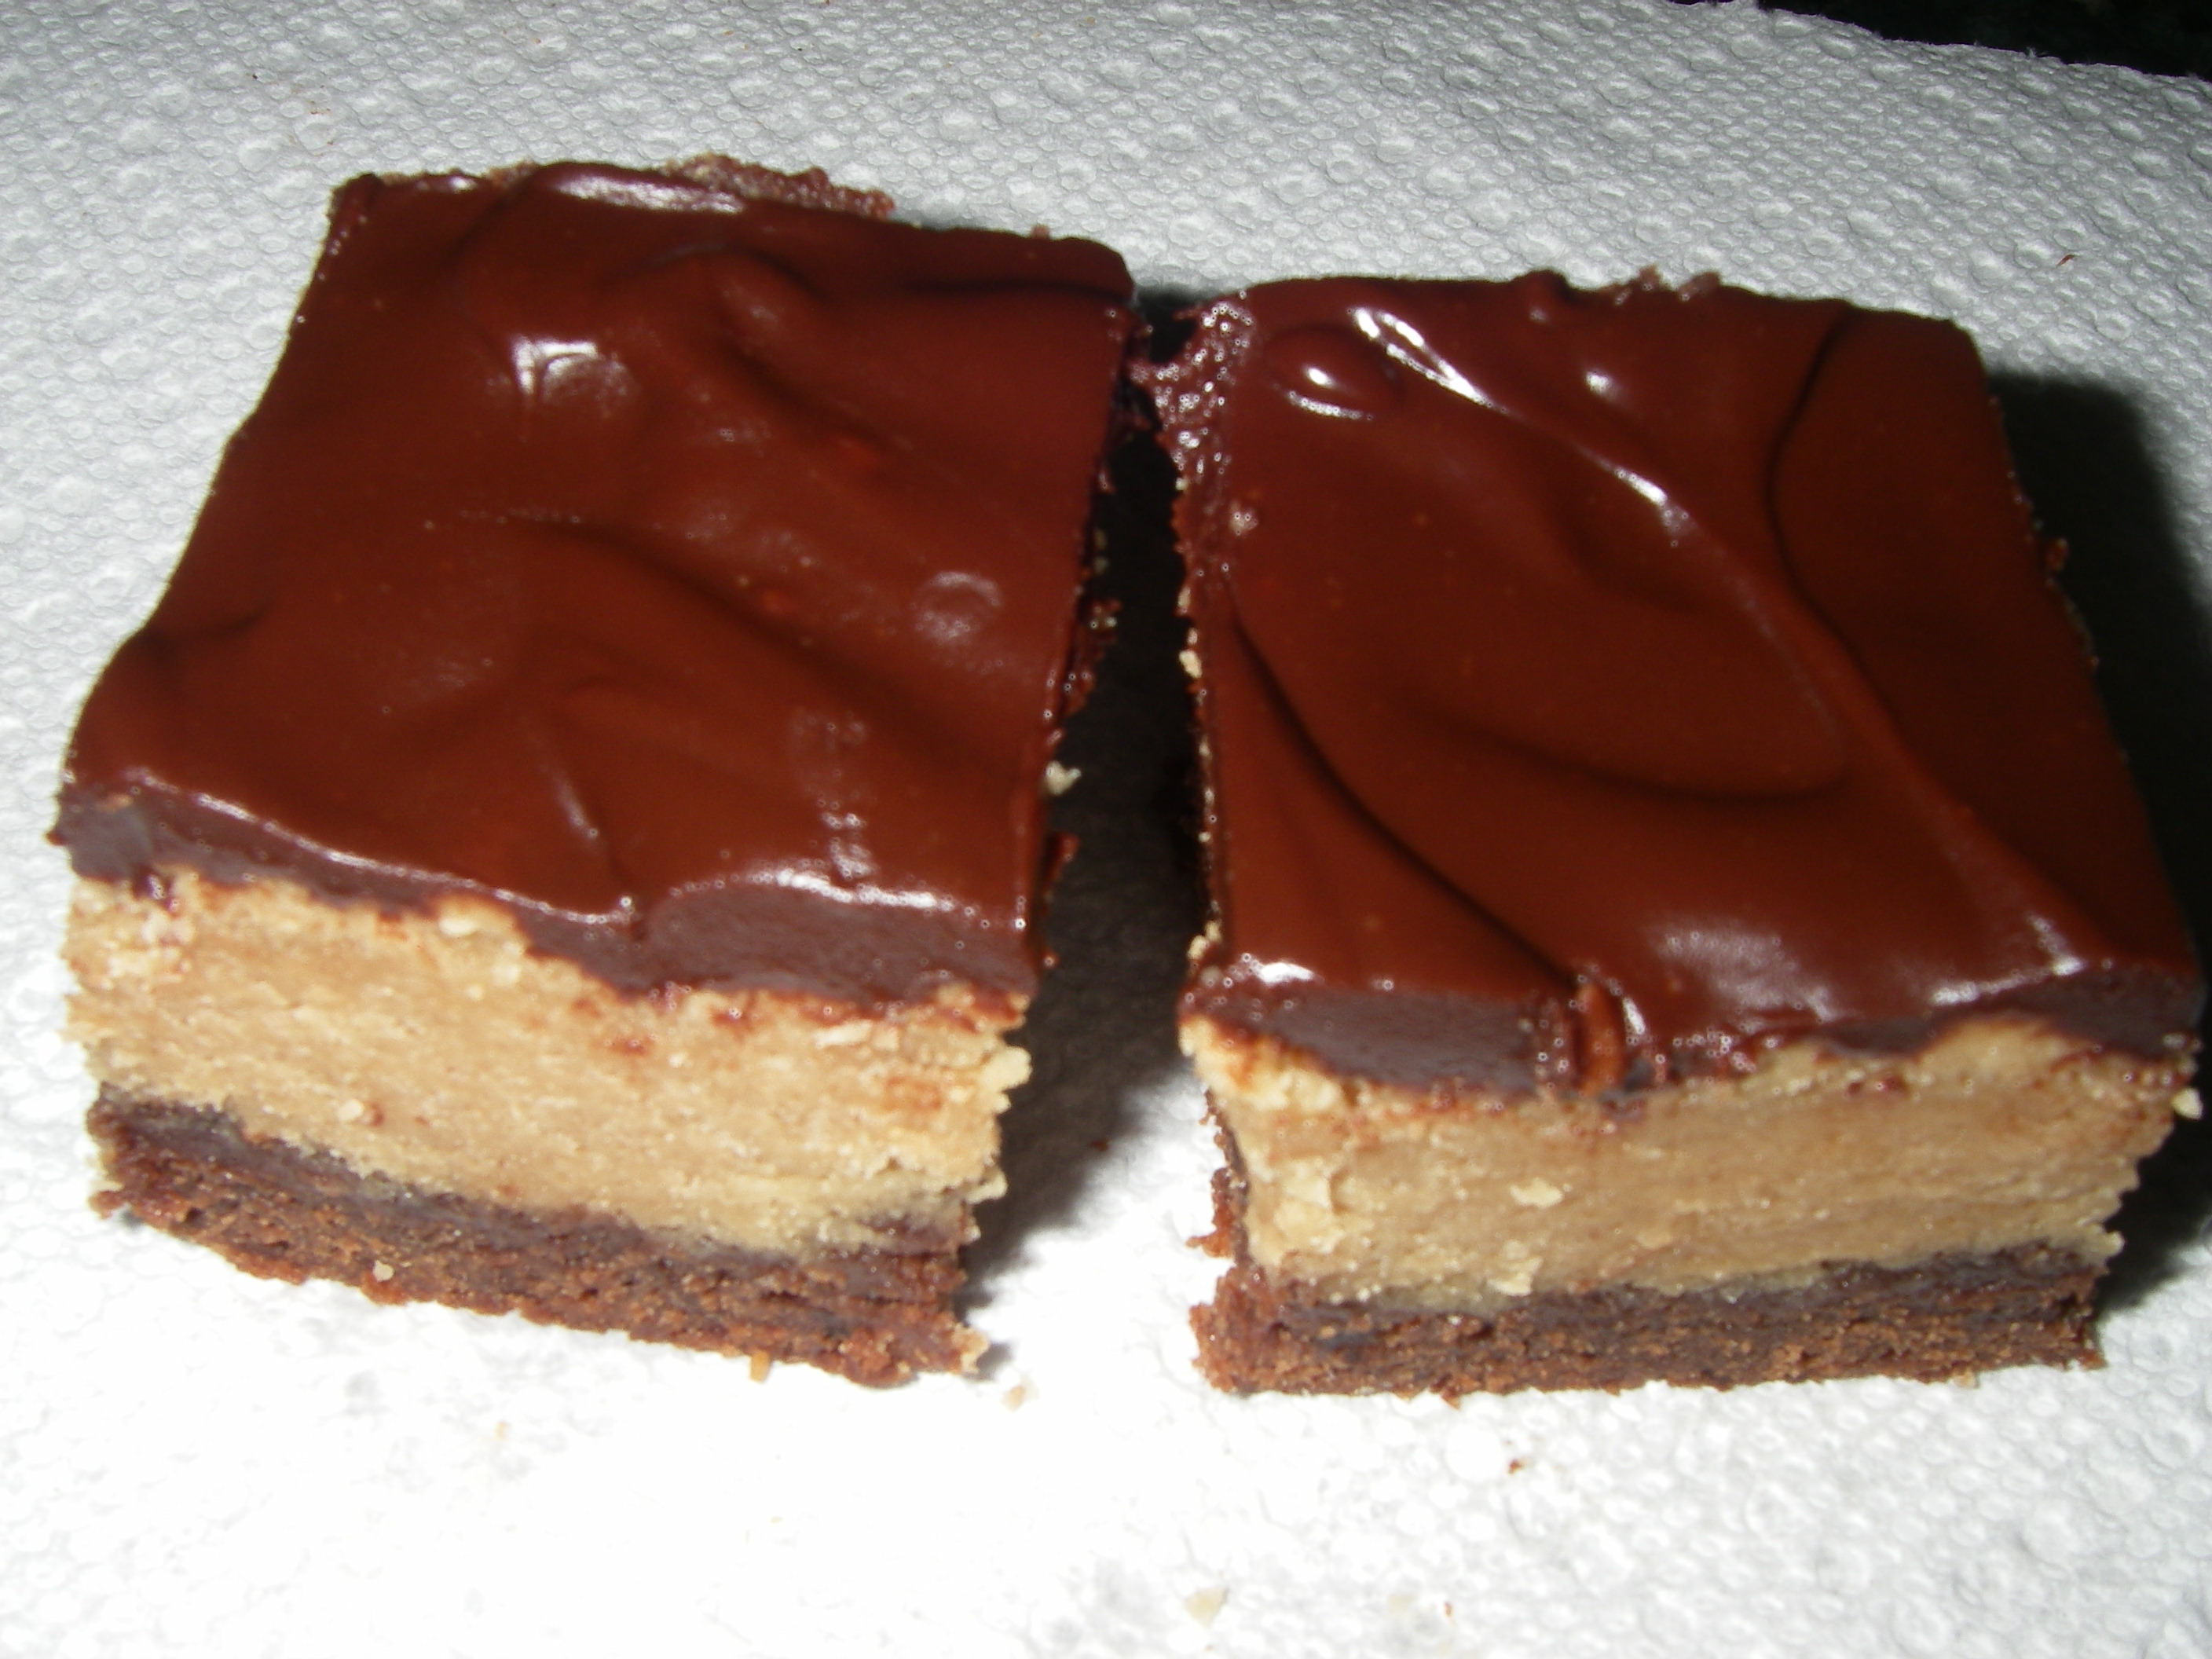
Triple Layer Chocolate Peanut Butter Brownies
Ingredients:
For the brownie layer:
6 ounces of semisweet chocolate, chopped
One stick of butter
½ cup granulated sugar
½ cup light brown sugar
½ teaspoon salt
3 large eggs
½ teaspoon vanilla
¾ cup AP flour
2 and ½ tablespoons unsweetened cocoa powder
For the peanut butter cookie dough layer:
½ cup butter
1 and ½ cups AP flour
¾ cup granulated sugar
1 large egg
1 and ¼ cups smooth peanut butter
1 teaspoon salt
1 teaspoon baking power
1 teaspoon vanilla extract
For the ganache topping:
6 ounces of semisweet chocolate, chopped
1 and ½ teaspoons confectioners sugar
2 tablespoons creamy peanut butter
1 tablespoon milk
¼ cup heavy cream
Method:
For the brownie layer:
1. Preheat your oven to 350 degrees and grease an 8×8 baking pan. Line the pan with parchment paper, leaving enough for an overhang (you’ll need this to get the brownies out later).
2. In a microwave, heat the chocolate and butter on 50% power until melted. (I recommend doing this in 45-second intervals and stirring in between.)
3. Whisk in sugars and salt until smooth. Then, whisk in the peanut butter, eggs, and vanilla.
4. Add your flour and cocoa powder to the wet mixture and stir until well-combined.
5. Pour the mixture into your prepared pan and bake for 20 minutes. While the brownies cool, you can move on to the next step.
For the peanut butter layer:
1. Using a hand or stand mixer, beat the butter and sugar on medium until the mixture is light and fluffy. Beat in the eggs one at a time. Then, add in the peanut butter and beat on medium for 2-3 minutes, or until well-combined.
2. Whisk together your flour, salt, and baking powder; then add to the peanut butter mixture and beat at low-medium speed until well-combined. Add your vanilla and mix well.
3. Once the brownies have been cooling for about 30 minutes (they don’t need to be completely cool, just not right out of the oven), spread the peanut butter cookie dough on top of the brownie layer. The top might start to sink in, and that’s okay. Put your pan back in the oven and bake for about 25 minutes, or until the top turns a nice golden brown and an inserted toothpick comes out clean.
4. Let the brownies cool for about an hour, then make and add the ganache.
For the ganache topping:
1. Combine the chocolate, confectioners sugar, peanut butter, and milk in a bowl. Heat the mixture in the microwave at 50% until somewhat (but not totally) melted.
2. In a small saucepan or microwave, heat the heavy cream until it just starts to boil. Immediately whisk it into the chocolate mixture until it looks nice and smooth.
3. Pour the ganache over the peanut butter cookie dough layer and resist the urge to cut into these babies until the topping has enough time to set. I recommend waiting at least an hour with the brownies in the fridge, or two hours if you decide to leave them at room temperature.