Pecan Pumpkin Bars

At some point I do realize this pumpkin fixation is going to have to start. After all, the holidays are almost here, at which point I may have to shift my attention toward my beloved peppermint bark. But until then, I will continue to be all about the pumpkin.

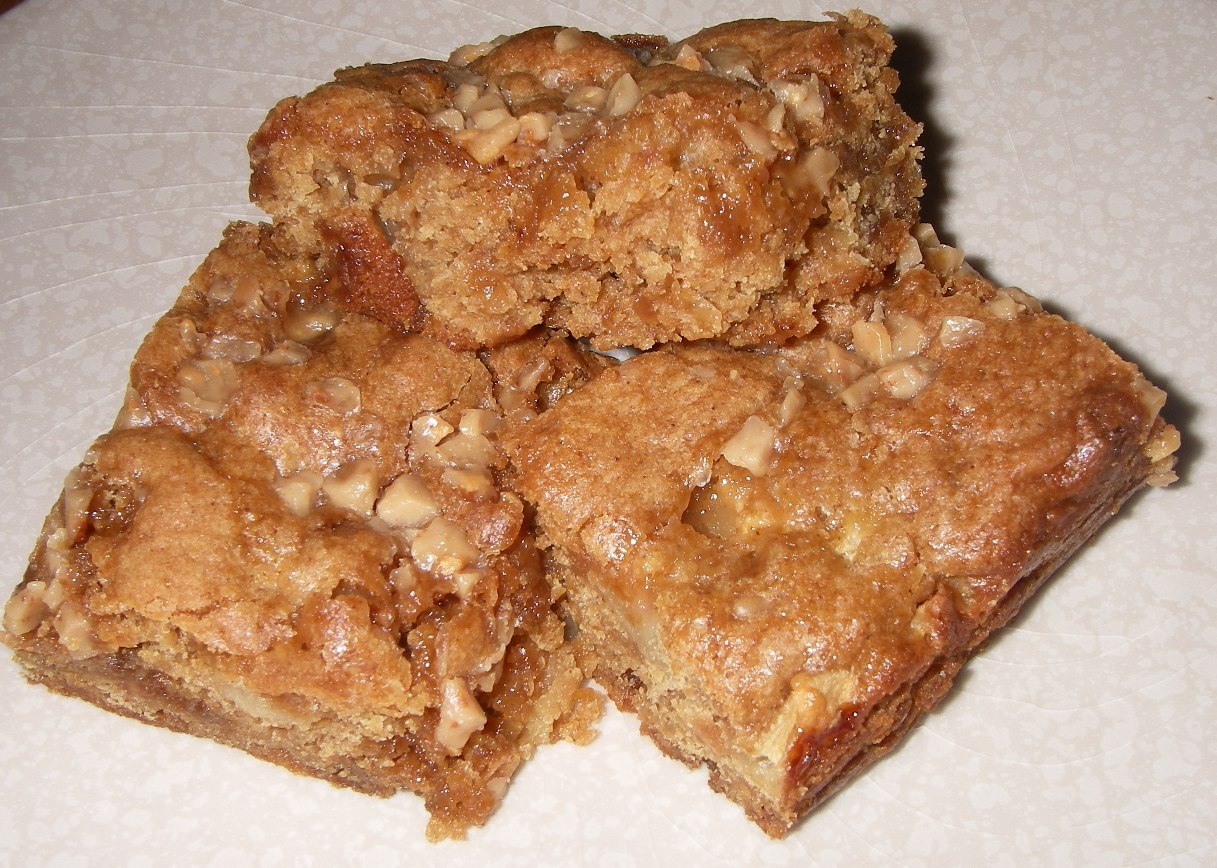
These pumpkin bars are super moist and very dense. One of the things I like about them is that they’re not super sweet – you can eat them for breakfast and not feel like you’re starting your day off with junk food. At the same time, if you prefer a sweeter bar, it’s easy enough to kick up the sugar factor by adding more white chocolate chips, and well, more sugar. Best of all, these bars are super easy to prepare, so if you’re short on time, as I tend to be, they’re a good snack to quickly throw together.
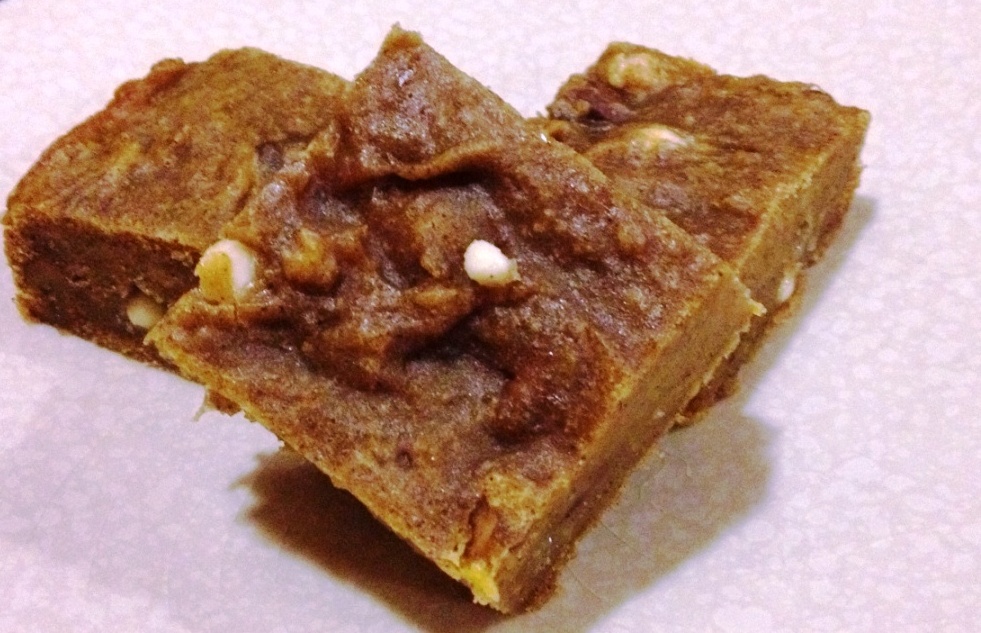
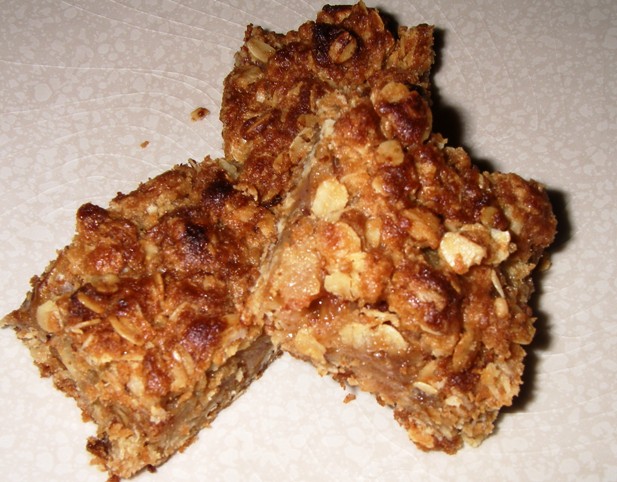
pecpumpbars

Pecan Pumpkin Bars

Ingredients:

1 and 1/4 cups AP flour
1 and 1/2 tsp cinnamon
1/2 tsp nutmeg
1/2 tsp ginger
1/4 tsp salt
1/2 cup butter, melted and cooled to room temp
1/2 cup dark brown sugar
1/4 cup granulated sugar
1 egg
1 and 1/2 tsp vanilla
1 cup pumpkin puree
1 cup toasted pecans, chopped
1/3 cup white chocolate chips

Method:

  1. Preheat your oven to 350 degrees. Grease an 8×8 baking pan and set aside.
  2. In a small bowl, whisk together the flour, spices, and salt. Set aside.
  3. In a large bowl, whisk together the melted butter and sugars until well-combined. Beat in the egg.
  4. Whisk in the vanilla and pumpkin until well-incorporated.
  5. Stir in the flour mixture until well-combined. Then, stir in the pecans and white chocolate chips, reserving a few to sprinkle on top if desired.
  6. Pour the batter into your prepared pan and bake for about 35 minutes, or until an inserted toothpick comes out clean.
  7. Let the bars cool in the pan for at least 2 hours before slicing and serving.

Pumpkin Oatmeal Crumb Bars

Can you tell that I’m pretty much obsessed with pumpkin?

Over the past few weeks, I’ve made pumpkin bread, pumpkin cookies, pumpkin brownies, pumpkin cheesecake, pumpkin whoopie pies, and pumpkin cake. Incidentally, I’ve also made pumpkin butter, pumpkin soup, pumpkin stew, and a host of other savory items featuring my favorite fall ingredient. But the one thing that was missing from the lineup until recently was the classic pumpkin pie.

Now don’t get me wrong – I like pumpkin pie. Love it, in fact. But this year I kind of wanted to do something different. Enter these pumpkin pie bars, which are essentially pumpkin pie taken up a notch, and in a very good way.

At a recent get-together at my place, I served these bars cold and topped them off with homemade whipped cream, and they were a huge hit. If you’re seriously into pumpkin like I am, go make these bars as soon as you have a chance.

pumpkinpiebars

Pumpkin Oatmeal Crumb Bars

Recipe from Brown Eyed Baker

Ingredients:

For the Oatmeal Crumb:

1 and 1/4 cups all-purpose flour
1 and 1/4 cups quick oats
1/2 teaspoon baking soda
1/2 teaspoon salt
1/2 cup granulated sugar
1/2 cup light brown sugar
3/4 cup unsalted butter, melted and cooled slightly
1 teaspoon vanilla extract

For the Pumpkin Pie Filling:

1/4 cup granulated sugar
1/4 cup light brown sugar
1 teaspoon ground cinnamon
1/2 teaspoon ground nutmeg
1/4 teaspoon ground ginger
1/4 teaspoon salt
1 egg
1 egg yolk
1/2 teaspoon vanilla extract
1 and 1/4 cups canned pumpkin
1/3 cup evaporated milk

Method:

1. Preheat your oven to 350 degrees. Line an 8-inch square baking pan with parchment paper, allowing the excess to hang over the sides.

2. To make the crust, in a medium mixing bowl, whisk together the flour, oats, baking soda, and salt. Add both the granulated sugar and brown sugar and mix until no clumps remain. Add the melted butter and vanilla extract, then stir with a fork until the mixture is evenly moistened. Press half of the mixture into your prepared pan and bake for 15 minutes.

3. To make the filling, whisk together the granulated sugar, brown sugar, cinnamon, nutmeg, ginger, cloves and salt. Add the egg, egg yolk, and vanilla, and whisk until well blended. Whisk in the pumpkin and then the evaporated milk until the mixture is smooth and thoroughly combined.

4. When the crust has finished baking, pour the filling over the bottom crust and return it to the oven for 15 minutes. Remove it from the oven, pinch the remaining oatmeal crumb mixture into small pieces, and sprinkle it over the top of the filling.

5. Return the pan to the oven and bake for an additional 20 to 25 minutes until the top starts to brown and the center jiggles only slightly.

6. Remove the pan from the oven and allow the bars to cool to room temperature for at least 1 to 2 hours. Then, transfer the pan to the refrigerator and chill for at least 2 hours. Store leftovers covered in the fridge – they’ll keep for a few days, assuming they don’t get gobbled up first.

Seven Layer Bars

In my household, the colder the weather, the more frequently baked goods tend to come out of my kitchen. For a recent gathering, I whipped up these seven layer bars in addition to a host of pumpkin treats. In fact, I specifically made these so that the non-pumpkin fans in the group (blasphemy) would have something to snack on.

There are many different recipes out there for seven layer bars, and mine is probably a little different than most of the ones you’ll see.  I’ve actually done the more “classic” seven layer bar in the past and specifically wanted to try something different this time around. I think the chocolate and gingerbread crust gives these bars more of a holiday/wintertime feel. If you really want to make things interesting, you could substitute the butterscotch chips with cinnamon chips. Or, use both and call them eight layer bars.

Although these bars are quite tasty, they’re also really, really sweet. I can only eat a small piece at a time, which is saying a lot. But if you’re looking for a fun, easy recipe to try, go ahead and give this one a shot.

7layerbars

Seven Layer Bars

Ingredients:

1 cup chocolate graham cracker crumbs
1/2 cup gingerbread cookie crumbs
1 stick of butter, melted
1 can (14 ounces) of sweetened condensed milk, divided
1 cup chopped walnuts nuts
1 cup butterscotch chips
1 cup semisweet chocolate chips
1 cup white chocolate chips
1 cup sweetened coconut, toasted

Method:

  1. Preheat your oven to 350 degrees. Line a 9×13 baking pan with parchment paper and set aside.
  2. In a small bowl, combine the melted butter with the chocolate graham cracker and gingerbread cookie crumbs. Press the crumb mixture into the bottom of your prepared pan.
  3. Pour 1/3 cup of condensed milk over the crumb mixture, using a spatula to spread it evenly.
  4. Sprinkle the chopped walnuts on top of the soaked crumb mixture. Then, add the butterscotch, semisweet, and white chocolate chips in layers one at a time.
  5. Spread the toasted coconut on top of the chocolate chips.
  6. Pour the remaining condensed milk over the entire mixture.
  7. Bake for 25-30 minutes, or until the top is slightly browned.
  8. Cool the bars in the pan completely (at least two hours) before slicing and serving.

Monster Cookie Bars

I’ve been on a pretty big pumpkin and apple kick lately, so I was surprised to find myself craving something peanut buttery the other day. Fortunately, these monster bars did the trick, and they gave me an excuse to finally use up the open bag of M&Ms that was sitting around taking up space in my pantry.

These bars are really easy to make, and because they’re so colorful and fun-looking, they’re a great thing to bring to parties or potlucks. They also freeze pretty well, so if you’re not like me and can’t finish an entire pan in a few days’ time, storing them that way is also an option.

monsterbars

Monster Cookie Bars

Recipe from The Baker Mama

Ingredients:

1 and 1/2 cups AP flour
1 teaspoon baking soda
1 teaspoon salt
1/2 cup (1 stick) unsalted butter, softened
1 and 1/2 cups peanut butter
1 cup light brown sugar
1 cup granulated sugar
2 teaspoons vanilla extract
2 eggs
1 cup rolled oats (the old-fashioned kind, not the quick kind)
1 cup semisweet chocolate chips
1 cup M&Ms

Method:

  1. Preheat your oven to 350. Grease a 13×9 baking pan and set aside.
  2. In a medium bowl, whisk together the flour, baking soda, and salt.
  3. In a separate bowl, beat the butter and peanut butter until smooth.
  4. Add the sugars and beat until well-blended.
  5. Add the vanilla and eggs and mix until light and fluffy.
  6. Gradually incorporate the flour mixture into the wet mixture until just combined.
  7. Mix in the oats until well-combined.
  8. Stir in the chocolate chips and M&Ms.
  9. Press the dough into your prepared pan and bake for 30 minutes, or until an inserted toothpick comes out clean. Let the bars cool in the pan for an hour or so before slicing and serving.

When stored in an airtight container, these bars should keep for a good 4-5 days. Or, as mentioned above, you can easily freeze your leftovers.

Pumpkin M&M Oat Bars

One of my favorite things about October is the abundance of seasonal pumpkin items available in stores. Case in point: Pumpkin Spice M&Ms. From what I hear, these babies can only be found at Target, and even though they’re not overwhelmingly pumpkin-flavored, they’re worth picking up for the color scheme alone. I decided to incorporate them into an oatmeal bar, and that actually really worked to bring out the pumpkin taste.

Believe it or not, these bars aren’t as sweet as your typical brownie or blondie, even with the candy pieces incorporated throughout. I really happen to enjoy the combination of pumpkin and chocolate, so in my book, these are a hit (and my coworkers, who helped me polish off the batch, seemed to agree).

pumpkinoatbar

Pumpkin M&M Oat Bars

Ingredients:

1 and 1/2 cups AP flour
1 teaspoon baking soda
1 teaspoon salt
1/2 teaspoon cinnamon
1/2 cup unsalted butter, melted
1 cup pumpkin
1 cup light brown sugar
3/4 cup granulated sugar
2 teaspoons vanilla extract
2 eggs
1 cup old fashioned rolled oats
1 cup Pumpkin Spice M&Ms (if you can’t find these, dark chocolate chunks or semisweet chocolate chips should work just as well; you can even use regular old M&Ms)

Method:

  1. Preheat your oven to 350. Grease a 13×9 baking pan and set aside.
  2. In a medium bowl, whisk together the flour, baking soda, salt, and cinnamon.
  3. In a separate bowl, beat the butter and sugars until smooth.
  4. Whisk or beat in the egg and vanilla, and mix until light and fluffy.
  5. Stir in the flour and oats, mixing until well-combined.
  6. Stir in the M&Ms.
  7. Pour the batter into your prepared pan and bake for 35-40 minutes, or until an inserted toothpick comes out clean. Let the bars cool in the pan for at least an hour before slicing and serving.

Apple Oat Bars

Clearly I’m not quite done with apples. That’s right: You’ve got another apple recipe coming your way, but I promise it’s a good one.

My latest creation combines rich, hearty oats with fresh, hand-picked apples. And while I tend to incorporate a variety of fall spices whenever I bake with apples, for this recipe, I exercised some restraint and limited myself to cinnamon only. The result? An easy-to-make, easy-to-eat snack cake that’s perfect for breakfast, dessert, or anytime in between.

appleoatbars

Apple Oat Bars

Ingredients:

For the crust and topping:

1 cup AP flour
1/2 cup dark brown sugar
1/8 cup granulated sugar
1/4 teaspoon salt
1 stick of butter, melted and cooled to room temp

For the apple filling:

1 cup of apples, peeled and chopped
1 tablespoon lemon juice
1 teaspoon cinnamon

Method:

  1. Preheat your oven to 425 degrees. Grease an 8×8 baking pan and set aside.
  2. To make the filling, combine the apples, lemon juice, and cinnamon in a small bowl. Stir to combine and let sit while you make the crust and topping.
  3. To make the crust and topping, in a large bowl, whisk together the flour, sugars, oats, and salt. Stir in the butter and mix well to combine.
  4. Press half of the mixture into your prepared pan. Spread the apple mixture on top of the crust, using the back of a spoon to distribute it evenly throughout the pan. Sprinkle the remaining oat mixture over the apple layer, once again using the back of a spoon to spread it out evenly.
  5. Bake for about 30 minutes, or until the top starts to brown and an inserted toothpick comes out clean.
  6. Let cool completely in the pan for two hours before slicing and serving.

Caramel Apple Toffee Bars

I just love caramel apples. I don’t have them often, but they’re definitely one of my all-time favorites fall treats. The problem with caramel apples, however, is that every time I eat one, I spend way too much worrying that I’m about to lose a tooth or three just by biting in. That’s why I think these caramel apple toffee bars are such a wonderful idea. They basically offer the same delicious taste of caramel apples without the potential dental repercussions. And while they do lack the crunch and texture that only an actual apple could offer, the toffee bits help make up for that slightly, especially when sprinkled generously on top.

Best of all, these bars are really easy to make, and they taste even better when warmed up and served with a bit of vanilla ice cream. If you’re a fan of caramel apples, be sure to add these to your to-do list.

appletoffeeblond

Caramel Apple Toffee Bars

Ingredients:

2 cups AP flour
2 tsp baking powder
1/4 tsp salt
2 tsp cinnamon
1/4 tsp nutmeg
1/2 cup butter, melted and cooled to room temp
3/4 cup packed dark brown sugar
3/4 cup white sugar
2 eggs
1 tbsp vanilla
2 cups diced and peeled apples
1 cup toffee bits, divided into 3/4 cup and 1/4 cup
1 cup caramel sauce (store-bought is fine, or you can make your own by combining about 15 Kraft caramels with two tablespoons of milk and melting in the microwave)

Method:

1. Preheat your oven to 350 degrees. Grease a 9×13 baking pan and set aside.
2. In medium bowl, whisk together the flour, baking powder, salt, and spices.
3. In a large bowl, combine the sugars and butter. Whisk thoroughly until well-combined.
4. Add eggs, one at a time, beating or whisking well to combine. Add vanilla extract and mix thoroughly.
5. Fold in the flour mixture a little bit at a time until just combined. Stir in apples, caramel sauce, and 3/4 cup toffee bits.
6. Pour the batter into your prepared pan. Sprinkle remaining 1/4 cup of toffee bits on top.
7. Bake for 30 minutes, or until an inserted toothpick comes out clean. The bars will/should be soft.
8. Remove the bars from the oven and let them cool completely (at least two hours) before slicing and serving.

Chocolate Butterscotch Crumb Bars

I like my job. I really do. But what I don’t like about my job is the fact that people tend to wait till the very last possible minute to ask me for things.

Now normally I pride myself on having a pretty good work ethic and going out of my way to be helpful. And I’m definitely not the type of person to put things off till the following day if there’s any chance of getting the job done on the spot. But when you email me at the very last second asking for something that will take at least 30 minutes of my time, you’re putting me in a position where I might be late picking up my child from daycare. And being late to daycare is bad for a lot of reasons, not the least of which is the fact that you actually get charged by the minute for not showing up on time.

A few weeks ago, I almost didn’t make it to the center on time. In fact, the only reason I got there about a minute shy of closing is that I was more than a little bit liberal with some of our local traffic laws. And why was I rushing in the first place? Oh yeah, because someone needed something from me at the very last possible minute, kind of like what happened last night.

Okay, rant over. I’m sure I’m not the only working person who goes through this, right?

Anyway, moving on…let’s talk about these yummy chocolate crumb bars. I decided to bake something for my coworkers—not the ones who cause me stress and aggravation by demanding things at the last minute, but rather the ones I actually like. These bars are really tasty and relatively simple to whip up. The original recipe didn’t include butterscotch chips, but I’m a big fan of the chocolate-butterscotch flavor combo and decided to mix things up a bit. I like the fact that these bars get nice and gooey in the center. They’re a great snack to have on hand or share with people you like. You can also keep some in your car in case you get pulled over by a local police officer wanting to know why you were going 50 in a 30 mile per hour zone and you need some sort of impromptu bribe. (For the record, I didn’t actually get pulled over en route to daycare. But it could’ve happened. Multiple times over. Thank you, procrastinating coworkers. Okay, maybe my rant wasn’t quite over.)

crumbbars

Chocolate Butterscotch Crumb Bars
Original recipe can be found here

Ingredients:
1 cup (2 sticks) of butter, softened
1 and 3/4 cups AP flour
1/2 cup granulated sugar
1/4 teaspoon salt
1 cup of semisweet chocolate chips, divided
1 cup of butterscotch chips, divided
1 can (14 oz) of sweetened condensed milk
1 teaspoon vanilla extract

Method:
1. Preheat your oven to 350 degrees. Grease a 13 x 9-inch baking pan.
2. Beat the butter in a large mixing bowl or in a stand mixer until creamy. Mix in the flour, sugar, and salt until crumbly.
3. With or floured or greased fingers (I sometimes spray a bit of cooking spray onto my fingers), press 2 cups of the crumb mixture into the bottom of your prepared baking pan; reserve remaining mixture for topping.
4. Bake for 10-12 minutes, or until the edges are golden brown.
5. While the mixture is baking, combine 1/2 cup semisweet chips, 1/2 cup butterscotch chips, and condensed milk in a small saucepan.
6. Warm over low heat, stirring until smooth. Stir in vanilla extract. Spread over hot crust.
7. Stir remaining chips into reserved crumb mixture and use your hands to sprinkle over chocolate filling.
8. Bake for 25-30 minutes, or until center is set.
9. Cool in pan on wire rack before cutting into bars.

Chocolate Cinnamon Oatmeal Bars

Oops. I realized I made these awhile ago but never got around to posting the recipe. Luckily I remembered to take a picture, so better late than never I suppose.

Anyway, I’m a big fan of repurposing easy recipes, especially when they come out tasting delicious. So when I needed something to throw together for an impromptu neighborhood gathering, I decided to revisit the oatmeal raisin bars I made a little while back. This time, however, I decided to forego the raisins in favor of chocolate and cinnamon chips. The end result? Pure magic in every bite.

oatmealchoccin

Chocolate Cinnamon Oatmeal Bars
Recipe slightly adapted from Martha Stewart

Ingredients:
3/4 cup (1 1/2 sticks) unsalted butter, melted, plus more for pan
3/4 cup packed light-brown sugar
1/4 cup granulated sugar
1 large egg
1/2 teaspoon salt
1/2 teaspoon ground cinnamon
1 cup AP flour
2 cups old-fashioned rolled oats
1/2 cup semisweet chocolate chips
1/2 cup cinnamon chips

Method:
1. Preheat your oven to 350 degrees.
2. Butter an 8×8 square baking pan. Line the bottom with parchment paper, leaving an overhang on two sides, and butter the paper.
3. In a large bowl, whisk together the butter, sugars, egg, salt, and cinnamon until smooth. Add flour, oats, and chips; fold in just until combined.
4. Spread batter in prepared pan, and bake for 25 to 30 minutes, or until an inserted toothpick comes out clean. Cool completely in pan.
5. Once cool, use the parchment paper to lift the bars onto a work surface for cutting.


Oatmeal Chocolate Peanut Butter Bars

We’ve had a bit of a heat wave lately here in New Jersey. And for the record, I knew this was going to happen. See, most years we get at least a little taste of that wonderful season called “spring.” You know, when the sun comes out and the temps are warm enough for you to walk around outside in a t-shirt without being too hot or too cold. Well, this year we basically had cold, often-rainy weather up until a couple of days ago. Then it turned hot. Really hot. I’m talking 85-degree, smog in the air hot. It’s the type of weather where my naturally curly hair doesn’t stand a chance (not that I’m above pulling it back into a bun or slapping a baseball cap on top of my head, but there’s just something about massive, uncontrollable humidity-induced frizz that makes my self-esteem take a bit of a hit) and the simple act of walking down the street is enough to make you reach for a Gatorade.

In weather like this, all I ever really want to eat is yogurt, cereal, and ice cream. And the last thing I want to do is slave over a hot stove or even contemplate turning on my oven. But alas, my desire to put something in my stomach other than pure dairy got the better of me, and so I decided to bake up some quick oatmeal bars.

The good thing about this recipe is that it’s just about the easiest thing ever. You don’t need fancy equipment or a ton of ingredients, and your oven stays on for only a short amount of time. While some people might refer to these babies as oatmeal cookie bars, to me, they’re more like candy bars. The only downside to making them smack in the middle of a heat wave is that the tops have a tendency to melt if you’re cheap and stubborn like me and refuse to run your air conditioner (though I eventually caved). In fact, you’ll definitely want to store these in the fridge, no matter the season. But if you like chewy, chocolate peanut butter candy bars, you’ll definitely want to whip up a batch of these. Just be careful offering them up to neighbors, coworkers, and friends—you may be surprised at what little you have left for yourself.

oatmealcandybars

Oatmeal Chocolate Peanut Butter Bars

Ingredients:

For the base:
4 cups of quick-cooking oats
1 cup dark brown sugar
3/4 cup butter, melted
1/2 cup corn syrup

For the topping:
1 cup milk chocolate, chopped (it’s okay to use chocolate chips)
1 cup peanut butter
1/2 cup peanuts, chopped

Method:

For the base:
1. Preheat your oven to 350 degrees. Grease a 9×13 pan and set aside. Using a wooden spoon, combine the oats, brown sugar, butter, and corn syrup.
2. Press the mixture into your prepared pan and bake for 10-12 minutes.
3. Allow the base to cool completely (at least 30 minutes) before adding the topping.

For the topping:
1. Combine the chocolate and peanut butter in a small bowl and melt in the microwave at 50% power for 30-second increments, stirring in between each. Once the mixture is smooth, immediately stir in the peanuts and then use an offset spatula to spread the topping over the base.
2. Place the bars in the fridge to set, at least one hour.
Keep these bars stored in the fridge, not at room temp. They happen to taste really good cold, but if you’d prefer them a little warmer and chewier, just take them out about 15-30 minutes before you want to eat them. I don’t recommend microwaving them to warm them up, as the topping has a tendency to melt quickly.