Hamentashen

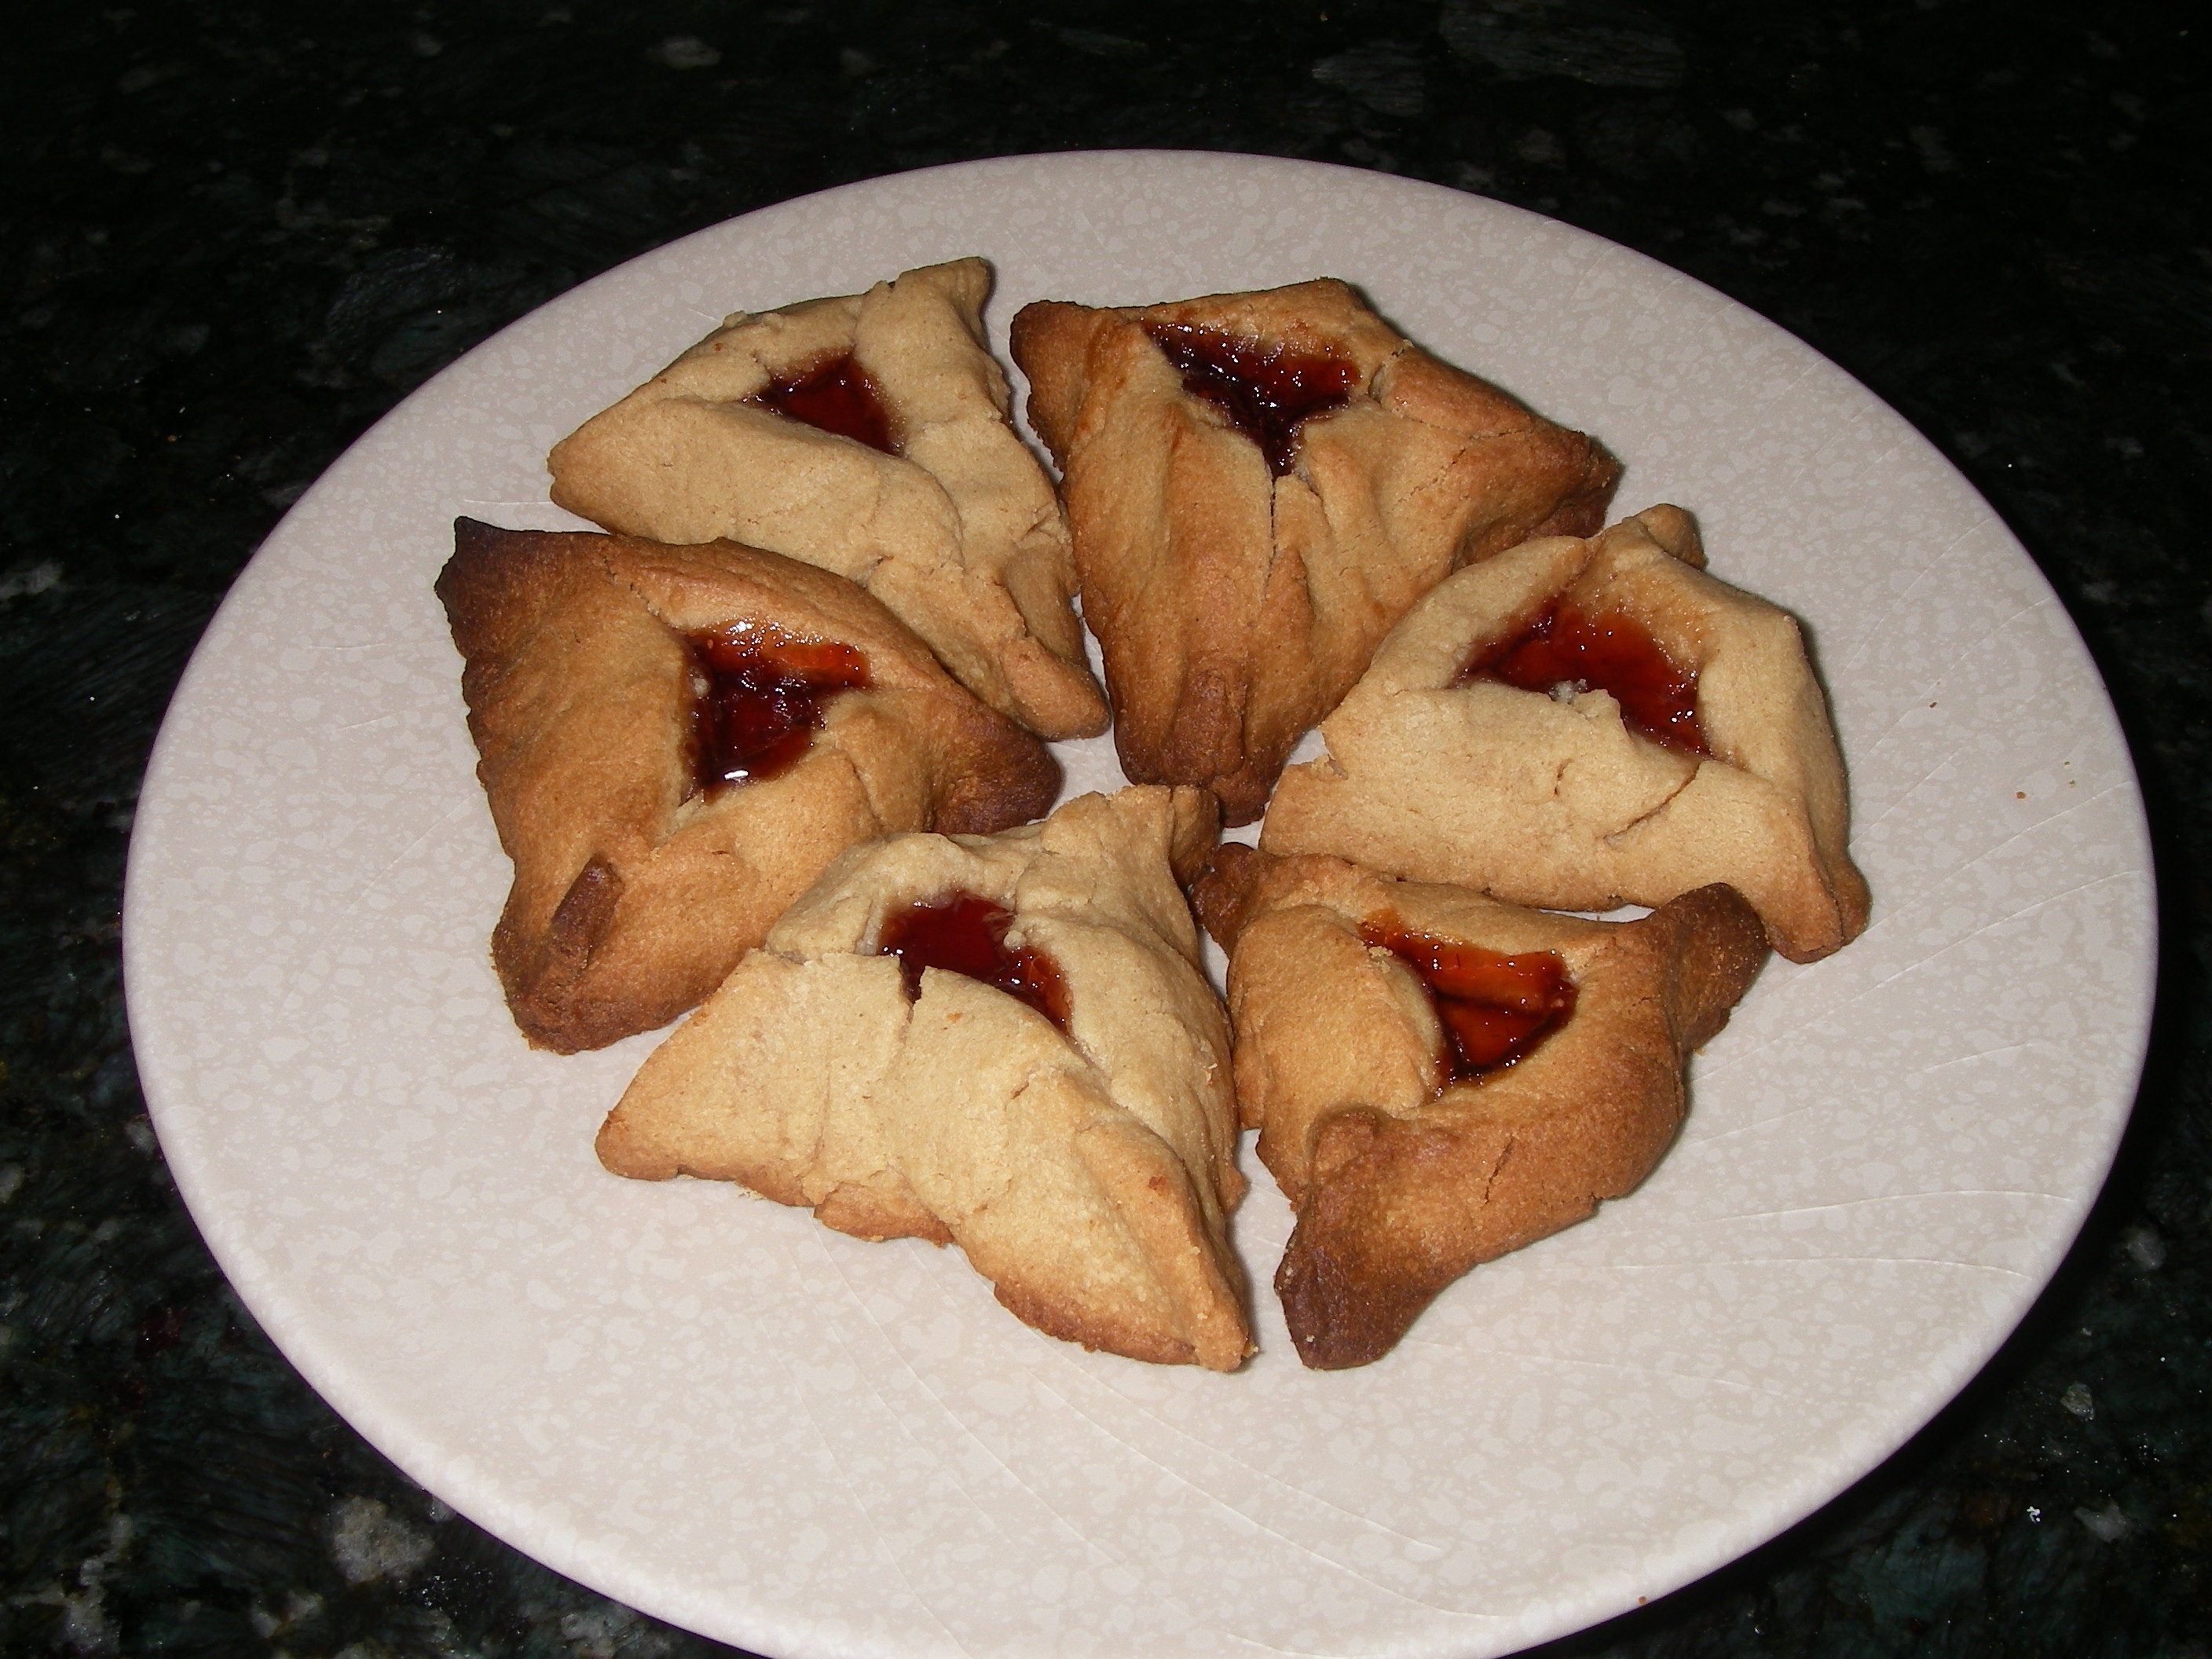
As part of last weekend’s baking extravaganza, I made several batches of hamentashen. For those of you who don’t know (and you wouldn’t be alone), hamentashen are triangular-shaped cookies that are typically filled with prune, apricot, or raspberry jam. They also happen to be one of my favorite things ever.

Now I will warn that hamentashen are fairly time-consuming as far as cookies go. The classic dough recipe I use is easy enough and takes no time to throw together, but the process of rolling out the dough, filling it, and shaping it requires a decent amount of time and patience. And the dough sometimes doesn’t like to cooperate. And the cleanup is atrocious (imagine sticky, caked-on dough particles all over your countertop and flour everywhere). But the end result is undeniably delicious, so if you’re up for the challenge, go ahead and make these one day. If anything, the people you share them with will get a kick out of the fun shape.

I like to make a variety of hamentashen, including some non-traditional variations. This year’s batch included classic prune, Nutella, apple-caramel, peanut butter and jelly, peanut butter and chocolate chip, and pumpkin. To create this assortment, I used three separate dough recipes, the most challenging of which is by far the classic one.

As far as my favorite version of the hamentashen goes, that’s hard to say. I really enjoyed the peanut butter and jelly combination, but there’s just something about classic prune-filled hamentashen that makes me keep going back for more. It’s a good thing I made almost 200 of these bad boys over the weekend. No, I’m not kidding. I gave most of them away but kept a few dozen on hand for myself…most of which are already gone…

IMGP1700          IMGP1717

Classic Hamentashen (my mom’s recipe)
Ingredients:
5 eggs, plus one more for brushing on the dough
1 and ½ cups vegetable oil
3 tsp baking powder
1 and ½ cups granulated sugar
¾ cup orange juice
6 cups AP flour
1/8 tsp salt
Water as needed, up to ¾ of a cup

Method:
1. Combine eggs, oil, baking powder, sugar, orange juice, flour, and salt in a large mixing bowl. Use a spoon and then your hands to form a dough that is soft but not too sticky. Add water as needed if the dough is too crumbly. If you end up incorporating too much water, you’ll need to compensate by adding more flour.
2. Cover the dough with plastic wrap and refrigerate for 30 minutes.
3. Preheat your oven to 350 degrees once the dough has come out of the fridge. Prepare as many baking sheets as you can by lining with aluminum foil and lightly greasing. (This recipe makes anywhere from four to six dozen hamentashen depending on big you make them, so unless you’ve got an endless supply of cookie sheets, prepare to bake these in several batches.)
4. Divide the dough into four sections and roll it out on a well-floured surface to ¼ inch thickness.
5. Cut the dough into circles using either a cookie cutter or a regular drinking glass (the latter is my preferred method). Place the circles on the prepared baking sheets.
6. Place a small amount of your desired filling in the center of each circle. Be careful not to overfill your hamentashen.
7. Form the circles into triangles by folding the dough over one side at a time. Lightly pinch each corner to seal the hamentashen.
8. Lightly brush each formed hamentashen with beaten egg.
9. Bake for 20-30 minutes, or until the tops are golden brown. Baking times can vary based on the size of your hamentashen as well as your oven, so be sure to check on them frequently once you hit the 20-minute mark.
10. Let the hamentashen cool on their baking sheets for 2-3 minutes, then transfer them to a rack to cool completely.

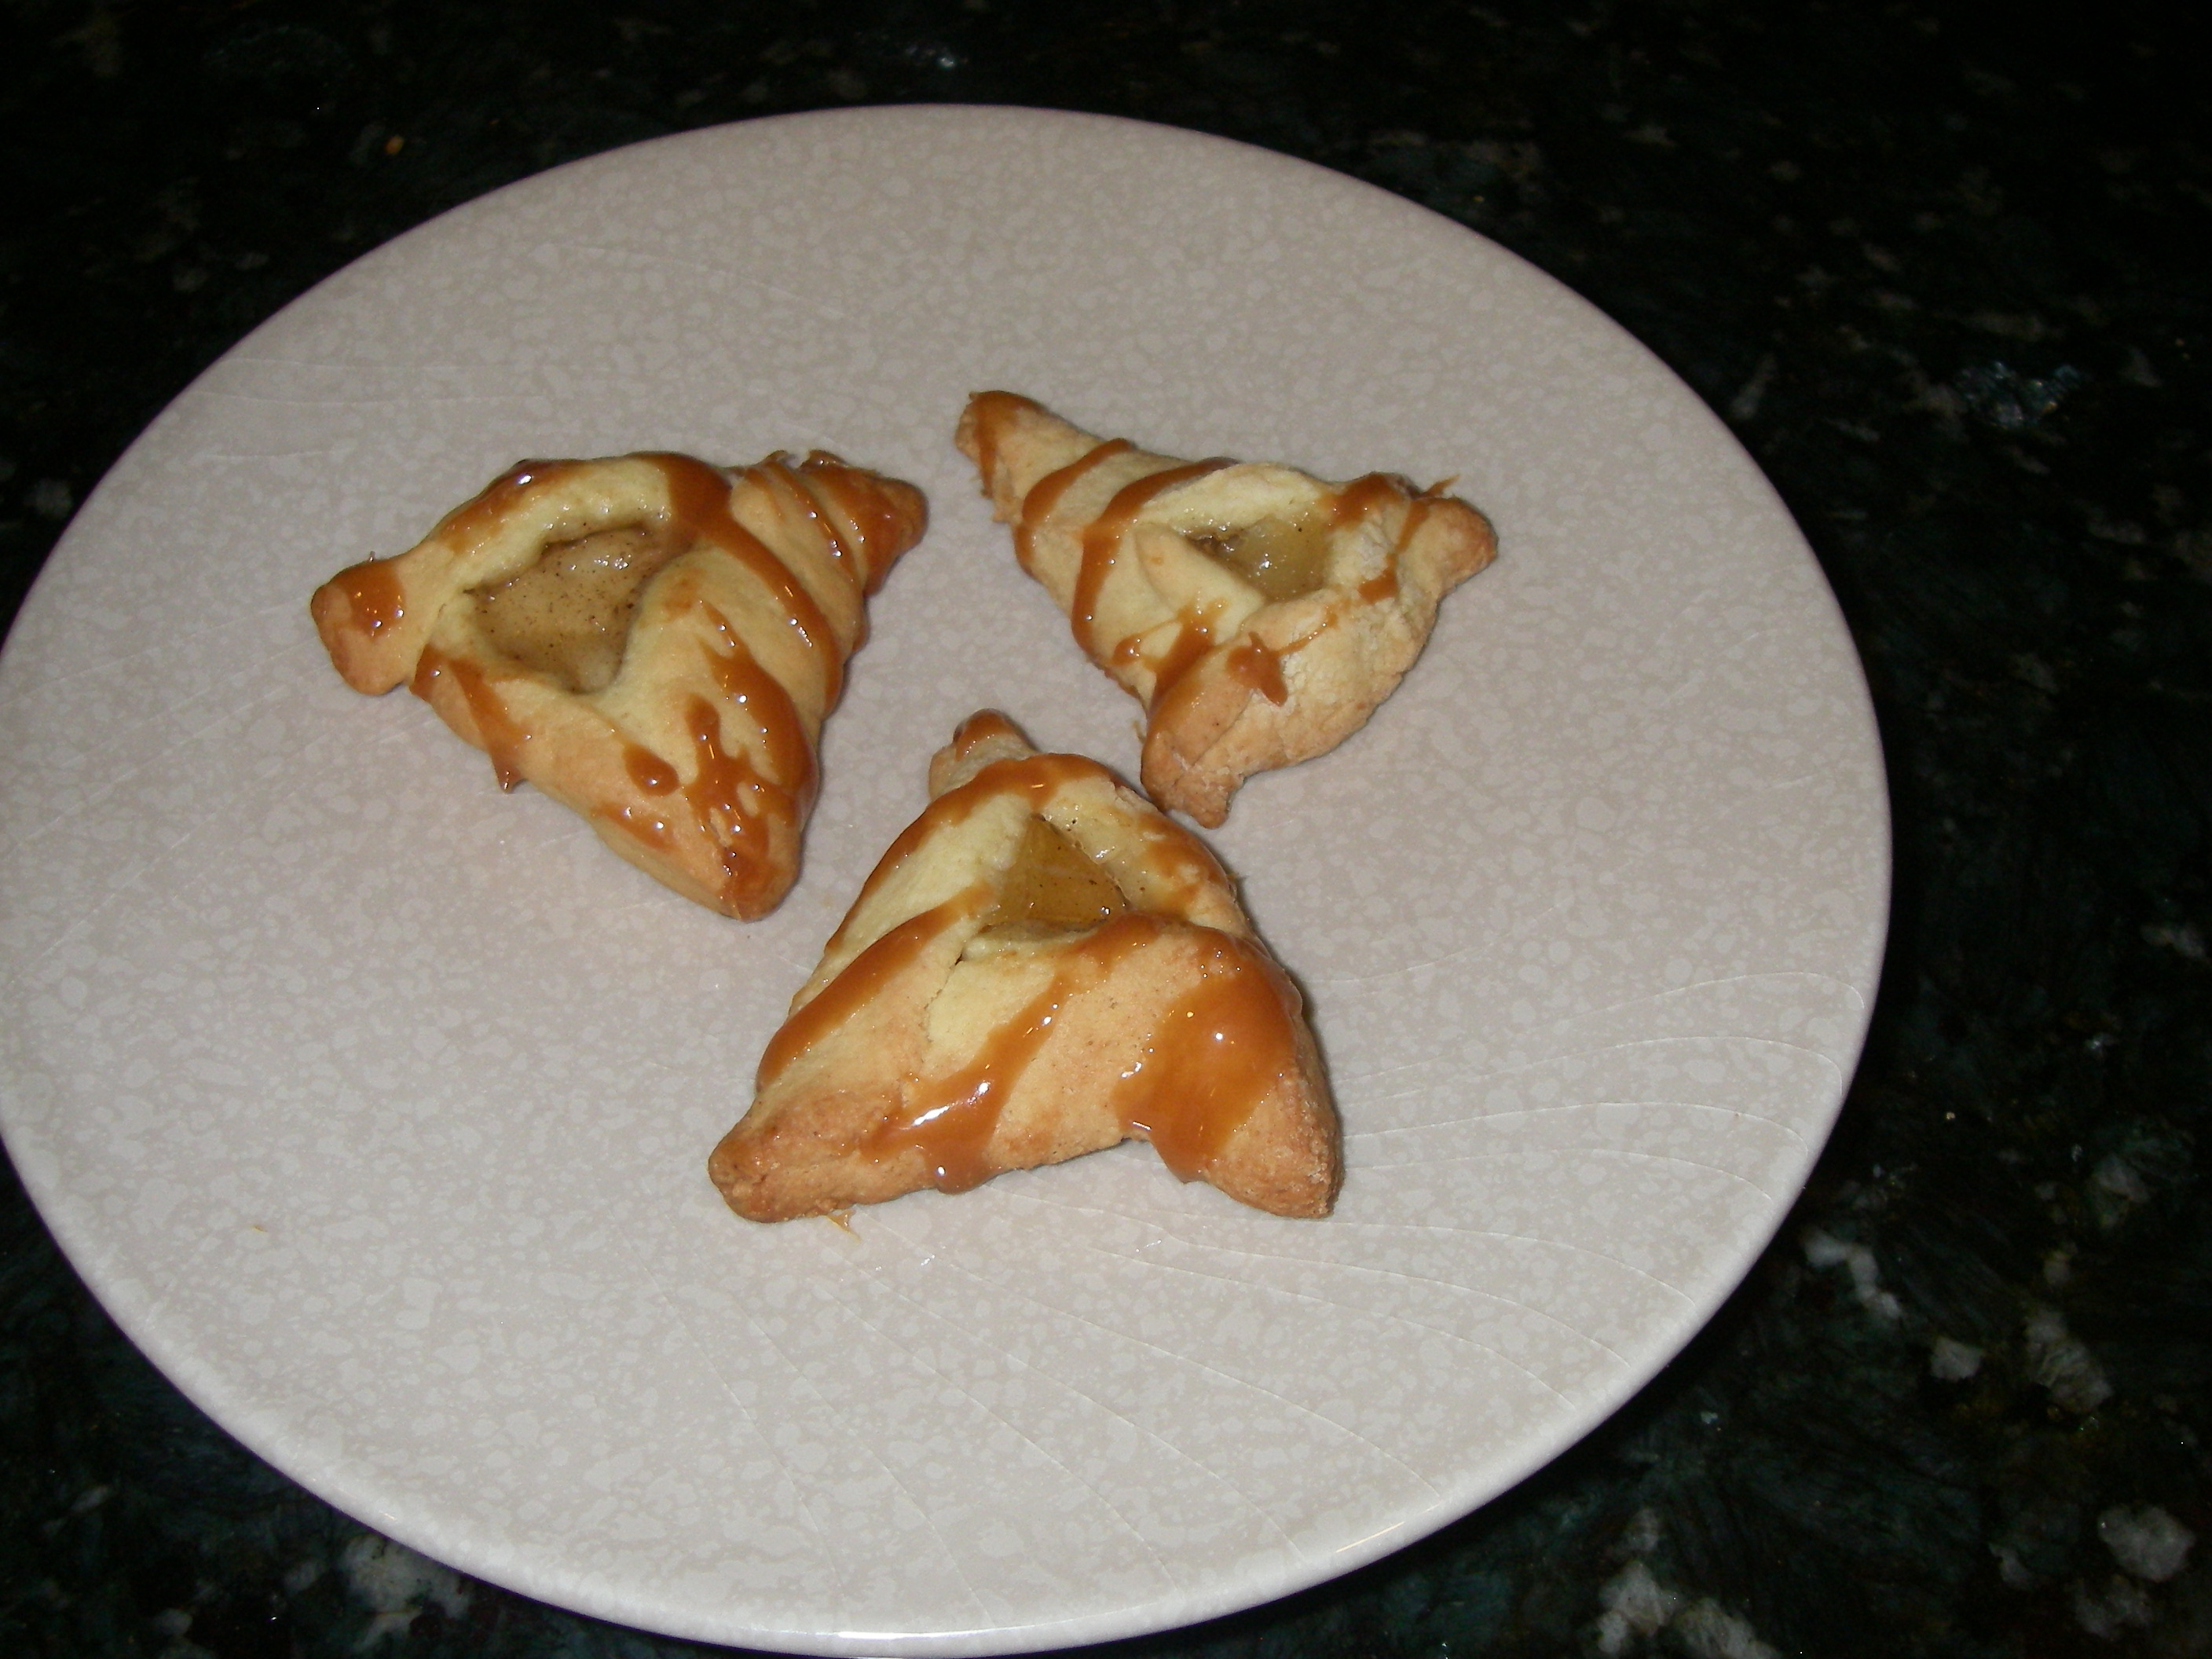
I used this classic recipe to make my prune, Nutella, and caramel-apple hamentashen. For the caramel apple, I simply used apple pie filling for the cookies and then drizzled them with a caramel sauce I made by heating about 15 Kraft caramel squares with a few teaspoons of milk.

IMGP1696

Peanut Butter Hamentashen

Ingredients:
2 sticks of unsalted butter at room temperature
3 cups Ap flour
1 and 1/2 cups granulated sugar
2 large eggs
2 and 1/2 cups smooth peanut butter
1 and 1/2 teaspoons salt
1 teaspoon baking powder
1 teaspoon pure vanilla extract

Method:
1. Using a hand or stand mixer, beat the butter and sugar on medium until the mixture is light and fluffy. Beat in the eggs one at a time. Add in the peanut butter and beat on medium for 2-3 minutes, or until well-combined.
2. Whisk together your flour, salt, and baking powder; then add to the peanut butter mixture and beat at low-medium speed until well-combined. Add your vanilla and mix well.
3. Cover the dough and refrigerate for 30-60 minutes. Then follow the steps above to roll it out and form it into triangles. (No need to use an egg wash for this dough).
4. Bake for 18-22 minutes at 350 degrees, or until the tops are golden brown. Follow the instructions above for cooling.

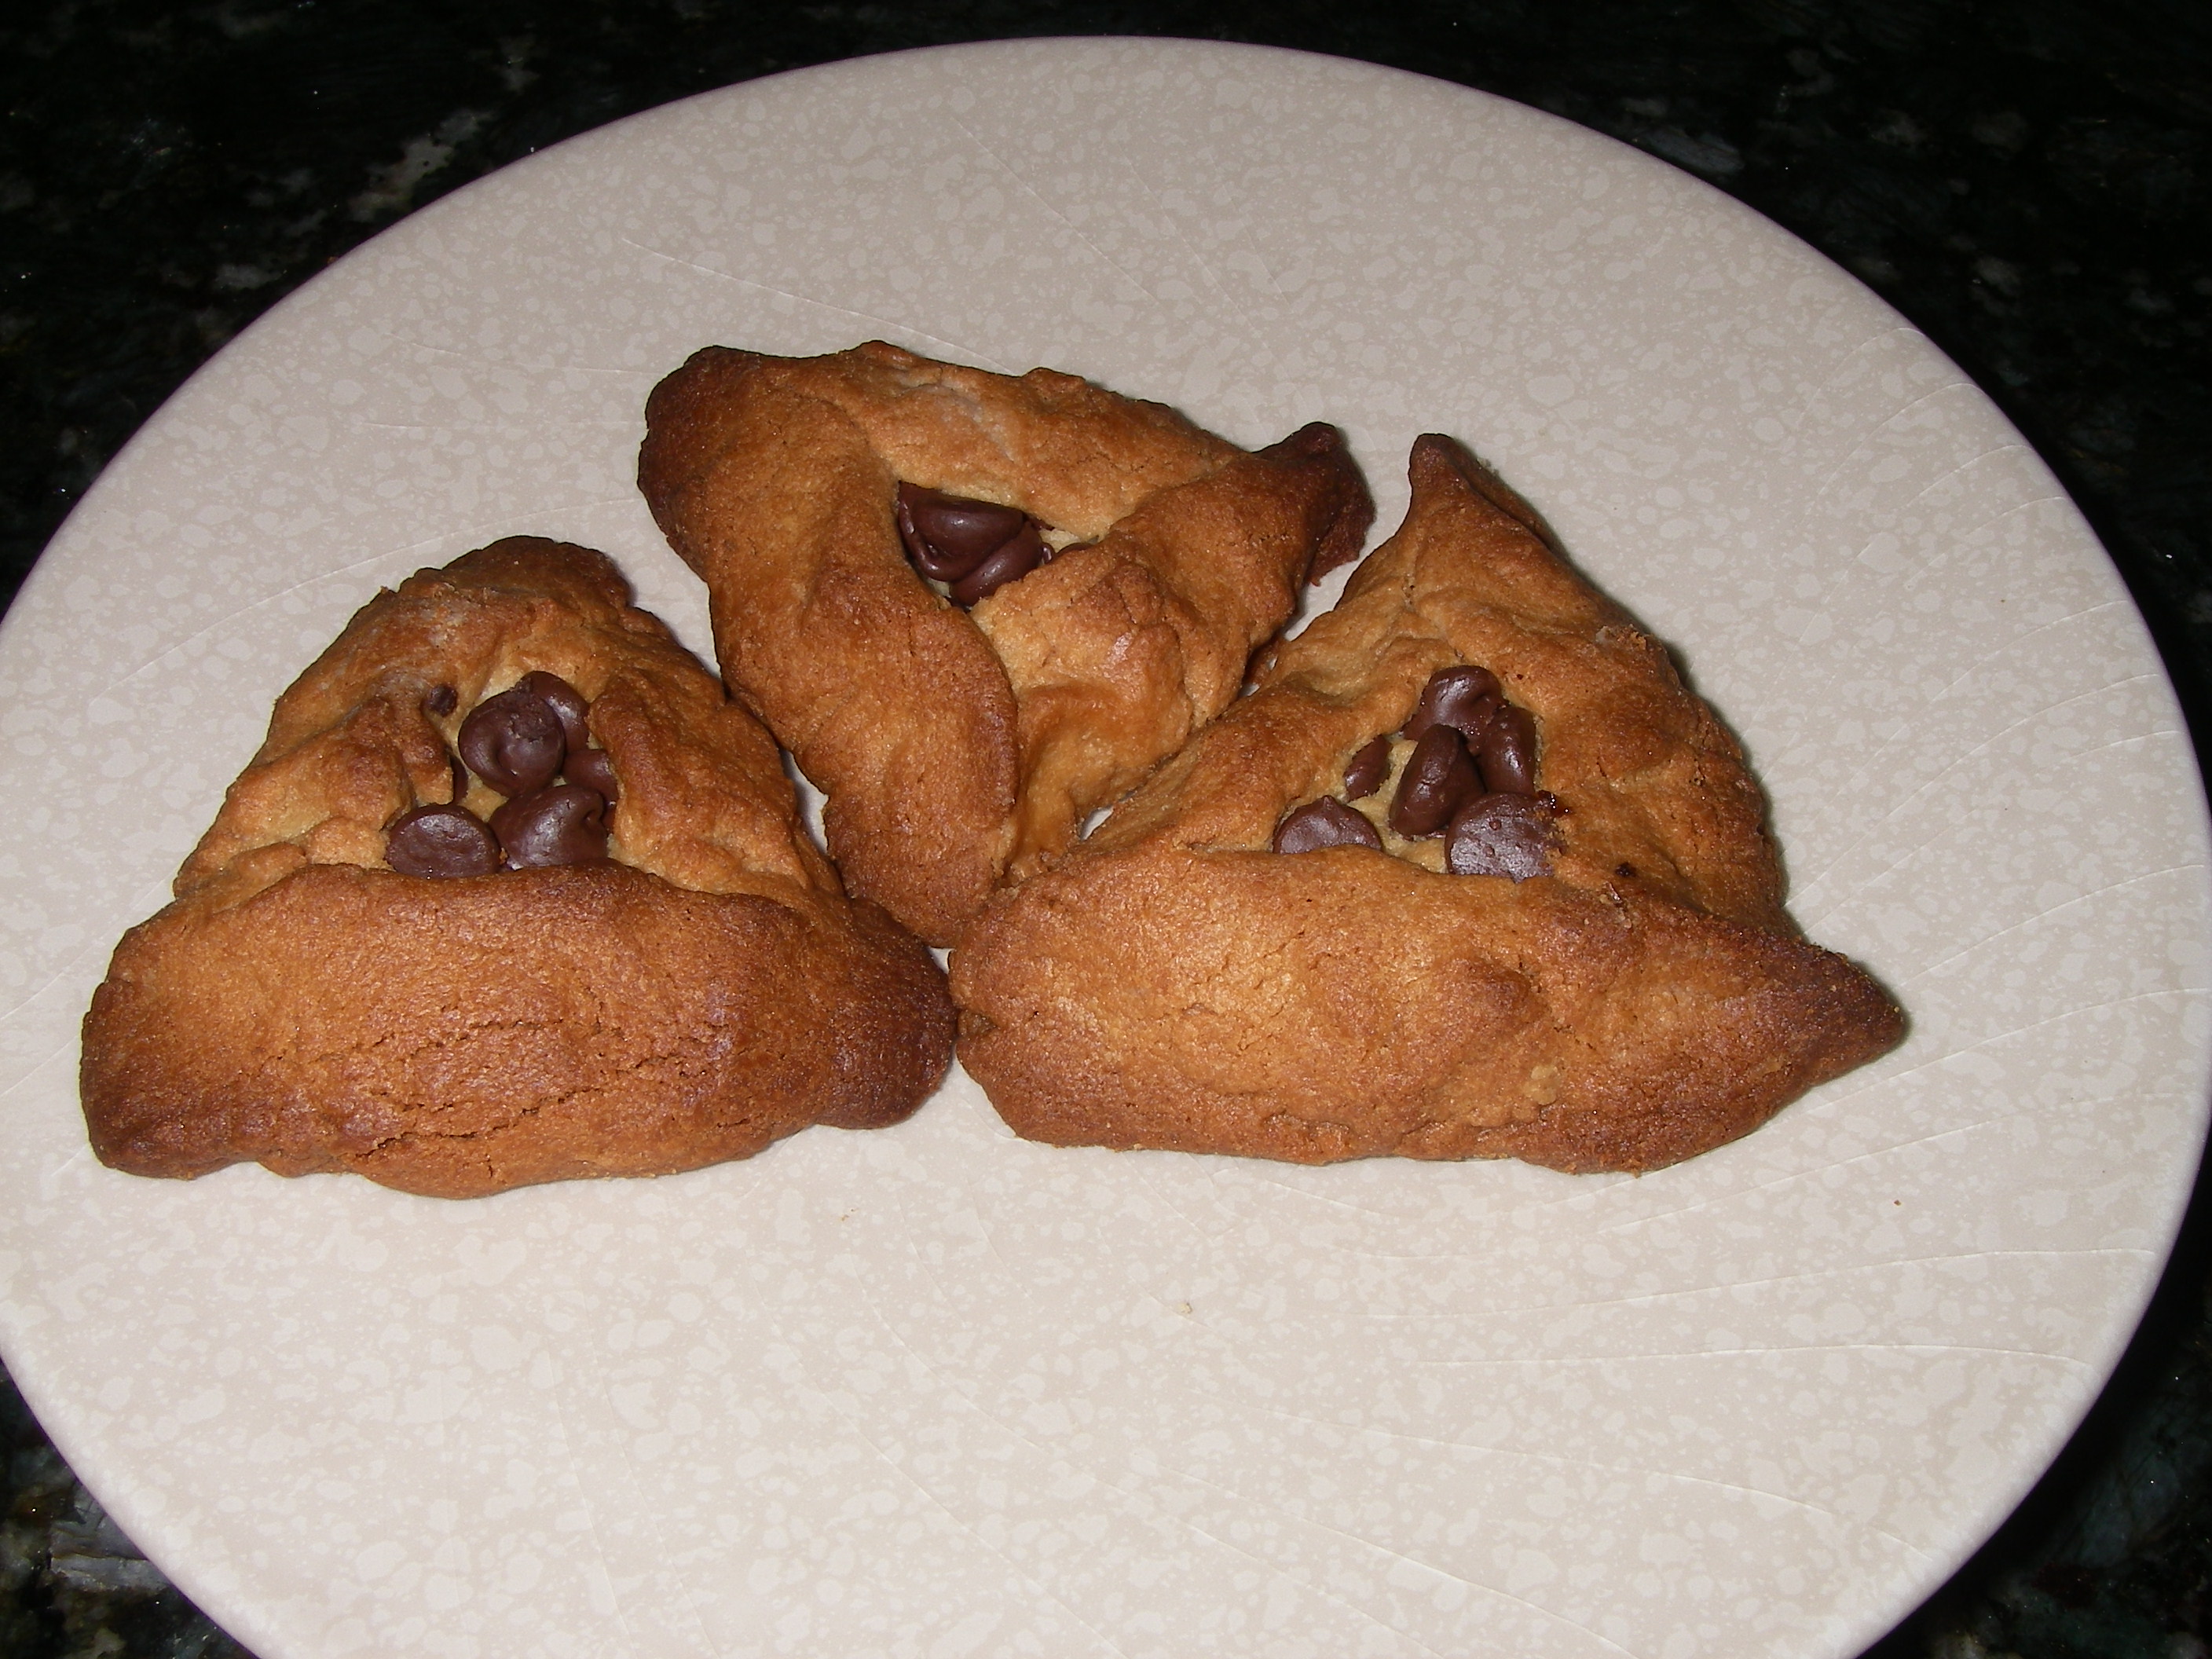
I filled my peanut butter hamentashen with grape jelly, strawberry jelly, and chocolate chips. I also threw in a couple of smashed-up Butterfinger bars as a filling. Feel free to get creative by adding raspberry jam, Nutella, white chocolate, or your favorite crushed-up candy bar.

IMGP1697

Pumpkintashen (Pumpkin Hamentashen)
Recipe from allrecipes.com

Ingredients:
3/4 cup unsalted butter
1/2 cup packed brown sugar
1 tablespoon orange zest
1/2 cup pumpkin puree
1 egg yolk
1 tsp vanilla extract
2 and 1/4 AP flour
1/4 teaspoon ground cinnamon
1/4 teaspoon ground ginger
1/4 teaspoon ground nutmeg
Pinch of salt

Method:
1. Cream together the butter, brown sugar, and orange zest.
2. Stir in the pumpkin.
3. Add the egg yolk and vanilla; mix well.
4. Sift together the flour, cinnamon, ginger, nutmeg, and salt; stir into the pumpkin mixture.
5. Cover the dough with plastic wrap and chill in the fridge for 30 minutes.
6. Follow the steps above to roll out the dough and form it into triangles. (No need to use an egg wash for this dough).
7. Bake at 375 for 20-25 minutes.
8. Follow the instructions above for cooling.

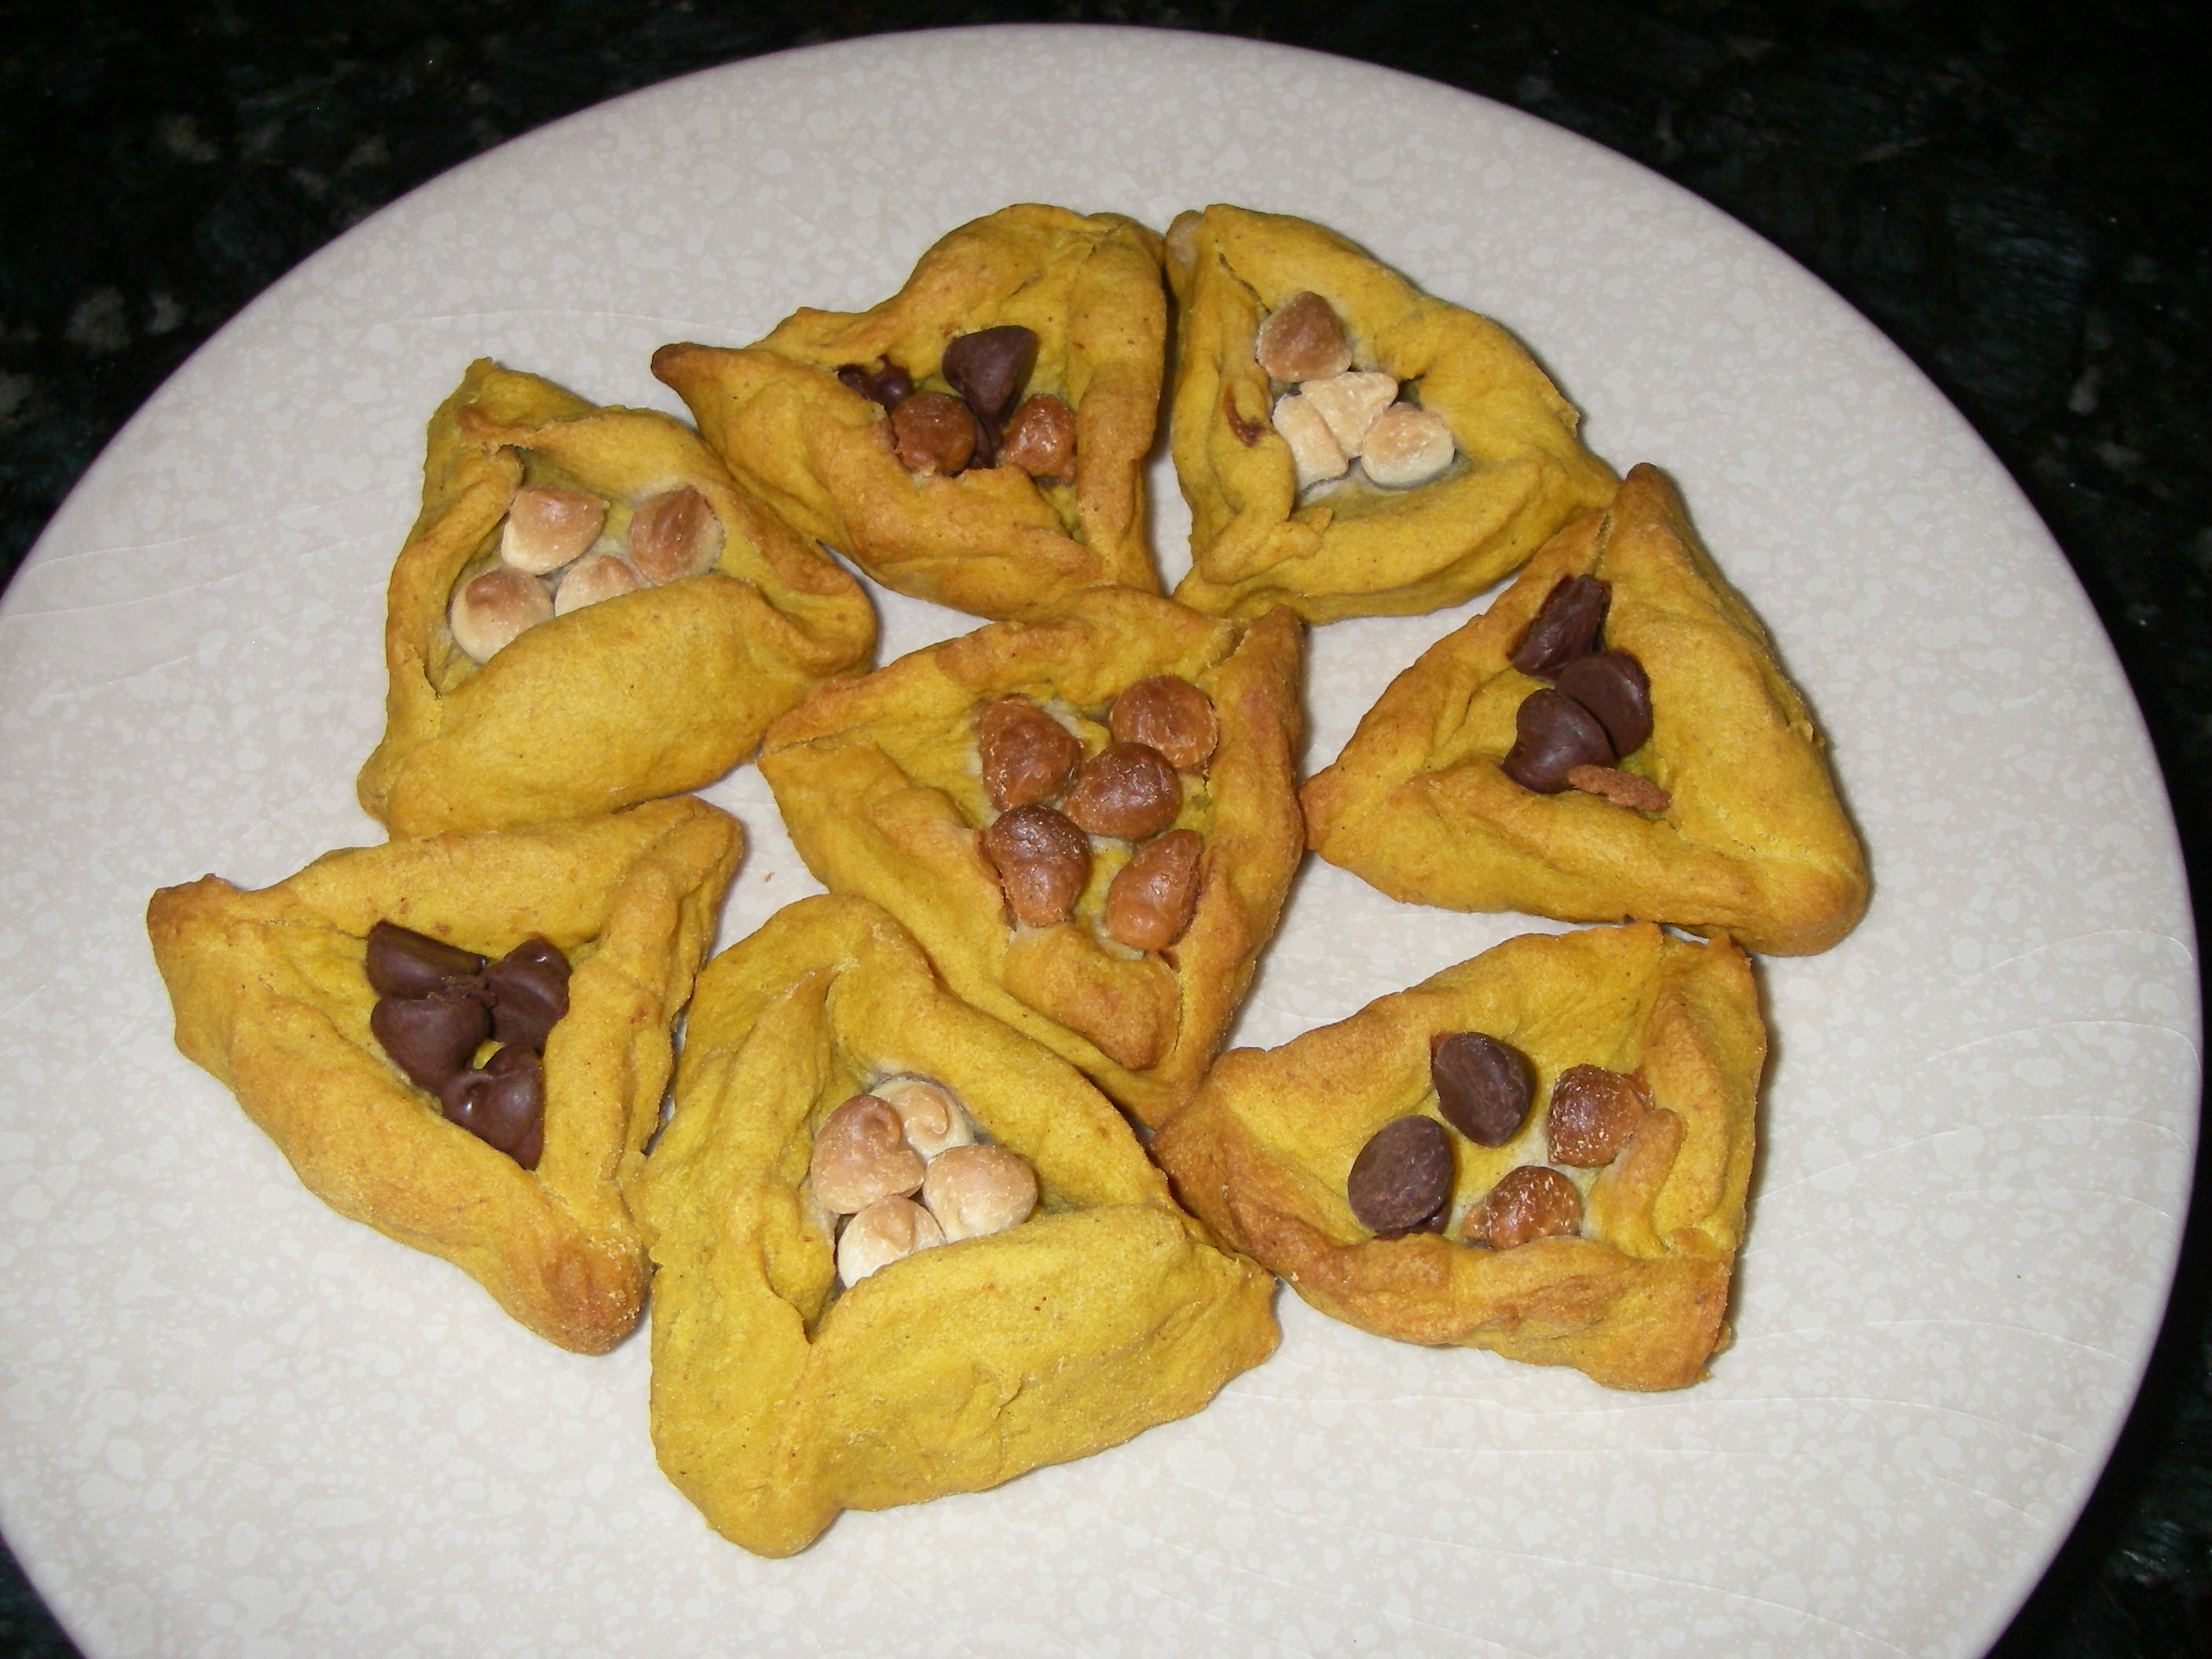
I filled my pumpkintashen with chocolate chips, white chocolate chips, and butterscotch chips. I think a sweet cinnamon-cream cheese filling would taste fantastic with these, but I kept things simple and stuck to the chips.


Vanilla Coconut Cake


I did a whole lot of baking this past weekend—so much so that I’m only first getting around to posting some photos and recipes now. I made this cake for a family get-together and it turned out delicious. I used one of my favorite vanilla cake recipes and then added a yummy coconut frosting and filling. The frosting was pretty sweet (as frosting tends to be) but the filling wasn’t; and the classic but simple vanilla cake was a nice contrast.

As far as layer cakes go, this one was very easy to whip up. The vanilla cake itself can be thrown together in no time, and then it’s just a matter of letting it cool before assembling—and you can work on the filling and frosting in the meantime.

I recommend serving this cake the same day you make it, if possible. It’ll still be good the day after, and probably even the day after that, but it’s wonderfully moist and fresh the day it actually comes out of the oven.

cake

Vanilla Coconut Cake
Recipe pieced together from here and here

Ingredients:

For the vanilla cake:
1 and 1/2 cups self-rising flour
1 and 1/4 cups all-purpose flour
2 sticks of unsalted butter, softened
2 cups sugar
4 large eggs, at room temperature
1 cup milk (I used half skim and half whole)
1 teaspoon vanilla extract

For the coconut filling:
6 tbsp sugar
1/2 cup sour cream
2 tbsp coconut milk
2/3 cup sweetened shredded coconut (the original recipe calls for 1/2 cup, but I found that the extra coconut helped thicken up the filling for a more substantial layer)

For the chocolate-coconut frosting:
1 stick of butter
2 oz unsweetened chocolate, chopped
1/4 cup cocoa powder
2 cups confectioners sugar
5 tbsp coconut milk
1 tsp vanilla
1/4 tsp salt
1/3 cup sweetened shredded coconut for garnish

Method:

For the vanilla cakes:
1. Preheat your oven to 350 degrees. Butter and flour two 9-inch cake pans; set aside.
2. Combine the flours and set aside.
3. Cream the butter and sugar until fluffy, about 2-3 minutes.
4. Add the eggs, one at a time, beating well after each addition.
5. Add the dry ingredients in three parts, alternating with the milk and vanilla. Be careful not to overbeat.
6. Using a rubber spatula, scrape down the sides of your mixing bowl to make sure the ingredients are well-blended.
7. Pour the batter into your prepared cake pans and bake for 30-40 minutes, or until an inserted toothpick comes out clean (I have a convection oven, and my cakes were done at about the 32-minute mark).
8. Cool the cakes in their pans for about 15 minutes; then invert them onto a wire rack and let them cool completely before assembling the cake.

For the coconut filling:
1. Beat together the sugar, sour cream, coconut milk, and shredded coconut until the mixture is smooth and well-blended; store in the refrigerator until you’re ready to assemble the cake.

For the chocolate-coconut frosting:
1. Using either a saucepan over low heat or your microwave at half-power, melt the butter and unsweetened chocolate until the mixture is smooth. Cool for 10-15 minutes, or until mixture is at room temperature.
2. Transfer the mixture to a larger bowl and blend in the cocoa powder, confectioners sugar, coconut milk, vanilla, and salt. Beat until the frosting is smooth and slightly fluffy. You can add additional confectioners sugar by the tablespoon if you want or need to thicken the frosting.

To assemble:
1. Place one of the vanilla cakes onto a serving plate. Use a knife to level off the top to make it flat, if needed.
2. Spread coconut filling on top of the first cake layer.
3. Check your second cake to make sure the top is relatively flat. If not, use a knife to carefully flatten. Gently place the second cake layer on top of the coconut filling.
4. Use a spatula to cover the top and sides of the cake with frosting.
5. Sprinkle shredded coconut on top of the cake to garnish.

I recommend storing this cake at room temperature the day you make it to keep it nice and moist. However, I’d transfer it to the fridge if it doesn’t all get eaten that same day. Plan ahead when digging into the leftovers—you’ll want about 30-60 minutes to bring the cake back to room temperature after it comes out of the fridge, though my husband ate it cold and liked it just as much as he did the first day.

slicejpg

Mom’s Carrot Loaf

Okay, I’m going to come right out and say it: I’m way overdue for a sugar detox. I blame the winter, really—the constant cold weather makes me want to spend my (limited) free time indoors, whipping up goodies and then eating them on the couch all wrapped up in a blanket. But lately I’ve been going overboard, just tossing all notions of self-control out the window in favor of frequent face-stuffing and brownies galore. It has to stop, at least for a day or two.

Of course, when I say sugar detox, I’m talking in relative terms. I mean, a girl’s still gotta eat, right? But I did decide to whip up a recipe that’s relatively light on the sugar front.

This carrot loaf is one that my mom used to make back when I was a kid. She actually used to serve it a side dish during dinner, but it’s just sweet enough to qualify as dessert. In my mind, it’s actually the perfect breakfast food. And best of all, it’s super easy to make. The toughest part is grating the carrots, and if you’ve got a food processor, that takes no time. Once your carrots are ready, it’s a simple matter of throwing the ingredients into a large bowl and mixing them together by hand.

As far as serving goes, I prefer this carrot loaf at room temperature, but I know some people like it warm. And my husband likes it cold right out of the fridge, so when I make it, I usually stick half in there for him and keep my half on the counter. In fact, another great thing about this recipe is that it’ll keep for several days stored at room temperature and up to a week in the fridge—though it never lasts that long in my house because of that self-control thing we talked about earlier. At least I’m aware of the problem.

IMGP1439

Mom’s Carrot Loaf

Ingredients:
2/3 cup butter or margarine
1/2 cup brown sugar
1 egg
2 cups grated carrots
1 1/4 cup flour
1 tsp. baking powder
1 tsp. baking soda
1 TB lemon juice
1 TB water
1 tsp. vanilla
1/2 tsp cinnamon
1/2 tsp. salt

Method:
1. Preheat your oven to 350 degrees and lightly grease a medium-sized loaf pan.
2. Whisk together flour, baking powder, and baking soda together.
3. Add egg and brown sugar; whisk to combine.
4. Stir in lemon juice, water, vanilla, cinnamon, salt, and carrots.
5. Pour into prepared pan and bake for 45-55 minutes, or until an inserted toothpick comes out clean. Cool in pan on a wire rack.