Birthday Cake, Celebrations, and Milestones

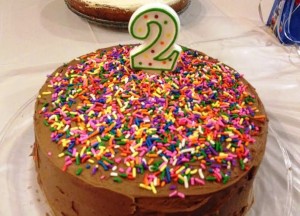
We celebrated my son’s second birthday this past weekend, which was awesome but really threw me for a loop. I mean, how on earth do I suddenly have a two-year-old? And does this mean that I can no longer refer to him as “the baby?”

I can’t believe how much my little guy has grown over the past year. It seems like only yesterday when we were first starting to see him walk…and now he spends many a day running, dancing, reading, playing, babbling, and of course, eating. (Not shockingly, my child loves his food. “Ice cream” and “cake” were among his first words – I kid you not.)

Now I could go on and on about how wonderful my little boy is and how much I love him, but I realize there’s a recipe to get to, and it involves birthday cake. Since we were having family over for a small celebration, I decided to go a little crazy on the dessert front. I made brownies, blondies, candy, and cheesecake, but no birthday dessert menu would be complete without a classic yellow cake with chocolate frosting. Needless to say, the child gobbled up his birthday cake after blowing out the candle with a a little help from Mommy and Daddy. He then proceeded to gobble up some cheesecake as well, after which he asked for fruit and ice cream. I wonder where he gets it from.

Not only is this the recipe I chose to make for my son’s birthday, but it’s also the 100th recipe I’m sharing with all of you. And I’m really happy to mark the occasion with a recipe that I made with my child in mind. See, when I started this blog almost a year ago, I had no idea how often I’d be able to update it or even get some quality time in the kitchen for that matter. Between working full-time, running a household, and taking care of the kid, the word “busy” sometimes doesn’t even begin to describe my day. But after all is said and done, everything I do, from laundry to cake-making, is all part of being a mama in my book. It’s not always glamorous, but I wouldn’t trade it in for anything else.

And with that, happy birthday little guy, and thank you for putting up with your busy baking mama.

bdaycake

Yellow Birthday Cake With Chocolate Buttercream Frosting

Cake Recipe from Smitten Kitchen; Frosting Recipe From Savory Sweet Life

Ingredients:

For the cake:

4 cups plus 2 tablespoons cake flour
2 teaspoons baking powder
1 and 1/2 teaspoons baking soda
1 teaspoon salt
2 sticks unsalted butter, softened
2 cups granulated sugar
2 teaspoons vanilla
4 large eggs, at room temperature
2 cups buttermilk, well-shaken

For the frosting:

2 sticks unsalted butter, softened
3 and 1/2 cups confectioners sugar
1/2 cup cocoa powder
1/2 teaspoon salt
2 teaspoons vanilla
4 tablespoons whole milk or heavy cream

Method:

For the cake:

  1. Preheat your oven to 350 degrees. Butter and flour two 9-inch round cake pans and set aside. (I added a light layer of cooking spray as well.)
  2. In a medium bowl, combine the flour, baking powder, baking soda, and salt.
  3. In a large bowl, beat the butter and sugar at medium speed until pale and fluffy.
  4. Beat in vanilla.
  5. Add your eggs, one at a time, beating well and scraping down the bowl after each addition.
  6. Mix in the buttermilk on low until just-combined.
  7. Add in the flour mixture in three batches, mixing until each addition is just incorporated.
  8. Spread the batter evenly in your prepared pans and bake for 35-40 minutes, or until the tops start to turn golden brown and an inserted toothpick comes out clean. (Don’t panic if your cakes start to puff up a little; mine did, but they flattened out as they cooled.)
  9. Cool the cakes in their pans for 10 minutes; then invert them onto racks to cool completely before applying frosting (at least one hour).

For the frosting:

  1. Beat the butter on medium speed for 2-3 minutes.
  2. Add in the confectioners sugar and cocoa, and mix on low until the dry ingredients and butter are well-incorporated.
  3. Increase your mixer’s speed to medium and add in the vanilla, salt, and milk/cream.
  4. Mix for about three minutes until your frosting achieves your desired consistency. If needed, you can add a litle more sugar to make it thicker or some more milk/cream to make it thinner.

To assemble:

  1. Place the first yellow cake on a platter or plate, leveling off the top as necessary to create a flat, even layer.
  2. Use an offset spatula to spread a layer of icing on top of the cake.
  3. Level off the top of your second cake and place it upside down on top of the frosting layer (so that the more even side of the cake is now the top layer).
  4. Spread the remaining frosting over the top and around the sides of the cake. Top with sprinkles if desired.
  5. Place the cake in the fridge for about an hour to allow the frosting to set, but remove the cake about an hour before you want to serve it.

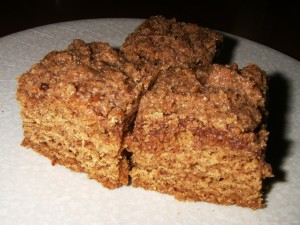
Mom’s Jam Cake

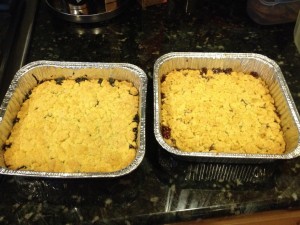
I love family recipes that are so simple but also so good. Case in point: my mom’s jam cake.

My mom has been making this cake for as long as I can remember. The great thing about it is that it’s super versatile – you can serve this cake as an afternoon cake or have it for breakfast, and it’ll fit right in. It’s sweet, but not very sweet – in fact, most of the sweetness comes from the filling more so than the actual dough – and it lends itself to a world of variation. It’s also a great cake to serve if you need a non-dairy option. While I tend to be a bit of a butter snob and only substitute margarine when absolutely necessary, in this cake the margarine totally works. And if you stick any leftovers you have of this cake in an airtight container, it’ll keep for a solid week, if not a touch longer.

Thanks, Mom, for making this cake so many times over the years – ’cause as easy as it is to make, there’s just something to be said about home-baked goods that are actually prepared by somebody else.

jamcakes

Jam Cake

Ingredients:

2 sticks butter or margarine
3/4 cup granulated sugar
1 large egg
1/2 tsp vanilla
2 and 1/2 cups AP flour
2 and 1/2 tsp baking powder
pinch of salt
1 cup filling of your choice – two of my favorites are prune jam (the same kind I used to make my hamentashen earlier this year) and 1 cup strawberry jam mixed with 1 cup sweetened coconut – but really, feel free to get creative)
Confectioners sugar for dusting, optional

Method:

  1. Preheat your oven to 350 degrees. Lightly grease and flour a 9×13 baking pan, and set aside.
  2. In a large bowl, cream the butter/margarine and sugar until light and fluffy. Beat or whisk in the egg and vanilla.
  3. In a separate bowl, whisk together the flour, baking powder, and salt. Pour the dry ingredients into the wet and mix until well-combined.
  4. Pour half of the batter into your prepared pan.
  5. Using a spoon or offset spatula, spread your filling of choice evenly on top.
  6. Use either a grater or your fingers to crumble the remaining dough over the top of the cake. (I prefer to use my hands. To prevent the dough from sticking to my fingers, what I like to do is coat one hand with a little cooking spray and use that hand to do the actual crumbling while leaving the other hand free to keep applying the spray. I suppose there are less complicated ways to do it, but this one works for me.)
  7. Bake the cake for 40-50 minutes, or until the top starts to turn golden without getting too dark.
  8. Once the cake has cooled completely, you can dust it with confectioners sugar.

jamslice2

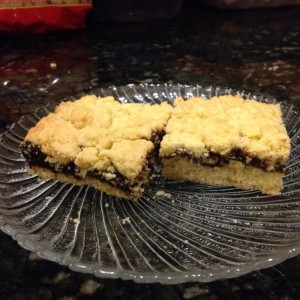
Check out the yummy prune version above.

jamslice

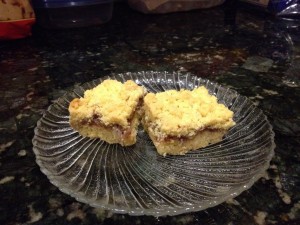
And the strawberry coconut counterpart…

Pumpkin Cake With Maple Cream Cheese Frosting

It was my dad’s birthday the other day, so I decided to whip up a cake for the occasion. There’s only one problem: My dad doesn’t eat sugar, or at least he’s not supposed to. So in reality, when I say I made this cake for my father, I really mean that I made it for his lovely coworkers, who got to enjoy the majority of it while he limited himself to a couple of small bites.

This isn’t the first time I’ve made this cake, and I have to say, this recipe is really one of my all-time favorites. The cake itself is just really flavorful and moist, so much so that I don’t even think it needs the frosting. In fact, as was the case the last time I made it, I wound up with a bunch of extra frosting, which is now sitting in my refrigerator just waiting to be incorporated into a new dessert (there are worse problems to have).

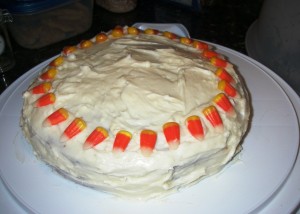
Unfortunately, the photo below really doesn’t do this recipe justice, but I wasn’t able to get a shot of the cake once it was sliced. The candy corn pieces on top, by the way, are totally optional, and in fact don’t do anything other than add a little extra color. I wanted my cake to have a bit of a festive look, but next time around I’ll definitely be skipping this step.

If there’s one pumpkin dessert recipe you’ve got to try this season, it’s this cake. Believe me, you won’t be disappointed.

bestpumpkincake

Pumpkin Cake With Maple Cream Cheese Frosting

Recipe from David Leite

Ingredients:

For the cake:

1 stick unsalted butter, at room temperature, plus more for the pans
1 cup firmly packed dark brown sugar
1/3 cup granulated sugar
2 cups cake flour, plus more for the pans
2 teaspoons baking powder
1 teaspoon baking soda
1 teaspoon ground cinnamon
1 teaspoon ground ginger
1/2 teaspoon ground nutmeg
1/8 teaspoon ground cloves
1/2 teaspoon salt
1/4 teaspoon freshly ground black pepper
2 large eggs
1/2 cup buttermilk mixed with 1 teaspoon vanilla
1 1/4 cups canned solid-pack pumpkin

For the maple cream cheese frosting:

Two (8-ounce) packages cream cheese, softened
1 stick unsalted butter, at room temperature
2 cups confectioners sugar
1/4 cup pure maple syrup (if you have the good stuff, bust it out – it’ll be worth it)

Method:

  1. Preheat your oven to 350 degrees. Butter two 8-by-2-inch cake pans, line them with parchment circles, butter the parchment, and coat the pans with flour. Tap out the excess.
  2. In a stand mixer, beat the butter and sugars on medium speed until fluffy, about 5 minutes. Meanwhile, sift the flour, baking powder, baking soda, cinnamon, ginger, nutmeg, cloves, salt, and pepper into a medium bowl.
  3. Add the eggs, one at a time, scraping down the sides after each addition.
  4. Alternate adding the flour and milk mixtures, beginning and ending with the flour.
  5. Beat in the pumpkin until smooth.
  6. Divide the batter equally between the pans and bake for 30-40 minutes, or until an inserted toothpick comes out clean.
  7. Cool the pans on racks for 10 minutes, then invert the cakes onto racks and remove the parchment paper to cool completely.
  8. Once the cake has cooled, you can make the frosting. In a stand mixer, beat all the ingredients on medium until fluffy.
  9. Assemble the cake by frosting the top of one cake and then placing the other cake on top and frosting the sides and top.
  10. Refrigerate the cake for 30 minutes to allow the frosting to set.

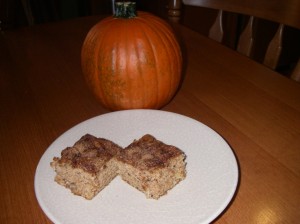
Pumpkin Coffee Cake With Brown Sugar Crumb Topping

Oh pumpkin, how I love you so.

Really, I could go on and on about how much I adore pumpkin in just about any type of culinary application, but one of my favorite things to do with pumpkin is put it in cakes. And since I happen to love coffee cake in general, this recipe is just about perfection in my book.

pumpkincofcake

Pumpkin Coffee Cake With Brown Sugar Crumb Topping

Recipe from Sally’s Baking Addiction

Ingredients:

For the cake:

2 cups AP flour
1 teaspoon baking soda
1/2 teaspoon baking powder
1/2 teaspoon salt
2 teaspoons ground cinnamon
1/2 teaspoon ground nutmeg
1/4 teaspoon allspice (the original recipe suggests cloves – take your pick, or just add a pinch more cinnamon and nutmeg if you don’t have either)
1 cup pumpkin puree
1/2 cup dark brown sugar
1/2 cup vegetable oil
1/4 cup pure maple syrup (this is when you want to bust out the good stuff, if you have it)
1/4 cup buttermilk (regular milk will work as well)

For the topping:

1/2 cup AP flour
1/4 cup unsalted butter, cold
1/2 cup dark brown sugar
1/4 teaspoon salt (I used more like 1/2 teaspoon because I wanted the salt to help cut the sweetness a little; in reality, I think about 1/3 of a teaspoon would be ideal)
2 teaspoons ground cinnamon

Method:

  1. Preheat your oven to 350 degrees. Grease a 9×9 baking pan and set aside.
  2. Make the crumb topping first: In a small bowl, toss the flour, brown sugar, salt, and cinnamon together. Cut in the cold butter using a pastry blender or a fork. Use your fingers to create clumps and crumbs. Set aside in the fridge until ready to use.
  3. For the cake, whisk together the flour, baking soda, baking powder, salt, and spices in a large bowl until combined.
  4. In a medium bowl, whisk together the pumpkin, brown sugar, oil, maple syrup, and milk.
  5. Pour the wet ingredients into the dry ingredients and stir until just combined. Try not to over-mix the batter, which will be thick.
  6. Pour the batter into the prepared pan and then use your fingers to sprinkle the crumb mixture evenly on top. It helps to coat your hands with a little cooking spray so that the crumbs don’t stick to your fingers.
  7. Bake for 30 minutes, or until an inserted toothpick comes out clean.
  8. Let the cake cool in its pan before slicing and serving.

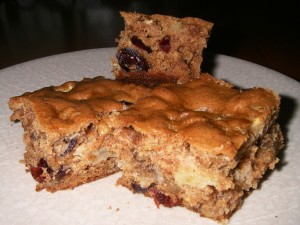
Apple Cranberry Walnut Coffee Cake

Okay…there are still apples in my fridge. Lots and lots of apples.

You know what that means: another apple cake, this time with some dried cranberries and walnuts for good measure. This recipe is essentially the same one I used for my last apple cake, only without the brown sugar topping. You can add the topping if you’d like, but I really don’t think this cake needs it.

I’ll stop making apple cakes (at least for a little while) until my supply is depleted. Till then, please bear with me.

applecrancofcak

Apple Cranberry Walnut Coffee Cake

Ingredients:

1/4 cup (1/2 stick) unsalted butter
3/4 cup light brown sugar
1 large egg
1 cup AP flour
1/2 tsp baking soda
1/2 tsp cinnamon
1/2 tsp salt
1/2 cup sour cream
1/2 tsp vanilla
1 cup apples, peeled and sliced
1/2 cup dried cranberries
1/2 cup chopped walnuts
1/4 cup raisins (not really necessary, but I wanted to use some up)

Method:

  1. Preheat your oven to 350 degrees. Lightly grease an 8×8 baking pan and set aside.
  2. To make the cake, in a large bowl, cream together the butter and sugar until light and fluffy. Beat in the egg until well-combined
  3. In a separate bowl, mix together the flour, baking soda, cinnamon, and salt. Add the dry ingredients to the wet ingredients, alternating with the sour cream and vanilla.
  4. Stir in the apples, dried cranberries, walnuts, and raisins (if you’re using them).
  5. Pour the batter into your prepared pan and bake for 35-40 minutes, or until an inserted toothpick comes out clean.
  6. Let the cake cool in its pan completely before serving.

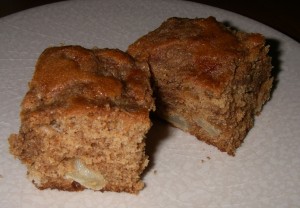
Apple Coffee Cake With Buttery Brown Sugar Topping

I’m impressed. I went apple picking several weeks ago at this point, but my apples still taste fresh and delicious. Storing them in the fridge probably helped, but it just goes to show that getting fruits and veggies right from the source is usually the best way to go.

Even though I was itching to make another cake out of pumpkin, I couldn’t let my seemingly never-ending supply of apples go to waste, and so I whipped up this yummy (and, ahem, incredibly easy) apple coffee cake. I have to say, I just love the way this cake came out. It was nice and moist (thank you, sour cream), and sweet without being too sweet. I was worried that the topping would add too much sugar, but it ended up balancing the cake out nicely.

If you’re looking for a way to use up some extra apples, give this recipe a try. You really won’t be sorry.

applecofcake

Apple Coffee Cake With Buttery Brown Sugar Topping

Recipe from Laura’s Sweet Spot

Ingredients:

For the cake:

1/4 cup (1/2 stick) unsalted butter
3/4 cup light brown sugar
1 large egg
1 cup AP flour
1/2 tsp baking soda
1/2 tsp cinnamon
1/2 tsp salt
1/2 cup sour cream
1/2 tsp vanilla
1 cup apples, peeled and sliced (I used a combination of Granny Smith and Golden Delicious, and that worked well for this cake)

For the topping:
1/4 cup light brown sugar
1/4 cup AP flour
1/2 tsp cinnamon
2 tbsp unsalted butter, softened

Method:

  1. Preheat your oven to 350 degrees. Lightly grease an 8×8 baking pan and set aside.
  2. To make the cake, in a large bowl, cream together the butter and sugar until light and fluffy. Beat in the egg until well-combined
  3. In a separate bowl, mix together the flour, baking soda, cinnamon, and salt. Add the dry ingredients to the wet ingredients, alternating with the sour cream and vanilla.
  4. Fold in the apples.
  5. Pour the batter into your prepared pan.
  6. To make the topping, combine the sugar, flour, cinnamon, and butter. Use your fingers to work it into a soft crumb mixture.
  7. Sprinkle the topping over the cake and bake for 35-40 minutes, or until an inserted toothpick comes out clean.
  8. Let the cake cool in its pan completely before serving.

Note: The original recipe calls for double the ingredients. You can follow that and just bake your cake in a 9×13 pan. I wanted a slightly smaller cake this time around since it was pretty much only going to be me and my mom eating it, but if you’ve got a crowd to feed, feel free to go for the larger version.

Apple Pumpkin Cake

For me, September is the time to indulge in everything apple. But come October, I tend to be all about the pumpkin. This year, I decided to make the transition from apple- to pumpkin-centric baking just a bit smoother by using both in a single cake.

This recipe is incredibly easy to whip up, and it produces a cake that’s soft, moist, and full of my favorite fall flavors. You can use canned pumpkin without a problem, but because I happened to go pumpkin picking recently, I chose to cook and puree some fresh pumpkin for my batter.

I’m really excited to start experimenting with some new pumpkin recipes, both sweet and savory. But for now, I’ll most likely be focused on eating this cake for the better part of the week until it’s gone.

pumpkinapplecake

Apple Pumpkin Cake

Ingredients:

1 and 1/4 cups AP flour
1 cup granulated sugar
1/2 tsp baking soda
1/2 tsp salt
1/2 tsp cinnamon
1/2 tsp nutmeg
1/2 tsp allspice
1 egg
1/4 cup vegetable oil
1 cup apples, peeled and chopped
1/2 cup pumpkin (fresh or canned)

Method:

  1. Preheat your oven to 350 degrees. Lightly grease an 8×8 baking pan and set aside.
  2. In a large bowl, whisk together the flour, sugar, baking soda, salt, and spices.
  3. Beat the eggs in a separate bowl. Add the oil, apples, and pumpkins, and stir together until well-combined.
  4. Pour the apple-pumpkin mixture into the flour mixture, stirring until thoroughly combined.
  5. Pour the batter into your prepared pan and bake for 25 minutes, or until an inserted toothpick comes out clean. The cake should be soft and springy, so try not to overbake.
  6. Let the cake cool completely in the pan before cutting into it.

Notes:
Looking to feed a larger crowd? Just double the recipe and use a 9×13 pan instead.
If you choose to use canned pumpkin for this recipe, make sure to buy regular, unsweetened pumpkin, as opposed to pumpkin pie filling.

Chocolate Roll Cake, a/k/a Giant Yodel Cake

I have a confession to make: I’m a sucker for processed, packaged baked goods. Sure, I’ve made my fair share of delicious cakes, pies, brownies, and more. But there’s just something about classic store-bought snack cakes that really takes me back to my childhood and makes me, on occasion, want to forego a baking session in favor of buying treats that are premade.

Growing up, one of my favorite packaged snack cakes was none other than the Yodel. But when I found myself craving one the other day, I discovered, much to my disappointment, that apparently they’re no longer in production. I was bummed, but not ready to give up. And I think you all know where this is going.

I decided to attempt my own version of Yodels, but in the form of a cake. Part of this was done out of laziness—I figured it would be easier to glaze a single cake than have to deal with glazing a bunch of smaller ones. But also, I thought it would be kind of cool to create a giant Yodel. And since I found a recipe for a chocolate roll cake online that seemed to be just what I was looking for, I decided to go for the cake.

Now before we go any further, I do have to tell you: This cake wasn’t so easy. In fact, the first version of this cake is sitting in my freezer in scraps until I figure out what to do with it. (Cake ball truffles, maybe?) The reason? I didn’t follow instructions and decided to roll it initially without using a kitchen towel. Why? I don’t know. The idea of rolling a cake in a kitchen towel seemed strange and unappealing. But it was a mistake not to do it, because when I tried it the second time around, it was much easier. So, lesson learned (though I suppose there are worse things than having extra chocolate cake lying around).

I’ll also say that even after having used the towel method, I still found this cake fairly tricky to re-roll once I added the filling. I was convinced that the darn thing was going to break on me, but somehow, it didn’t. And once I made it to the ganache stage, I knew I had a winner.

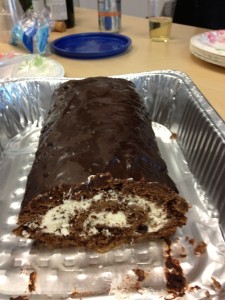
Now I’m sure you’re wondering: Did this cake end up tasting like a Yodel? It’s hard to say. I don’t think I’ve had a Yodel in well over a decade at least. But what I will say is that it turned out absolutely delicious. The chocolate cake was perfectly moist, the whipped cream filling was far tastier and fresher than I remember the classic filling being, and the chocolate ganache was utterly divine. In fact, I can say with relative confidence that my version wound up tasting far better than any mass-produced chocolate roll cake you’d find in a box…though if any of you out there know of a way to get your hands on some classic Yodels, I’d be super grateful if you could hook me up.

yodel

Chocolate Roll Cake, a/k/a Giant Yodel Cake
Recipe from Serious Eats

Ingredients:

For the cake:
1 cup AP flour
1/4 cup unsweetened cocoa powder
2 teaspoons baking powder
4 ounces of bittersweet chocolate, finely chopped
1 stick of unsalted butter
3/4 cup granulated sugar
4 large eggs
1/4 teaspoon salt
1/3 cup hot water

For the whipped cream filling:
1 and 1/2 cups heavy cream
2 tablespoons granulated sugar
1 and 1/2 teaspoons vanilla extract (the original recipe called for only 1, but I wanted a bit more of a vanilla flavor)

For the ganache:
4 ounces bittersweet chocolate, finely chopped
1/2 cup heavy cream

Method:

1. Preheat your oven to 350 degrees. Line a 10×15 jelly roll pan with parchment paper.
2. Sift flour, cocoa, and baking powder into a small bowl; set aside.
3. Place the chocolate and butter in a microwave-safe bowl and microwave in 15-second increments, stopping to stir with a rubber spatula until the mixture is completely melted and smooth. Set aside to cool slightly.
4. Using a stand mixer, whip the sugar with the eggs and salt on medium-high speed until the mixture is light and thick (about 5 minutes).
5. Fold in the chocolate mixture with a rubber spatula. Then, fold in the flour mixture and then water until just-combined.
6. Spread the batter into your prepared pan and bake the cake for 10-15 minutes, or until just-firm.
7. Let the cake cool for about 10 minutes; then run a knife along the pan edge to loosen it.
8. Place a clean kitchen towel over the cake. Starting with the short end, carefully roll the cake up with the towel (with the parchment paper attached).
9. Let the cake cool until just-cooled (anywhere from 20-40 minutes should do the trick, but keep checking the cake – you don’t want to leave it for too long). While the cake is cooling, make the filling.
10. Using a stand mixer, whip the cream with the sugar and vanilla on medium-high speed until the mixture can hold medium peaks. (Try not to keep sneaking little tastes of the whipped cream as you wait for the cake to cool…)
11. Once the cake is cool, gently unroll it, removing the towel but leaving the very end rolled to ensure a good grip.
12. Spread the cream over the exposed surface of cake.
13. Carefully re-roll cake into a log, removing the parchment paper as you go along.
14. Wrap the cake tightly with plastic wrap to retain its log shape as you prepare the ganache.
15. In a heat-proof bowl, heat the chocolate with the cream, stirring frequently, until the chocolate is melted and the mixture is smooth. I used a microwave at 50% power to do this.
16. Chill the ganache until thickened slightly, about 10 minutes.
17. Remove the plastic wrap from the cake and place the cake on wire rack set over a rimmed baking sheet. Spoon the ganache over the cake.
18. Using an off-set spatula, smooth the ganache over the sides and ends of the cake.
19. Place the cake in the fridge to allow the ganache to set for at least an hour. Store the cake in the fridge and serve within a day or two for optimal freshness.


Chocolate Guinness Cake

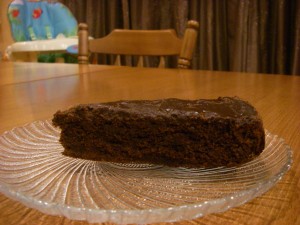
I’ve slowed down a little on the baking front lately, mostly because life and its various priorities have gotten in the way. But in honor of my brother-in-law’s birthday, which happens to be St. Patrick’s Day, I had to squeeze in a quick baking session to whip up a deliciously moist chocolate cake. I decided to try something I’ve wanted to do for awhile: Make a chocolate cake with stout. I chose to use Guinness since we already had some in the house, and I have to say, the cake turned out wonderful. It was incredibly rich and moist, and although you could taste a hint of the Guinness in it, it wasn’t overly strong.

I topped my cake off with a cream cheese frosting, but you could easily swap that for a simple chocolate glaze, confectioners sugar, or nothing at all. The best part? This cake took practically no time to make…or eat, which is a testament to how good it is.

IMGP1737

Chocolate Guinness Cake
Cake recipe from A Whisk and a Spoon

Ingredients:

For the cake:
1 and 1/2 cups AP flour
1 cup granulated sugar
7 tablespoons unsweetened cocoa powder (I used 3 regular and 4 dark)
1/2 teaspoon baking soda
1/2 teaspoon salt
1/2 cup Guinness (or other stout of your choice)
1/2 cup espresso or strong coffee
1/4 cup water
2 teaspoons vanilla
1 teaspoon apple cider or white vinegar
1/2 cup vegetable oil

For the frosting:
1 stick of butter at room temperate
8 oz cream cheese at room temperature
2 cups confectioners sugar
1 teaspoon vanilla extract

Method:

For the cake:
1. Preheat your oven to 350 degrees. Grease an 8-inch cake pan with cooking spray, then line with parchment and lightly spray the parchment.
2. Whisk together the flour, sugar, cocoa, baking soda, and salt in a medium bowl.
3. In a measuring cup, mix together your stout, coffee, water, vanilla and vinegar. Stir gently into the flour mixture.
4. Add oil and stir gently until you have a smooth batter.
5. Pour the batter into your prepared pan and bake for 30-35 minutes, or until an inserted toothpick comes out clean.
6. Let the cake cool on a rack before peeling off the parchment paper. Top with frosting, glaze, or confectioners sugar. Or, just let this fudgy masterpiece stand on its own.

For the frosting:
1. Using an electric mixer, beat the butter and cream cheese until smooth (about 3 minutes at medium speed).
2. Add the vanilla and then the confectioners sugar; mix on low-medium speed until well-combined. Depending on how thick you want your frosting, you may want to add extra confectioners sugar by the tablespoon to reach your desired consistency.


Almost-Fudge Gateau

I’m definitely much more of a vanilla person than a chocolate person. Take me to a bakery, and I’ll almost always order a vanilla cake or something vanilla-based. And when it comes to ice cream, I’m a vanilla girl all the way. But sometimes, depending on my mood, my hormones (yeah, I went there), or the season, I find myself suddenly craving chocolate. And when I do, it’s gotta be a rich, dense, full-on chocolate assault. So when my latest chocolate urge crept up on me out of nowhere, I decided it was time to try a recipe I had bookmarked some time ago.

A lot of food bloggers have tried this fudge cake recipe and raved about it. It’s from the famous Baking: From My Home to Yours cookbook by Dorie Greenspan, which I actually don’t have but need to get my hands on.

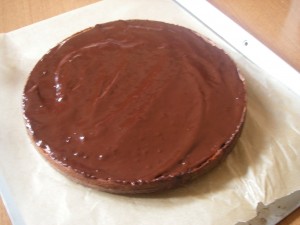
The great thing about this cake is that it’s not super complicated but incredibly decadent. The “almost-fudge” description is pretty accurate, only whereas classic fudge can take sweetness to an insane level, this cake strikes the perfect balance of intense chocolate flavor without that cloying sweetness factor. If you’re craving chocolate, this cake will definitely hit the spot. And if you have guests coming over, you’ll be sure to impress them by whipping it up. I ate a giant piece with a touch of whipped cream and a small scoop of vanilla ice cream on the side—because even when I need my chocolate, I’m still a vanilla girl at heart.

IMGP1613

Almost-Fudge Gateau

Recipe can also be found here

Ingredients:

For the cake:
5 large eggs
9 ounces of bittersweet chocolate, coarsely chopped
1 cup of granulated sugar
5 tablespoons unsalted butter, cut into chunks
2 tablespoons coffee or water
1/3 cup AP flour
Pinch of salt

For the glaze:
4 ounces of bittersweet chocolate, coarsely chopped
1/2 cup heavy cream
2 teaspoons light corn syrup

Method:

For the cake:
1. Preheat your oven to 350 degrees. Butter a 9-inch springform pan, line the bottom with parchment paper, butter the paper, dust the inside of the pan with flour, and tap out the excess. Place the pan on a baking sheet lined with parchment paper or a silicone mat.
2. Separate the eggs.
3. Set a heatproof bowl over a saucepan of simmering water and add the chocolate, sugar, butter, and coffee. Stir occasionally until the chocolate and butter are melted; the sugar may still be grainy, and that’s okay. Transfer the bowl to the counter and let the mixture sit for a few minutes.
4. Using a rubber spatula, stir in the egg yolks one by one, then fold in the flour.
5. Working with the whisk attachment of a stand mixer (or, if you don’t have one, a hand mixer will have to do), beat the egg whites with the pinch of salt until they hold firm, glossy peaks.
6. Use a spatula to stir about a quarter of the beaten egg whites into the batter; then gently fold in the rest.
7. Pour the batter into your prepared pan and gently jiggle the pan from side to side a couple of times to even it out.
8. Bake for 35 to 45 minutes, or until the cake has risen evenly (it may rise around the edges and you’ll think it’s done, but give it a few minutes more, and the center will puff too) and the top has firmed (it will probably be cracked); a thin knife inserted into the center should come out just slightly streaked with chocolate.
9. Transfer the pan to a cooling rack and let the cake rest for 5 to 10 minutes.
10. Run a knife gently around the edges of the cake and remove the sides of the pan. Carefully turn the cake over onto a rack and remove the pan bottom and the parchment paper. Invert the cake onto another rack and cool to room temperature right side up. Warning: The cake may sink a bit as it cools. Don’t worry if it does.

For the glaze:
1. Place your chocolate in a small heatproof bowl and melt over a pan of simmering water or in your microwave. The chocolate should be just-melted and not too hot.
2. Meanwhile, bring the cream to a boil in a small saucepan. Pour the hot cream over the chocolate and stir very gently with a rubber spatula until the mixture is smooth and shiny.
3. Stir in the corn syrup and let the glaze sit for a few minutes.
4. Gently place the cake on a wax paper-lined baking sheet, or on a wire rack with wax paper underneath. This will prevent excess glaze from getting all over your kitchen counter or work surface.
5. Pour the glaze over the cake and smooth the top. It’s easiest to do this using a long metal icing spatula.
6. Allow the glaze to set at room temperature or, if you’re impatient, you can stick the cake into the refrigerator for about 20 minutes. I let mine set for a couple of hours on the counter, and it was perfect.

IMGP1615