Vanilla and White Chocolate Mousse Cheesecake

Ever have a recipe bookmarked for ages that you’re just itching to try but don’t have the time to tackle?

Such was the case with this particular cheesecake. But let me backtrack a little, only to tell you how much I love cheesecake. Whether it’s the rich and dense kind or the type that’s light and airy, put it in front of me and I’ll be sure to devour it. And then go get myself another piece. And maybe a third one after that. Yes, I like cheesecake that much. And if there’s one flavor profile I also happen to adore, it’s the vanilla and white chocolate combo. Talk about heavenly. So when I found a cheesecake recipe that incorporated several of my favorite elements into one rich, indulgent dessert, I just had to give it a try…about six months later. That’s how long this recipe has been swirling around in my mind, just begging my stomach to give in and make it. But it finally happened. And it was well worth the wait.

Now I’ll warn you: This recipe is not a quick one. There are four separate steps, though two of them are fairly simple. Usually I don’t have the luxury of making multi-layered cakes, but between my son’s birthday and the holidays, I was in such a celebratory mood that I forced myself to make the time.

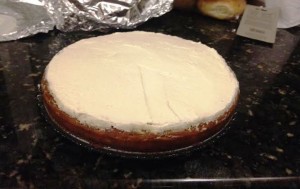
What you’ve got here is a classic, simple graham cracker crust topped with a rich layer of vanilla-flavored cheesecake. On top of that is a nice helping of white chocolate mousse, followed by a generous layer of vanilla whipped cream. In other words, pure and utter deliciousness on a plate, and well worth the multi-hour investment.

vbccake

Vanilla and White Chocolate Mousse Cheesecake

Recipe very slightly adapted from The Inner Gourmet

Ingredients:

For the crust:

1 and 1/2 cups crushed graham crackers
1/4 cup dark brown sugar
1/2 cup butter, melted
1 egg yolk, beaten
1/4 teaspoon vanilla

For the cheesecake layer:

16 ounces cream cheese, softened
1 cup sour cream
2 tablespoons corn starch
1 cup granulated sugar
1 stick unsalted butter, softened
1 stick salted butter, softened
2 teaspoons vanilla

For the white chocolate mousse:

1 cup whipping cream
3 tablespoons confectioners sugar
4 ounces cream cheese, softened
5 ounces white chocolate baking squares, melted and cooled to room temperature

For the vanilla whipped cream topping:

1 cup whipping cream
3 tablespoons confectioners sugar
2 teaspoons vanilla

Method:

To make the crust:

  1. Preheat your oven to 375 degrees.
  2. In a small bowl, whisk together the graham crackers, brown sugar, butter, egg yolk, and vanilla until well-combined. Press the mixture into the bottom of a 9-inch springform pan.
  3. Bake for 8-10 minutes, or until the edges start to turn brown.
  4. Let the crust cool completely while you make the cheesecake layer.

To make the cheesecake:

  1. Lower your oven to 325 degrees.
  2. Beat the cream cheese and butter at medium speed until smooth.
  3. Add in sugar and beat until well-combined.
  4. Add in the sour cream, corn starch, and vanilla; mix on low until smooth.
  5. Pour the mixture on top of the crust, doing your best to spread it evenly.
  6. Bake the cheesecake for one hour. After an hour, it will probably still look jiggly, but don’t worry – this is normal.
  7. Turn off the oven, open the oven door, and let the cheesecake sit in the oven for one hour.
  8. Remove the cheesecake from the oven and let it cool to room temperature, at least one hour.
  9. Place the cheesecake in the fridge to set, at least 4-5 hours or overnight.

To make the mousse (you can do this in advance and keep it in the fridge, or do it right before you’re ready to spread it and just chill it for a few minutes before applying to the cake):

  1. In the bowl of a stand mixer, whip the cream on high until soft peaks form.
  2. Gradually add in your confectioners sugar and beat until stiff peaks form.
  3. Place the whipped cream in the fridge for 5-10 minutes. Meanwhile, combine the melted white chocolate (which, by the way, should be completely cooled before you use it – make sure of this) and cream cheese and beat until smooth and fluffy.
  4. Remove the whipped cream from the fridge, fold it into the white chocolate mixture, and place the mousse back in the fridge for 15-20 minutes.
  5. Once the mousse is nice and cold, use an offset spatula to spread it on top of the cheesecake layer.
  6. Return the cheesecake to the fridge until you’re ready to top it with the whipped cream (which I recommend doing right before you serve it).

To make the whipped cream:

  1. In the bowl of a stand mixer, whip the cream on high until soft peaks form.
  2. Gradually stir in the confectioners sugar and vanilla, and beat until stiff peaks form.
  3. Chill the whipped cream for at least 20-30 minutes (or overnight) before topping off the cheesecake.

Store your leftovers, if any remain, covered in the fridge. The cheesecake will keep for 2-3 days.


Vanilla Cardamom Shortbread Bars with White Chocolate Caramel Glaze

Just when it seemed like the weather was finally starting to get a bit warmer around here, bam—another cold front hit. Okay, it wasn’t exactly a cold front, but after several days of temps in the 60s and 70s (you know, actual spring weather), it went back down to the low 50s with a vengeance. Now I realize that 52 degrees isn’t actually freezing. But throw in cloudy, gray skies, a bout of rain, and, oh yeah, the fact that it’s late April, and all it took was a couple of cooler days to make me want to curl up in a blanket the moment I put the child to bed.

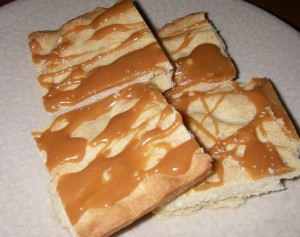
Of course, no couch potato moment would be truly complete without something freshly baked to accompany it, and so I decided to whip up some shortbread cookie bars. The base is very similar to that of the Samoa bars I made last week, only it incorporates a bunch of fall spices that jack up the flavor and work well with the caramel and white chocolate topping.

Now I have to say, I really love the way these babies turned out. But more so than that, they smelled absolutely amazing while they were baking up. Had I been able to somehow capture the smell and mass-produce a line of household products and candles to feature it, I would’ve found myself sitting on a goldmine. But alas, all I could do was enjoy the sweet aroma of vanilla, cinnamon, nutmeg, and cardamom wafting through the air as the rain kept rapping against my windows and the wind howled in protest of spring.

vanshortbread

Vanilla Cardamom Shortbread Bars with White Chocolate Caramel Glaze

Ingredients:

For the shortbread cookie base:
1/2 cup sugar
3/4 cup butter, softened
1 large egg
1 and 1/2 tsp vanilla
2 cups Ap flour
1/4 tsp salt
1/4 tsp cardamom
1/4 tsp cinnamon
1/4 tsp nutmeg

For the topping:
1/2 cup Kraft caramel bits (or a half cup’s worth Kraft caramel candies, unwrapped)
1 tbsp whole milk
1/2 cup white chocolate, melted

Method:

To make the shortbread cookie base:
1. Preheat your oven to 350 degrees. Lightly grease a 9×13-inch baking pan, or line with parchment paper.
2. Cream together sugar and butter until fluffy.
3. Beat in egg and vanilla extract.
4. Gradually beat in flour, salt, and spices at low speed until mixture is crumbly.
5. Pour crumbly dough into prepared pan and press into an even layer.
6. Bake for 20-25 minutes, until base is set and edges are lightly browned.
7. Cool completely on a wire rack before adding the topping.

To make the topping:
1. Combine caramel bits, milk, and white chocolate in a medium bowl.
2. Heat in the microwave for 30-second increments at 50% power, stirring the mixture in between. You’ll find that the caramel will melt before the white chocolate, so it’s important to keep stirring. When the white chocolate is mostly melted, vigorously whisk the mixture together to eliminate the lumps.
3. Drizzle the mixture over the shortbread base.
4. Allow to set in the fridge for an hour before cutting into bars.


Vanilla Coconut Cake


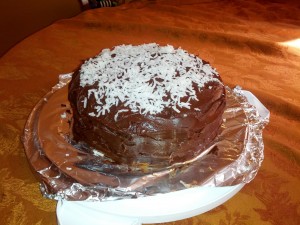
I did a whole lot of baking this past weekend—so much so that I’m only first getting around to posting some photos and recipes now. I made this cake for a family get-together and it turned out delicious. I used one of my favorite vanilla cake recipes and then added a yummy coconut frosting and filling. The frosting was pretty sweet (as frosting tends to be) but the filling wasn’t; and the classic but simple vanilla cake was a nice contrast.

As far as layer cakes go, this one was very easy to whip up. The vanilla cake itself can be thrown together in no time, and then it’s just a matter of letting it cool before assembling—and you can work on the filling and frosting in the meantime.

I recommend serving this cake the same day you make it, if possible. It’ll still be good the day after, and probably even the day after that, but it’s wonderfully moist and fresh the day it actually comes out of the oven.

cake

Vanilla Coconut Cake
Recipe pieced together from here and here

Ingredients:

For the vanilla cake:
1 and 1/2 cups self-rising flour
1 and 1/4 cups all-purpose flour
2 sticks of unsalted butter, softened
2 cups sugar
4 large eggs, at room temperature
1 cup milk (I used half skim and half whole)
1 teaspoon vanilla extract

For the coconut filling:
6 tbsp sugar
1/2 cup sour cream
2 tbsp coconut milk
2/3 cup sweetened shredded coconut (the original recipe calls for 1/2 cup, but I found that the extra coconut helped thicken up the filling for a more substantial layer)

For the chocolate-coconut frosting:
1 stick of butter
2 oz unsweetened chocolate, chopped
1/4 cup cocoa powder
2 cups confectioners sugar
5 tbsp coconut milk
1 tsp vanilla
1/4 tsp salt
1/3 cup sweetened shredded coconut for garnish

Method:

For the vanilla cakes:
1. Preheat your oven to 350 degrees. Butter and flour two 9-inch cake pans; set aside.
2. Combine the flours and set aside.
3. Cream the butter and sugar until fluffy, about 2-3 minutes.
4. Add the eggs, one at a time, beating well after each addition.
5. Add the dry ingredients in three parts, alternating with the milk and vanilla. Be careful not to overbeat.
6. Using a rubber spatula, scrape down the sides of your mixing bowl to make sure the ingredients are well-blended.
7. Pour the batter into your prepared cake pans and bake for 30-40 minutes, or until an inserted toothpick comes out clean (I have a convection oven, and my cakes were done at about the 32-minute mark).
8. Cool the cakes in their pans for about 15 minutes; then invert them onto a wire rack and let them cool completely before assembling the cake.

For the coconut filling:
1. Beat together the sugar, sour cream, coconut milk, and shredded coconut until the mixture is smooth and well-blended; store in the refrigerator until you’re ready to assemble the cake.

For the chocolate-coconut frosting:
1. Using either a saucepan over low heat or your microwave at half-power, melt the butter and unsweetened chocolate until the mixture is smooth. Cool for 10-15 minutes, or until mixture is at room temperature.
2. Transfer the mixture to a larger bowl and blend in the cocoa powder, confectioners sugar, coconut milk, vanilla, and salt. Beat until the frosting is smooth and slightly fluffy. You can add additional confectioners sugar by the tablespoon if you want or need to thicken the frosting.

To assemble:
1. Place one of the vanilla cakes onto a serving plate. Use a knife to level off the top to make it flat, if needed.
2. Spread coconut filling on top of the first cake layer.
3. Check your second cake to make sure the top is relatively flat. If not, use a knife to carefully flatten. Gently place the second cake layer on top of the coconut filling.
4. Use a spatula to cover the top and sides of the cake with frosting.
5. Sprinkle shredded coconut on top of the cake to garnish.

I recommend storing this cake at room temperature the day you make it to keep it nice and moist. However, I’d transfer it to the fridge if it doesn’t all get eaten that same day. Plan ahead when digging into the leftovers—you’ll want about 30-60 minutes to bring the cake back to room temperature after it comes out of the fridge, though my husband ate it cold and liked it just as much as he did the first day.

slicejpg