Crazy Bark

Sometimes I like to get a little nutty in the kitchen, especially when said nuttiness can be achieved without investing a significant amount of time. I invented this concoction awhile back and decided to whip up a batch recently. I call it Crazy Bark, ‘cause, well, it’s a little insane.

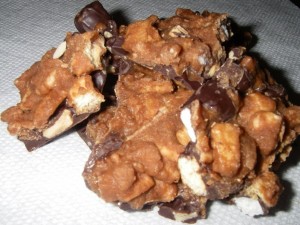
How do I describe what this is? In a nutshell, it’s like a s’more and a peanut chew collided to make one supremely indulgent concoction. I mean, take a look at the ingredients. You’ve got chocolate and peanut butter. You’ve got caramel. You’ve got graham crackers and marshmallows. What more could you ask for?

crazybrk

Crazy Bark

Ingredients:

For the bottom layer:
1 cup semisweet chocolate, chopped
1/2 cup dark chocolate
1/3 cup lightly salted peanuts
1/4 cup peanut butter
1/3 cup chopped marshmallows (not mini marshmallows—you want smaller pieces here)
1 graham cracker, chopped

For the top layer:
1/2 cup caramel chips (if you can’t find these, feel free to use butterscotch or peanut butter chips instead; or, just double the amount of caramel and milk indicated below)
6-8 Kraft caramels, unwrapped
1 tbsp whole milk (you can use another type of milk if you don’t typically have whole milk on hand)
1/3 cup chopped marshmallows
1/3 cup chopped graham crackers

Method:

1. Line a baking sheet with parchment paper and set aside.
2. Melt the semisweet chocolate, dark chocolate, and peanut butter in the microwave on 50% power at 30-second intervals, stirring in between. Once melted, stir in the peanuts, marshmallows, and graham cracker. Pour the mixture into your prepared baking sheet and refrigerate until set (1-2 hours).
3. Once the bottom layer has set, combine the caramel chips, caramels, and milk in a bowl and melt the mixture in the microwave. Once melted, stir in the marshmallows and graham crackers. Pour the mixture over the bottom layer and return to the fridge to set (another 1-2 hours).
4. Once the bark has set, use a sharp knife (or your hands) to break into pieces. Try not to eat entire batch all at once.

Chocolate Cinnamon Oatmeal Bars

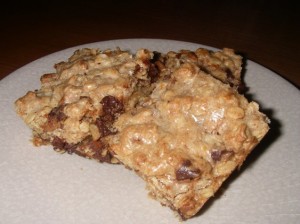
Oops. I realized I made these awhile ago but never got around to posting the recipe. Luckily I remembered to take a picture, so better late than never I suppose.

Anyway, I’m a big fan of repurposing easy recipes, especially when they come out tasting delicious. So when I needed something to throw together for an impromptu neighborhood gathering, I decided to revisit the oatmeal raisin bars I made a little while back. This time, however, I decided to forego the raisins in favor of chocolate and cinnamon chips. The end result? Pure magic in every bite.

oatmealchoccin

Chocolate Cinnamon Oatmeal Bars
Recipe slightly adapted from Martha Stewart

Ingredients:
3/4 cup (1 1/2 sticks) unsalted butter, melted, plus more for pan
3/4 cup packed light-brown sugar
1/4 cup granulated sugar
1 large egg
1/2 teaspoon salt
1/2 teaspoon ground cinnamon
1 cup AP flour
2 cups old-fashioned rolled oats
1/2 cup semisweet chocolate chips
1/2 cup cinnamon chips

Method:
1. Preheat your oven to 350 degrees.
2. Butter an 8×8 square baking pan. Line the bottom with parchment paper, leaving an overhang on two sides, and butter the paper.
3. In a large bowl, whisk together the butter, sugars, egg, salt, and cinnamon until smooth. Add flour, oats, and chips; fold in just until combined.
4. Spread batter in prepared pan, and bake for 25 to 30 minutes, or until an inserted toothpick comes out clean. Cool completely in pan.
5. Once cool, use the parchment paper to lift the bars onto a work surface for cutting.


Oatmeal Chocolate Peanut Butter Bars

We’ve had a bit of a heat wave lately here in New Jersey. And for the record, I knew this was going to happen. See, most years we get at least a little taste of that wonderful season called “spring.” You know, when the sun comes out and the temps are warm enough for you to walk around outside in a t-shirt without being too hot or too cold. Well, this year we basically had cold, often-rainy weather up until a couple of days ago. Then it turned hot. Really hot. I’m talking 85-degree, smog in the air hot. It’s the type of weather where my naturally curly hair doesn’t stand a chance (not that I’m above pulling it back into a bun or slapping a baseball cap on top of my head, but there’s just something about massive, uncontrollable humidity-induced frizz that makes my self-esteem take a bit of a hit) and the simple act of walking down the street is enough to make you reach for a Gatorade.

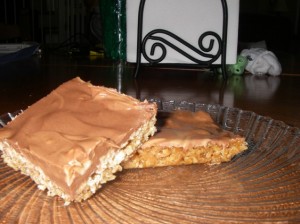
In weather like this, all I ever really want to eat is yogurt, cereal, and ice cream. And the last thing I want to do is slave over a hot stove or even contemplate turning on my oven. But alas, my desire to put something in my stomach other than pure dairy got the better of me, and so I decided to bake up some quick oatmeal bars.

The good thing about this recipe is that it’s just about the easiest thing ever. You don’t need fancy equipment or a ton of ingredients, and your oven stays on for only a short amount of time. While some people might refer to these babies as oatmeal cookie bars, to me, they’re more like candy bars. The only downside to making them smack in the middle of a heat wave is that the tops have a tendency to melt if you’re cheap and stubborn like me and refuse to run your air conditioner (though I eventually caved). In fact, you’ll definitely want to store these in the fridge, no matter the season. But if you like chewy, chocolate peanut butter candy bars, you’ll definitely want to whip up a batch of these. Just be careful offering them up to neighbors, coworkers, and friends—you may be surprised at what little you have left for yourself.

oatmealcandybars

Oatmeal Chocolate Peanut Butter Bars

Ingredients:

For the base:
4 cups of quick-cooking oats
1 cup dark brown sugar
3/4 cup butter, melted
1/2 cup corn syrup

For the topping:
1 cup milk chocolate, chopped (it’s okay to use chocolate chips)
1 cup peanut butter
1/2 cup peanuts, chopped

Method:

For the base:
1. Preheat your oven to 350 degrees. Grease a 9×13 pan and set aside. Using a wooden spoon, combine the oats, brown sugar, butter, and corn syrup.
2. Press the mixture into your prepared pan and bake for 10-12 minutes.
3. Allow the base to cool completely (at least 30 minutes) before adding the topping.

For the topping:
1. Combine the chocolate and peanut butter in a small bowl and melt in the microwave at 50% power for 30-second increments, stirring in between each. Once the mixture is smooth, immediately stir in the peanuts and then use an offset spatula to spread the topping over the base.
2. Place the bars in the fridge to set, at least one hour.
Keep these bars stored in the fridge, not at room temp. They happen to taste really good cold, but if you’d prefer them a little warmer and chewier, just take them out about 15-30 minutes before you want to eat them. I don’t recommend microwaving them to warm them up, as the topping has a tendency to melt quickly.


Chocolate Blackout Cake

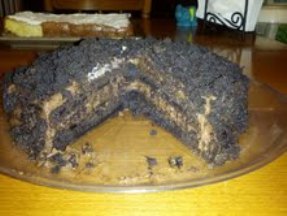
As I mentioned in my previous post, this past weekend was my husband’s birthday, and I went a little crazy and decided to make him two cakes to celebrate the occasion. The first was a yummy tres leches cake, and the second was this insanely, intensely delicious chocolate blackout cake.

To give you the back story (it’s a quick one): Before my husband and I had our baby, we used to actually leave the house for dinner every so often. And when we did, we’d often hit up a local diner that served this awesome chocolate cake. My husband, who’s definitely not a big cake person, would order it and devour it every time. So since it was his birthday, and since it’s been well over a year since we’ve gone out and had that cake, I decided I would try to make something similar.

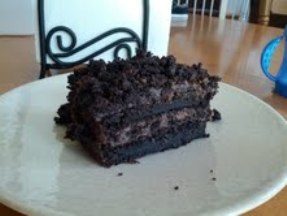
I started searching for a blackout cake recipe online and stumbled across this classic Brooklyn recipe from the famed and long-gone Ebinger’s bakery. Being a Brooklyn girl at heart (I grew up there), I just had to give it a go. And it’s a good thing I did, because I think this is one of the best cakes I’ve ever made. The cake itself is rich and moist, and combined with the chocolate pudding filling, the end result is absolutely amazing. If you’re a chocolate-lover, you must try this cake. And when you do, having a tall glass of milk on hand and is practically a must.

The recipe itself isn’t complicated, but you do need to leave yourself enough time to allow the pudding to set up. I actually made the pudding the day before and left it in the fridge overnight; but if you start early enough, you can definitely pull off this cake in a single day. And if you’re like me and my husband, you can definitely take down half this cake in a single sitting. But you probably shouldn’t. No judgment either way.

blackout

Chocolate Blackout Cake
Original recipe can be found here

Ingredients:

For the cake:
1 stick unsalted butter, plus extra for greasing pans
1 and 1/2 cups AP flour, plus extra for dusting pans
2 tsp baking powder
1/2 tsp baking soda
1/2 tsp salt
3/4 cup cocoa powder
1 cup strong black coffee
1 cup buttermilk
1 cup packed light brown sugar
1 cup granulated sugar
2 large eggs
1 tsp vanilla extract

For the chocolate pudding/filling:
1 and 1/4 cups granulated sugar
1/4 cup cornstarch
1/2 teaspoon salt
2 cups half and half
1 cup whole milk
6 oz unsweetened chocolate, chopped
2 tsp vanilla

Method:

For the cake:
1. Preheat your heat oven to 325 degrees.
2. Butter and flour two 8-inch cake pans, plus a mini loaf tin (you’ll want to have an extra “mini cake” on hand for the crumb topping).
3. Whisk together the flour, baking powder, baking soda, and salt. Set aside.
4. Melt the butter in a large saucepan over medium heat. Stir in the cocoa and cook until fragrant, about 1 minute.
5. Take the mixture off the heat and whisk in your coffee, buttermilk, and sugars until dissolved.
6. Whisk in your eggs and vanilla, and then slowly whisk in the flour mixture.
7. Pour some batter into the mini loaf pan until it’s about half-full. Then divide the remaining batter evenly between your 8-inch pans and bake for 30-35 minutes, or until an inserted toothpick comes out clean.
8. Let the cakes cool in their pans for about 15 minutes and then invert onto a wire rack to cool completely (at least one hour).

For the chocolate pudding/filling:
1. Whisk together your sugar, cornstarch, salt, half and half, and milk in a large saucepan.
2. Set the pan over medium heat. Add the chocolate and whisk constantly until the chocolate melts and the mixture begins to bubble. (The original recipe said this would take 2 to 4 minutes, but I let mine go for about double that time. You want the mixture bubbling pretty consistently; otherwise your pudding may not set up.)
3. Stir in your vanilla and transfer the pudding to large bowl.
4. Place plastic wrap directly on the surface of the pudding and refrigerate until cold, at least 4 hours and up to a full day. The plastic wrap is supposed to prevent a skin from forming. If you get one anyway, just scrape it off.

To assemble the cake:
1. Take the cake from the mini loaf pan and use your hands to crumble it into crumbs. Set aside.
2. Place the first cake layer on a platter and top with pudding. Sprinkle on crumbs.
3. Place the second cake layer on top of the filling and spread your remaining pudding evenly over the top and sides of the cake. Then sprinkle your remaining cake crumbs evenly over the top and sides of the cake, pressing lightly so that the crumbs stick.
4. Store the cake in the refrigerator. The recipe says it’ll keep for two days, but that depends on the speed at which you devour it. Again, no judgment either way.

blackoutslicejpg

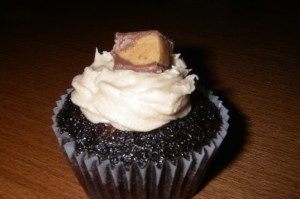
Dark Chocolate Peanut Butter Cupcakes with Peanut Butter Buttercream

I’ve said it before, and I’ll say it again: I just adore chocolate and peanut butter together. Whoever first came up with the idea to marry the two in dessert form deserves some of medal or prize. And since I needed something to bring to a potluck dinner this past weekend, I decided to whip up some super-rich, ultra-decadent chocolate peanut butter cupcakes.

Now let me warn you: These cupcakes aren’t for the faint of heart. There’s a lot of chocolate and a lot of peanut butter in there, which means these babies are in no way, shape, or form even remotely healthy. But they’re so delicious it almost doesn’t (shouldn’t) bother you.

Putting these cupcakes together takes a bit of time—time I really didn’t have but managed to come up with in the form of foregone sleep. (Again, worth it. ) Each of the steps involved is fairly easy, but the batter can be a bit tricky to work with (see below), and of course it just plain takes time to individually frost 24 cupcakes. (It takes even longer when you keep stopping to sample the frosting while refilling your piping bag.) But the end result is a pretty, indulgent treat that’s the perfect reward for all that hard work.

chocpbcup

Dark Chocolate Peanut Butter Cupcakes with Peanut Butter Buttercream
Cupcake recipe slightly adapted from Alida’s Kitchen

Ingredients:

For the cake:
2 cups granulated sugar
1 3/4 cups AP flour
1/2 cup unsweetened dark cocoa powder (I used Hershey’s Special Dark)
1 1/2 teaspoons baking powder
1 teaspoon salt
1/4 teaspoon baking soda
2 eggs
1 cup water
1 cup skim milk
1/2 cup canola oil
2 teaspoons vanilla extract

For the filling:
6 ounces cream cheese, at room temperature (the original recipe offers a lighter option, but I decided to go all in)
1/2 cup peanut butter
1/4 cup granulated sugar
2 tablespoons whole milk (the original recipe calls for skim, and I’m sure that would be fine as well)

For the frosting:
1 and 1/2 sticks of butter, at room temperature
3/4 cup peanut butter
2 and 3/4 cup confectioners sugar
1 tablespoon milk (I used whole)

Method:

To make the cake:
1. Preheat your oven to 350 degrees. Line 24 muffin cups with liners and set aside.
2. In a large bowl, whisk together the sugar, flour, cocoa, baking powder, salt, and baking soda.
3. In a separate bowl, whisk the eggs, water, milk, oil, and vanilla. Fold the wet imxture into the dry ingredients until just moistened. Note that the batter will be pretty thin.
4. Fill prepared muffin cups halfway with batter and set remaining batter aside.

To make the filling:
1. Using a hand or stand mixer, beat the cream cheese, peanut butter, sugar, and milk until combined. Divide the filling evenly amongst the 24 cups, dropping a spoonful of filling in the center of each.
2. Cover each cup with the remaining chocolate batter.
3. Bake for 25 minutes, or until a toothpick inserted into the cake comes out clean.
4. Cool for 10 minutes in the pan; then move the cupcakes to a wire rack to cool completely before adding the frosting.

To make the frosting:
1. In the bowl of your stand mixer, beat the butter and peanut butter together on medium speed until the mixture gets nice and smooth.
2. Add the confectioners sugar and beat on low for about one minute. Scrape down the sides of the bowl as necessary.
3. Add the tablespoon of milk and beat on medium for about another minute. If needed, add a little more confectioners sugar if you want your frosting to be thicker.
4. Use a spatula or piping bag to top your cupcakes once cooled.
5. Garnish with chopped miniature peanut butter cups if desired.

A few notes:
1. As mentioned above, the chocolate cupcake batter is pretty thin, which makes getting it cleanly into your muffin cups a bit of a challenge. I suggest using a batter/ice cream scoop but having a teaspoon ready underneath to catch stray drips.
2. I don’t tend to like tons of frosting on my cupcakes, and since these cupcakes are quite rich to begin with, I found that a small amount worked perfectly. But if you’re the type to pile on the frosting (and there’d be nothing wrong with that), you’ll probably want to make one and a half times the amount referenced above.


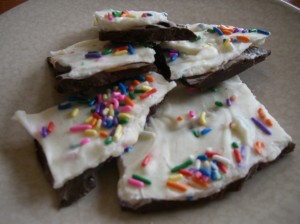
Funfetti Cake Batter Bark

When it comes to candy, I’m a total kid at heart. Sure, I can indulge in a box of sophisticated truffles. But sometimes I like my candy to be bright and fun. Case in point: cake batter bark. I was in the mood for something different and decided to whip up a batch of fun, sprinkle-infused candy.

This stuff is sweet and tasty, and it’s incredibly easy to make. The bad news is that it’s also incredibly easy to eat…

cakebatter

Funfetti Cake Batter Bark

Ingredients:

12 ounces semisweet chocolate
12 ounces white chocolate
3 teaspoons Funfetti cake mix
¼ cup rainbow sprinkles, plus more for topping

Method:

1. Line a baking sheet with parchment paper and set aside.
2. Melt the semisweet chocolate in the microwave at 50% power for 30-second intervals, stirring in between. Once melted, pour the chocolate onto the prepared baking sheet. Refrigerate until set (approximately one hour).
3. Once the semisweet chocolate has hardened, melt the white chocolate using the same method in the step above. Once melted, stir in the cake mix and ¼ cup rainbow sprinkles until well-combined.
4. Pour the white chocolate mixture over the semisweet chocolate. Use an offset spatula to spread the mixture evenly (or, if you don’t have one or get lazy, just use the back of a regular spoon).
5. Scatter additional sprinkles over the white chocolate layer as desired.
6. Return to fridge and let set for at least an hour before breaking up into individual pieces.

Samoa Bars

It’s been awhile since I’ve posted a recipe. That’s what happens when life gets in the way of baking. But this is a good one, promise.

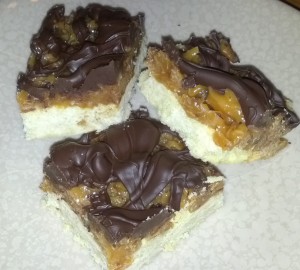
Ever since my Girls Scouts cookies were delivered back in March, I’ve been indulging on a pretty much regular basis. But this year, I decided to be conservative and only order one box of Samoas—my favorite. So when it came to my attention that I was starting to run out of my beloved Samoas, I decided to take matters into my own hands by whipping up some homemade Samoa cookie bars.

I’ve seen a few different recipes for these bars, some of which involve dipping the bottoms in chocolate. Since I didn’t have a ton of time, I opted to skip that step and instead just drizzle chocolate on top of the bars—a little less Samoa-like, but delicious nonetheless.

Although this recipe is incredibly simple, there are several steps involved, and you need to wait for each layer to cool/set before moving on to the next. But as long as you leave yourself enough time, you should have no problem throwing these together over the course of an afternoon.

Samoabars

Samoa Bars
Recipe from Baking Bites

Ingredients:

For the shortbread cookie base:
1/2 cup sugar
3/4 cup butter, softened
1 large egg
1/2 tsp vanilla
2 cups Ap flour
1/4 tsp salt

For the topping:
3 cups shredded sweetened coconut
12 oz chewy caramels (I used Kraft)
1/4 tsp salt
3 tbsp milk (I used whole)
10 oz semisweet chocolate

Method:

To make the shortbread cookie base:
1. Preheat your oven to 350 degrees. Lightly grease a 9×13-inch baking pan, or line with parchment paper.
2. Cream together sugar and butter until fluffy.
3. Beat in egg and vanilla extract.
4. Gradually beat in flour and salt at low speed until mixture is crumbly.
5. Pour crumbly dough into prepared pan and press into an even layer.
6. Bake for 20-25 minutes, until base is set and edges are lightly browned.
7. Cool completely on a wire rack before adding the topping.

To make the topping:
1. Preheat your oven to 300 degrees.
2. Spread the coconut evenly on a parchment-lined baking sheet and toast for about 20 minutes, stirring every few minutes, until coconut is golden. Let cool and set aside.
3. Unwrap your caramels and place them in a microwave-safe bowl along with the milk and salt. Cook on high for about 3-4 minutes, stopping to stir a few times to help the caramel melt evenly. Once smooth, fold in toasted coconut with a spatula.
4. Pour dollops of the coconut-caramel topping over the cooled shortbread base. Using your spatula, spread the topping into an even layer.
5. Let topping set at room temperature until cooled, about 1 hour.
6. Melt your chocolate – I used the microwave method. Place chocolate in a microwave-safe bowl and cook on 50% power in 30-45 second intervals, stirring in between.
7. Once melted, drizzle chocolate over the tops of the bars (it won’t cover them completely).
8. Let the chocolate topping set before cutting the bars, either 2 hours at room temperature or 1 hour in the fridge. Once cooled, use a sharp knife to cut into individual bars.

Chocolate Roll Cake, a/k/a Giant Yodel Cake

I have a confession to make: I’m a sucker for processed, packaged baked goods. Sure, I’ve made my fair share of delicious cakes, pies, brownies, and more. But there’s just something about classic store-bought snack cakes that really takes me back to my childhood and makes me, on occasion, want to forego a baking session in favor of buying treats that are premade.

Growing up, one of my favorite packaged snack cakes was none other than the Yodel. But when I found myself craving one the other day, I discovered, much to my disappointment, that apparently they’re no longer in production. I was bummed, but not ready to give up. And I think you all know where this is going.

I decided to attempt my own version of Yodels, but in the form of a cake. Part of this was done out of laziness—I figured it would be easier to glaze a single cake than have to deal with glazing a bunch of smaller ones. But also, I thought it would be kind of cool to create a giant Yodel. And since I found a recipe for a chocolate roll cake online that seemed to be just what I was looking for, I decided to go for the cake.

Now before we go any further, I do have to tell you: This cake wasn’t so easy. In fact, the first version of this cake is sitting in my freezer in scraps until I figure out what to do with it. (Cake ball truffles, maybe?) The reason? I didn’t follow instructions and decided to roll it initially without using a kitchen towel. Why? I don’t know. The idea of rolling a cake in a kitchen towel seemed strange and unappealing. But it was a mistake not to do it, because when I tried it the second time around, it was much easier. So, lesson learned (though I suppose there are worse things than having extra chocolate cake lying around).

I’ll also say that even after having used the towel method, I still found this cake fairly tricky to re-roll once I added the filling. I was convinced that the darn thing was going to break on me, but somehow, it didn’t. And once I made it to the ganache stage, I knew I had a winner.

Now I’m sure you’re wondering: Did this cake end up tasting like a Yodel? It’s hard to say. I don’t think I’ve had a Yodel in well over a decade at least. But what I will say is that it turned out absolutely delicious. The chocolate cake was perfectly moist, the whipped cream filling was far tastier and fresher than I remember the classic filling being, and the chocolate ganache was utterly divine. In fact, I can say with relative confidence that my version wound up tasting far better than any mass-produced chocolate roll cake you’d find in a box…though if any of you out there know of a way to get your hands on some classic Yodels, I’d be super grateful if you could hook me up.
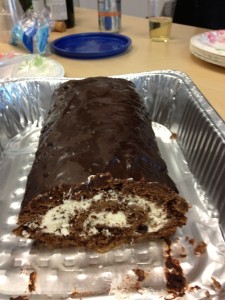
yodel

Chocolate Roll Cake, a/k/a Giant Yodel Cake
Recipe from Serious Eats

Ingredients:

For the cake:
1 cup AP flour
1/4 cup unsweetened cocoa powder
2 teaspoons baking powder
4 ounces of bittersweet chocolate, finely chopped
1 stick of unsalted butter
3/4 cup granulated sugar
4 large eggs
1/4 teaspoon salt
1/3 cup hot water

For the whipped cream filling:
1 and 1/2 cups heavy cream
2 tablespoons granulated sugar
1 and 1/2 teaspoons vanilla extract (the original recipe called for only 1, but I wanted a bit more of a vanilla flavor)

For the ganache:
4 ounces bittersweet chocolate, finely chopped
1/2 cup heavy cream

Method:

1. Preheat your oven to 350 degrees. Line a 10×15 jelly roll pan with parchment paper.
2. Sift flour, cocoa, and baking powder into a small bowl; set aside.
3. Place the chocolate and butter in a microwave-safe bowl and microwave in 15-second increments, stopping to stir with a rubber spatula until the mixture is completely melted and smooth. Set aside to cool slightly.
4. Using a stand mixer, whip the sugar with the eggs and salt on medium-high speed until the mixture is light and thick (about 5 minutes).
5. Fold in the chocolate mixture with a rubber spatula. Then, fold in the flour mixture and then water until just-combined.
6. Spread the batter into your prepared pan and bake the cake for 10-15 minutes, or until just-firm.
7. Let the cake cool for about 10 minutes; then run a knife along the pan edge to loosen it.
8. Place a clean kitchen towel over the cake. Starting with the short end, carefully roll the cake up with the towel (with the parchment paper attached).
9. Let the cake cool until just-cooled (anywhere from 20-40 minutes should do the trick, but keep checking the cake – you don’t want to leave it for too long). While the cake is cooling, make the filling.
10. Using a stand mixer, whip the cream with the sugar and vanilla on medium-high speed until the mixture can hold medium peaks. (Try not to keep sneaking little tastes of the whipped cream as you wait for the cake to cool…)
11. Once the cake is cool, gently unroll it, removing the towel but leaving the very end rolled to ensure a good grip.
12. Spread the cream over the exposed surface of cake.
13. Carefully re-roll cake into a log, removing the parchment paper as you go along.
14. Wrap the cake tightly with plastic wrap to retain its log shape as you prepare the ganache.
15. In a heat-proof bowl, heat the chocolate with the cream, stirring frequently, until the chocolate is melted and the mixture is smooth. I used a microwave at 50% power to do this.
16. Chill the ganache until thickened slightly, about 10 minutes.
17. Remove the plastic wrap from the cake and place the cake on wire rack set over a rimmed baking sheet. Spoon the ganache over the cake.
18. Using an off-set spatula, smooth the ganache over the sides and ends of the cake.
19. Place the cake in the fridge to allow the ganache to set for at least an hour. Store the cake in the fridge and serve within a day or two for optimal freshness.

 

Chocolate Guinness Cake

I’ve slowed down a little on the baking front lately, mostly because life and its various priorities have gotten in the way. But in honor of my brother-in-law’s birthday, which happens to be St. Patrick’s Day, I had to squeeze in a quick baking session to whip up a deliciously moist chocolate cake. I decided to try something I’ve wanted to do for awhile: Make a chocolate cake with stout. I chose to use Guinness since we already had some in the house, and I have to say, the cake turned out wonderful. It was incredibly rich and moist, and although you could taste a hint of the Guinness in it, it wasn’t overly strong.

I topped my cake off with a cream cheese frosting, but you could easily swap that for a simple chocolate glaze, confectioners sugar, or nothing at all. The best part? This cake took practically no time to make…or eat, which is a testament to how good it is.

IMGP1737

Chocolate Guinness Cake
Cake recipe from A Whisk and a Spoon

Ingredients:

For the cake:
1 and 1/2 cups AP flour
1 cup granulated sugar
7 tablespoons unsweetened cocoa powder (I used 3 regular and 4 dark)
1/2 teaspoon baking soda
1/2 teaspoon salt
1/2 cup Guinness (or other stout of your choice)
1/2 cup espresso or strong coffee
1/4 cup water
2 teaspoons vanilla
1 teaspoon apple cider or white vinegar
1/2 cup vegetable oil

For the frosting:
1 stick of butter at room temperate
8 oz cream cheese at room temperature
2 cups confectioners sugar
1 teaspoon vanilla extract

Method:

For the cake:
1. Preheat your oven to 350 degrees. Grease an 8-inch cake pan with cooking spray, then line with parchment and lightly spray the parchment.
2. Whisk together the flour, sugar, cocoa, baking soda, and salt in a medium bowl.
3. In a measuring cup, mix together your stout, coffee, water, vanilla and vinegar. Stir gently into the flour mixture.
4. Add oil and stir gently until you have a smooth batter.
5. Pour the batter into your prepared pan and bake for 30-35 minutes, or until an inserted toothpick comes out clean.
6. Let the cake cool on a rack before peeling off the parchment paper. Top with frosting, glaze, or confectioners sugar. Or, just let this fudgy masterpiece stand on its own.

For the frosting:
1. Using an electric mixer, beat the butter and cream cheese until smooth (about 3 minutes at medium speed).
2. Add the vanilla and then the confectioners sugar; mix on low-medium speed until well-combined. Depending on how thick you want your frosting, you may want to add extra confectioners sugar by the tablespoon to reach your desired consistency.


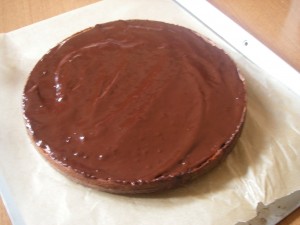
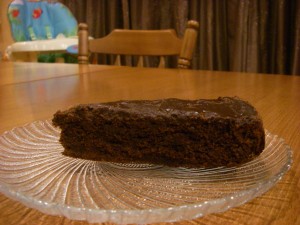
Almost-Fudge Gateau

I’m definitely much more of a vanilla person than a chocolate person. Take me to a bakery, and I’ll almost always order a vanilla cake or something vanilla-based. And when it comes to ice cream, I’m a vanilla girl all the way. But sometimes, depending on my mood, my hormones (yeah, I went there), or the season, I find myself suddenly craving chocolate. And when I do, it’s gotta be a rich, dense, full-on chocolate assault. So when my latest chocolate urge crept up on me out of nowhere, I decided it was time to try a recipe I had bookmarked some time ago.

A lot of food bloggers have tried this fudge cake recipe and raved about it. It’s from the famous Baking: From My Home to Yours cookbook by Dorie Greenspan, which I actually don’t have but need to get my hands on.

The great thing about this cake is that it’s not super complicated but incredibly decadent. The “almost-fudge” description is pretty accurate, only whereas classic fudge can take sweetness to an insane level, this cake strikes the perfect balance of intense chocolate flavor without that cloying sweetness factor. If you’re craving chocolate, this cake will definitely hit the spot. And if you have guests coming over, you’ll be sure to impress them by whipping it up. I ate a giant piece with a touch of whipped cream and a small scoop of vanilla ice cream on the side—because even when I need my chocolate, I’m still a vanilla girl at heart.

IMGP1613

Almost-Fudge Gateau

Recipe can also be found here

Ingredients:

For the cake:
5 large eggs
9 ounces of bittersweet chocolate, coarsely chopped
1 cup of granulated sugar
5 tablespoons unsalted butter, cut into chunks
2 tablespoons coffee or water
1/3 cup AP flour
Pinch of salt

For the glaze:
4 ounces of bittersweet chocolate, coarsely chopped
1/2 cup heavy cream
2 teaspoons light corn syrup

Method:

For the cake:
1. Preheat your oven to 350 degrees. Butter a 9-inch springform pan, line the bottom with parchment paper, butter the paper, dust the inside of the pan with flour, and tap out the excess. Place the pan on a baking sheet lined with parchment paper or a silicone mat.
2. Separate the eggs.
3. Set a heatproof bowl over a saucepan of simmering water and add the chocolate, sugar, butter, and coffee. Stir occasionally until the chocolate and butter are melted; the sugar may still be grainy, and that’s okay. Transfer the bowl to the counter and let the mixture sit for a few minutes.
4. Using a rubber spatula, stir in the egg yolks one by one, then fold in the flour.
5. Working with the whisk attachment of a stand mixer (or, if you don’t have one, a hand mixer will have to do), beat the egg whites with the pinch of salt until they hold firm, glossy peaks.
6. Use a spatula to stir about a quarter of the beaten egg whites into the batter; then gently fold in the rest.
7. Pour the batter into your prepared pan and gently jiggle the pan from side to side a couple of times to even it out.
8. Bake for 35 to 45 minutes, or until the cake has risen evenly (it may rise around the edges and you’ll think it’s done, but give it a few minutes more, and the center will puff too) and the top has firmed (it will probably be cracked); a thin knife inserted into the center should come out just slightly streaked with chocolate.
9. Transfer the pan to a cooling rack and let the cake rest for 5 to 10 minutes.
10. Run a knife gently around the edges of the cake and remove the sides of the pan. Carefully turn the cake over onto a rack and remove the pan bottom and the parchment paper. Invert the cake onto another rack and cool to room temperature right side up. Warning: The cake may sink a bit as it cools. Don’t worry if it does.

For the glaze:
1. Place your chocolate in a small heatproof bowl and melt over a pan of simmering water or in your microwave. The chocolate should be just-melted and not too hot.
2. Meanwhile, bring the cream to a boil in a small saucepan. Pour the hot cream over the chocolate and stir very gently with a rubber spatula until the mixture is smooth and shiny.
3. Stir in the corn syrup and let the glaze sit for a few minutes.
4. Gently place the cake on a wax paper-lined baking sheet, or on a wire rack with wax paper underneath. This will prevent excess glaze from getting all over your kitchen counter or work surface.
5. Pour the glaze over the cake and smooth the top. It’s easiest to do this using a long metal icing spatula.
6. Allow the glaze to set at room temperature or, if you’re impatient, you can stick the cake into the refrigerator for about 20 minutes. I let mine set for a couple of hours on the counter, and it was perfect.

IMGP1615