Peanut Butter Blondies With Reese’s Pieces

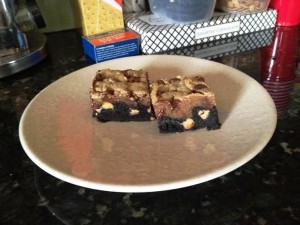
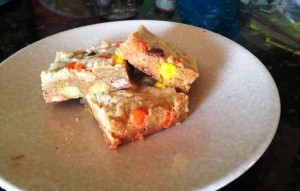
Sometimes you have days where you’ve just got to have peanut butter. There’s no question about it. Yesterday was one of those days. After being cooped up during yet another snowstorm, I needed some peanut butter in my life, pronto. Enter these blondies. They’re only slightly different from the ones I made a few months back, but I like the playful color the Reese’s Pieces bring to the mix. Also, the candy coating from the Reese’s adds some crunch to an otherwise soft, chewy, and delicious blondie bar. If you’re craving peanut butter and stuck indoors, be kind to yourself and make a batch of these.

Reesesjpg

Peanut Butter Blondies With Reese’s Pieces

Ingredients:

1/4 cup (1/2 stick) butter, melted and cooled to room temp
1/4 cup peanut butter (smooth or chunky)
1/2 cup light brown sugar
1/2 cup granulated sugar
1 egg
1 tsp vanilla
1 cup AP flour
1/2 tsp salt
1 and 1/2 cups Reese’s Pieces

Method:

  1. Preheat your oven to 350 degrees. Grease an 8×8 baking pan and set aside.
  2. In a medium bowl, whisk together the melted butter, peanut butter, and sugars until well-combined.
  3. Beat in the egg (you can use a whisk or a fork for this) and vanilla; mix until well-incorporated.
  4. Stir in the flour and salt, mixing well.
  5. Stir in the Reese’s Pieces.
  6. Pour your batter into the prepared pan and bake for 22-25 minutes, or until an inserted toothpick comes out clean.
  7. Let the blondies cool in the pan (at least one hour) before slicing and serving.

Double Layer Chocolate Peanut Butter Brownies

Warning: If you don’t enjoy crazy, indulgent treats, stay away from these brownies. They really are kind of insane. But in a very good way.

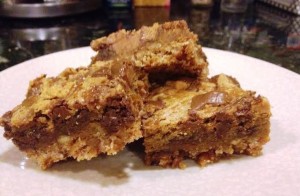
I was craving that chocolate-peanut butter combo but couldn’t decide whether to go for a brownie with peanut butter chips or a peanut butter blondie with chocolate chips. And then I thought, hey, why not combine the two? And that’s how these brownies were born. The bottom layer is a rich, dark chocolate brownie with peanut butter in the base and peanut butter chips generously intermingled, while the top layer is a moist peanut butter blondie studded with semisweet chocolate chips.

Although these brownies do essentially mean making two recipes in one, each batter is really quick and easy to throw together, and the end result is pretty impressive. So even if you’re short on time, if you’re craving chocolate and peanut butter and want something truly over-the-top, go ahead and make a batch of these.

crazybrownies

Double Layer Chocolate Peanut Butter Brownies

Ingredients:

For the brownie layer:

1 stick of butter, melted
1/2 cup granulated sugar
1/2 cup dark brown sugar
1/2 cup smooth peanut butter
1 large egg
1 tsp vanilla
1 cup AP flour
1/4 tsp salt
1/2 cup dark cocoa powder (I used Hershey’s Special Dark)
2 ounces bittersweet chocolate, melted and cooled slightly
3/4 cup peanut butter chips

For the peanut butter blondie layer:

1/4 cup (1/2 stick) butter, melted and cooled to room temp
1/4 cup smooth peanut butter
1/2 cup dark brown sugar
1/2 cup granulated sugar
1 egg
1 tsp vanilla
1 cup AP flour
1/2 tsp salt
3/4 cup semisweet chocolate chips

Method:

For the brownie layer:

  1. Preheat your oven to 350 degrees. Grease an 8×8 baking pan and set aside. (You can also use a 9×9 pan – your brownies won’t be quite as tall, but that’s okay.)
  2. In a large bowl, whisk together the butter, sugars, egg, and vanilla. Stir in peanut butter and melted chocolate, then set aside.
  3. In a small bowl, combine the flour, salt, and cocoa powder.
  4. Mix the dry ingredients into the wet until well-combined.
  5. Stir in the peanut butter chips.
  6. Pour the batter into your prepared pan, using an offset spatula to smooth out the top.

For the peanut butter blondie layer:

  1. In a medium bowl, whisk together the butter, peanut butter, and sugars.
  2. Beat in the egg and vanilla until well-incorporated (you can do this with a whisk or even a fork).
  3. Stir in the flour and salt, mixing well.
  4. Stir in the chocolate chips.
  5. Using a offset spatula, spread the peanut butter blondie layer over the brownie layer.
  6. Bake for 35-40 minutes, or until an inserted toothpick comes out clean, or with only a few moist crumbs.
  7. Let the brownies cool in the pan before cutting and slicing. I recommend holding out two hours if you can, but make sure to leave these for at least a solid hour to set up.

Pretzel-Crusted Chocolate-Peanut Butter-Caramel Blondies

Wow, that’s a mouthful. No pun intended. The great thing about blondies is that they can be pretty simple. Or not, like these bars. Want to know what inspired these? I was sort of looking for a way to emulate the taste of Chubby Hubby, one of my favorite Ben & Jerry’s ice cream flavors, in blondie form, and this is what I came up with.

These bars are pretty outrageous. You’ve got a sweet and salty pretzel crust on the bottom, a rich caramel-peanut butter blondie center packed with chocolate chips in the middle, and a generous layer of chopped peanut butter cups to top it all off. In other words, these bars are really rich. But really, really good.

Chubhub

Pretzel-Crusted Chocolate-Peanut Butter Caramel Blondies

Ingredients:

For the crust:

2 cups crushed pretzels
1/2 cup (1 stick) melted butter
1/2 cup dark brown sugar

For the blondie layer:

1/2 cup (1 stick) unsalted butter, melted and cooled to room temp
1 cup light brown sugar
1 large egg
2 tsp vanilla
1 cup AP flour
1/4 tsp salt
1/2 cup smooth peanut butter
3/4 cup semisweet chocolate chips
1/2 cup caramel sauce (store-bought is fine, or make your own by melting about 12 Kraft caramel candies with a tablespoo of heavy cream)
1 cup chopped peanut butter cups, for topping

Method:

  1. Preheat your oven to 350 degrees. Grease a 9×9 baking pan and set aside.
  2. Make the crust by combining the pretzels, melted butter, and brown sugar in a small bowl and mixing well. Press the crust into the bottom of your prepared pan and bake for 10 minutes. Remove from oven and set aside.
  3. In a medium bowl, whisk together the melted butter, brown sugar, peanut butter, and egg. Stir in the vanilla.
  4. In a separate bowl, combine the flour and salt.
  5. Stir the dry ingredients into the wet until well-combined. Then, stir in the caramel sauce and chocolate chips.
  6. Pour the batter on top of the crust. Sprinkle the chopped peanut butter cups on top of the blondie layer.
  7. Bake for 30-35 minutes, or until an inserted toothpick comes out clean. Let the blondies cool in the pan (at least one hour) before slicing and serving.

Chocolate Chunky Peanut Butter Brownies

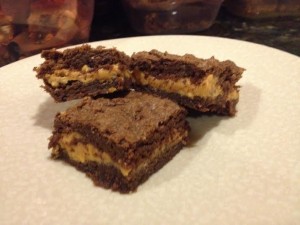
I just love me a good brownie. And I also happen to be a big fan of the whole chocolate-peanut butter combo. So basically, if you’re me, these brownies are a very good thing. They feature a rich, fudgy chocolate-peanut butter base with a chunky peanut butter filling. Talk about yum.

Incidentally, my work schedule recently changed (read: got more demanding) and so I haven’t been posting (or baking, for that matter) quite as regularly as I normally would. I wonder if this new schedule will have a positive effect on both my wallet and waistline…guess we’ll have to see what happens.

chunkypb

Chocolate Chunky Peanut Butter Brownies

Ingredients:

1 stick of butter, melted
1/2 cup granulated sugar
1/2 cup dark brown sugar
1 large egg
1 tsp vanilla
1 cup AP flour
1/4 tsp salt
1/2 cup cocoa powder
1/2 cup smooth peanut butter
3/4 cup chunky peanut butter

Method:

  1. Preheat your oven to 350 degrees. Grease an 8×8 baking pan and set aside.
  2. In a large bowl, whisk together the butter, sugars, egg, smooth peanut butter, and vanilla. Set aside.
  3. In a small bowl, combine the flour, salt, and cocoa powder.
  4. Mix the dry ingredients into the wet until well-combined.
  5. Pour half of the batter into your prepared pan.
  6. Spread the chunky peanut butter on top of the base layer using either the greased back of a spoon or an offset spatula.
  7. Spread the remaining brownie batter on top.
  8. Bake for 30 minutes, or until an inserted toothpick comes out clean. Let the brownies cool in the pan for at least an hour before slicing and serving.

Peanut Butter Blondies

Sometimes I just really find myself in the mood for peanut butter. Does that ever happen to you? And when I find myself craving peanut butter, it’s like there’s nothing else in the world that could possibly take its place.

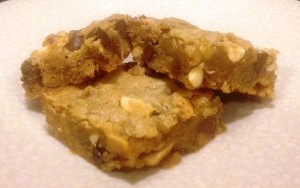
I had one of these cravings sneak up on me the other day, and so I decided to whip up some easy peanut butter blondies. This recipe can be thrown together really quickly, and it’s one of those that you can seamlessly double to feed a larger crowd. I love the contrast of the crunchy peanuts and chocolate chips against the perfectly soft blondie base. And while milk chocolate chips worked great in the batch I made, next time I may go for dark chocolate for a slightly different taste. And yes, there will have to be a next time. These blondies are just that good.

pbblondies

Peanut Butter Blondies

Ingredients:
1/4 cup (1/2 stick) butter, melted and cooled to room temp
1/4 cup peanut butter (I used smooth but chunky will work as well)
1 cup light brown sugar
1 egg
1 tsp vanilla
1 cup AP flour
1/2 tsp salt
1/2 cup peanuts (I used roasted), chopped
1/2 cup milk chocolate chips
1/2 cup peanut butter chips

Method:

  1. Preheat your oven to 350 degrees. Grease an 8×8 baking pan and set aside.
  2. In a medium bowl, whisk together the melted butter, peanut butter, and brown sugar until well-combined.
  3. Beat in the egg (you can use a whisk or a fork for this) and vanilla; mix until well-incorporated.
  4. Stir in the flour and salt, mixing well.
  5. Stir in the peanuts, milk chocolate chips, and peanut butter chips.
  6. Pour your batter into the prepared pan and bake for 22-25 minutes, or until an inserted toothpick comes out clean. Try to be careful not to overbake these – you want them nice and soft.
  7. Let the blondies cool in the pan (at least one hour) before slicing and serving.

Monster Cookie Bars

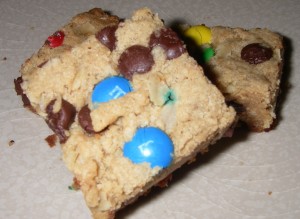
I’ve been on a pretty big pumpkin and apple kick lately, so I was surprised to find myself craving something peanut buttery the other day. Fortunately, these monster bars did the trick, and they gave me an excuse to finally use up the open bag of M&Ms that was sitting around taking up space in my pantry.

These bars are really easy to make, and because they’re so colorful and fun-looking, they’re a great thing to bring to parties or potlucks. They also freeze pretty well, so if you’re not like me and can’t finish an entire pan in a few days’ time, storing them that way is also an option.

monsterbars

Monster Cookie Bars

Recipe from The Baker Mama

Ingredients:

1 and 1/2 cups AP flour
1 teaspoon baking soda
1 teaspoon salt
1/2 cup (1 stick) unsalted butter, softened
1 and 1/2 cups peanut butter
1 cup light brown sugar
1 cup granulated sugar
2 teaspoons vanilla extract
2 eggs
1 cup rolled oats (the old-fashioned kind, not the quick kind)
1 cup semisweet chocolate chips
1 cup M&Ms

Method:

  1. Preheat your oven to 350. Grease a 13×9 baking pan and set aside.
  2. In a medium bowl, whisk together the flour, baking soda, and salt.
  3. In a separate bowl, beat the butter and peanut butter until smooth.
  4. Add the sugars and beat until well-blended.
  5. Add the vanilla and eggs and mix until light and fluffy.
  6. Gradually incorporate the flour mixture into the wet mixture until just combined.
  7. Mix in the oats until well-combined.
  8. Stir in the chocolate chips and M&Ms.
  9. Press the dough into your prepared pan and bake for 30 minutes, or until an inserted toothpick comes out clean. Let the bars cool in the pan for an hour or so before slicing and serving.

When stored in an airtight container, these bars should keep for a good 4-5 days. Or, as mentioned above, you can easily freeze your leftovers.

Crazy Bark

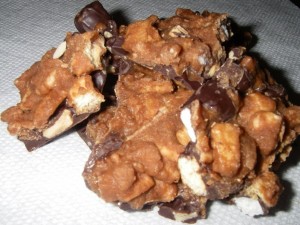
Sometimes I like to get a little nutty in the kitchen, especially when said nuttiness can be achieved without investing a significant amount of time. I invented this concoction awhile back and decided to whip up a batch recently. I call it Crazy Bark, ‘cause, well, it’s a little insane.

How do I describe what this is? In a nutshell, it’s like a s’more and a peanut chew collided to make one supremely indulgent concoction. I mean, take a look at the ingredients. You’ve got chocolate and peanut butter. You’ve got caramel. You’ve got graham crackers and marshmallows. What more could you ask for?

crazybrk

Crazy Bark

Ingredients:

For the bottom layer:
1 cup semisweet chocolate, chopped
1/2 cup dark chocolate
1/3 cup lightly salted peanuts
1/4 cup peanut butter
1/3 cup chopped marshmallows (not mini marshmallows—you want smaller pieces here)
1 graham cracker, chopped

For the top layer:
1/2 cup caramel chips (if you can’t find these, feel free to use butterscotch or peanut butter chips instead; or, just double the amount of caramel and milk indicated below)
6-8 Kraft caramels, unwrapped
1 tbsp whole milk (you can use another type of milk if you don’t typically have whole milk on hand)
1/3 cup chopped marshmallows
1/3 cup chopped graham crackers

Method:

1. Line a baking sheet with parchment paper and set aside.
2. Melt the semisweet chocolate, dark chocolate, and peanut butter in the microwave on 50% power at 30-second intervals, stirring in between. Once melted, stir in the peanuts, marshmallows, and graham cracker. Pour the mixture into your prepared baking sheet and refrigerate until set (1-2 hours).
3. Once the bottom layer has set, combine the caramel chips, caramels, and milk in a bowl and melt the mixture in the microwave. Once melted, stir in the marshmallows and graham crackers. Pour the mixture over the bottom layer and return to the fridge to set (another 1-2 hours).
4. Once the bark has set, use a sharp knife (or your hands) to break into pieces. Try not to eat entire batch all at once.

Oatmeal Chocolate Peanut Butter Bars

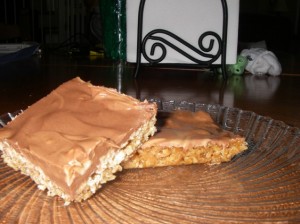
We’ve had a bit of a heat wave lately here in New Jersey. And for the record, I knew this was going to happen. See, most years we get at least a little taste of that wonderful season called “spring.” You know, when the sun comes out and the temps are warm enough for you to walk around outside in a t-shirt without being too hot or too cold. Well, this year we basically had cold, often-rainy weather up until a couple of days ago. Then it turned hot. Really hot. I’m talking 85-degree, smog in the air hot. It’s the type of weather where my naturally curly hair doesn’t stand a chance (not that I’m above pulling it back into a bun or slapping a baseball cap on top of my head, but there’s just something about massive, uncontrollable humidity-induced frizz that makes my self-esteem take a bit of a hit) and the simple act of walking down the street is enough to make you reach for a Gatorade.

In weather like this, all I ever really want to eat is yogurt, cereal, and ice cream. And the last thing I want to do is slave over a hot stove or even contemplate turning on my oven. But alas, my desire to put something in my stomach other than pure dairy got the better of me, and so I decided to bake up some quick oatmeal bars.

The good thing about this recipe is that it’s just about the easiest thing ever. You don’t need fancy equipment or a ton of ingredients, and your oven stays on for only a short amount of time. While some people might refer to these babies as oatmeal cookie bars, to me, they’re more like candy bars. The only downside to making them smack in the middle of a heat wave is that the tops have a tendency to melt if you’re cheap and stubborn like me and refuse to run your air conditioner (though I eventually caved). In fact, you’ll definitely want to store these in the fridge, no matter the season. But if you like chewy, chocolate peanut butter candy bars, you’ll definitely want to whip up a batch of these. Just be careful offering them up to neighbors, coworkers, and friends—you may be surprised at what little you have left for yourself.

oatmealcandybars

Oatmeal Chocolate Peanut Butter Bars

Ingredients:

For the base:
4 cups of quick-cooking oats
1 cup dark brown sugar
3/4 cup butter, melted
1/2 cup corn syrup

For the topping:
1 cup milk chocolate, chopped (it’s okay to use chocolate chips)
1 cup peanut butter
1/2 cup peanuts, chopped

Method:

For the base:
1. Preheat your oven to 350 degrees. Grease a 9×13 pan and set aside. Using a wooden spoon, combine the oats, brown sugar, butter, and corn syrup.
2. Press the mixture into your prepared pan and bake for 10-12 minutes.
3. Allow the base to cool completely (at least 30 minutes) before adding the topping.

For the topping:
1. Combine the chocolate and peanut butter in a small bowl and melt in the microwave at 50% power for 30-second increments, stirring in between each. Once the mixture is smooth, immediately stir in the peanuts and then use an offset spatula to spread the topping over the base.
2. Place the bars in the fridge to set, at least one hour.
Keep these bars stored in the fridge, not at room temp. They happen to taste really good cold, but if you’d prefer them a little warmer and chewier, just take them out about 15-30 minutes before you want to eat them. I don’t recommend microwaving them to warm them up, as the topping has a tendency to melt quickly.


Dark Chocolate Peanut Butter Cupcakes with Peanut Butter Buttercream

I’ve said it before, and I’ll say it again: I just adore chocolate and peanut butter together. Whoever first came up with the idea to marry the two in dessert form deserves some of medal or prize. And since I needed something to bring to a potluck dinner this past weekend, I decided to whip up some super-rich, ultra-decadent chocolate peanut butter cupcakes.

Now let me warn you: These cupcakes aren’t for the faint of heart. There’s a lot of chocolate and a lot of peanut butter in there, which means these babies are in no way, shape, or form even remotely healthy. But they’re so delicious it almost doesn’t (shouldn’t) bother you.

Putting these cupcakes together takes a bit of time—time I really didn’t have but managed to come up with in the form of foregone sleep. (Again, worth it. ) Each of the steps involved is fairly easy, but the batter can be a bit tricky to work with (see below), and of course it just plain takes time to individually frost 24 cupcakes. (It takes even longer when you keep stopping to sample the frosting while refilling your piping bag.) But the end result is a pretty, indulgent treat that’s the perfect reward for all that hard work.
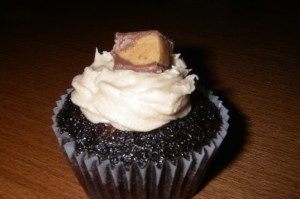
chocpbcup

Dark Chocolate Peanut Butter Cupcakes with Peanut Butter Buttercream
Cupcake recipe slightly adapted from Alida’s Kitchen

Ingredients:

For the cake:
2 cups granulated sugar
1 3/4 cups AP flour
1/2 cup unsweetened dark cocoa powder (I used Hershey’s Special Dark)
1 1/2 teaspoons baking powder
1 teaspoon salt
1/4 teaspoon baking soda
2 eggs
1 cup water
1 cup skim milk
1/2 cup canola oil
2 teaspoons vanilla extract

For the filling:
6 ounces cream cheese, at room temperature (the original recipe offers a lighter option, but I decided to go all in)
1/2 cup peanut butter
1/4 cup granulated sugar
2 tablespoons whole milk (the original recipe calls for skim, and I’m sure that would be fine as well)

For the frosting:
1 and 1/2 sticks of butter, at room temperature
3/4 cup peanut butter
2 and 3/4 cup confectioners sugar
1 tablespoon milk (I used whole)

Method:

To make the cake:
1. Preheat your oven to 350 degrees. Line 24 muffin cups with liners and set aside.
2. In a large bowl, whisk together the sugar, flour, cocoa, baking powder, salt, and baking soda.
3. In a separate bowl, whisk the eggs, water, milk, oil, and vanilla. Fold the wet imxture into the dry ingredients until just moistened. Note that the batter will be pretty thin.
4. Fill prepared muffin cups halfway with batter and set remaining batter aside.

To make the filling:
1. Using a hand or stand mixer, beat the cream cheese, peanut butter, sugar, and milk until combined. Divide the filling evenly amongst the 24 cups, dropping a spoonful of filling in the center of each.
2. Cover each cup with the remaining chocolate batter.
3. Bake for 25 minutes, or until a toothpick inserted into the cake comes out clean.
4. Cool for 10 minutes in the pan; then move the cupcakes to a wire rack to cool completely before adding the frosting.

To make the frosting:
1. In the bowl of your stand mixer, beat the butter and peanut butter together on medium speed until the mixture gets nice and smooth.
2. Add the confectioners sugar and beat on low for about one minute. Scrape down the sides of the bowl as necessary.
3. Add the tablespoon of milk and beat on medium for about another minute. If needed, add a little more confectioners sugar if you want your frosting to be thicker.
4. Use a spatula or piping bag to top your cupcakes once cooled.
5. Garnish with chopped miniature peanut butter cups if desired.

A few notes:
1. As mentioned above, the chocolate cupcake batter is pretty thin, which makes getting it cleanly into your muffin cups a bit of a challenge. I suggest using a batter/ice cream scoop but having a teaspoon ready underneath to catch stray drips.
2. I don’t tend to like tons of frosting on my cupcakes, and since these cupcakes are quite rich to begin with, I found that a small amount worked perfectly. But if you’re the type to pile on the frosting (and there’d be nothing wrong with that), you’ll probably want to make one and a half times the amount referenced above.

 

Peanut Butter and Jelly Bars

Sometimes it pays to keep things simple flavor-wise. Case in point: the classic peanut butter and jelly combination. Growing up, PB&J sandwiches were a steady part of my school lunch rotation; and while I suppose I enjoyed them, they certainly didn’t stand out at the time as anything particularly special. But as I got older, I began to develop a fondness for PB&J. Maybe it’s because your coworkers look at you funny when you’re sitting around the break room table and they’re all eating their tandoori chicken takeout while you’re eating something they haven’t tasted since 1987. Or perhaps it’s because there’s just something about the awesome flavor combination that simply brings back memories of being a carefree kid.

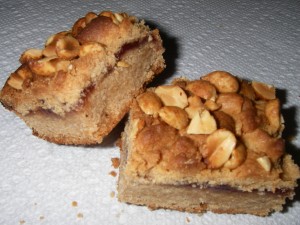
Either way, peanut butter and jelly is a winner in my book, so it was only natural take the concept one step further by turning it into dessert. I found this Martha Stewart recipe and decided to give it a go, and the result was a batch of peanut butter and jelly bars that are good enough to make any adult feel like a kid again.

For some reason, these bars took a little longer to make than I initially expected. The peanut butter dough was really thick, and so I had to keep scraping down the sides of my mixer bowl and adjusting the speed up and down. And then it took me awhile to chop up the peanuts and make the crumbly dough topping, but that’s partly because for some strange reason, I love the feeling of balled-up dough in between my fingers and probably wasn’t in a particular rush to get the process over with.

This recipe makes a nice amount of PB&J bars—which means you’ll probably have enough left over to divvy up among your coworkers in exchange for their promise to stop mocking you for your peanut butter and jelly lunches, at least for the foreseeable future.

IMGP1649

Peanut Butter and Jelly Bars
Recipe from Martha Stewart

Ingredients:
1 cup (2 sticks) of unsalted butter, room temperature, plus more to butter the pan
3 cups of AP flour, plus more for the pan
1 and 1/2 cups granulated sugar
2 large eggs
2 and 1/2 cups smooth peanut butter
1 and 1/2 teaspoons salt
1 teaspoon baking powder
1 teaspoon vanilla extract
1 and 1/2 cups of your favorite jam flavor (I used strawberry and classic grape—I’ll explain)
2/3 cup salted peanuts, roughly chopped

Method:
1. Preheat your oven to 350 degrees. Grease a 9-by-13-inch pan with butter, and line the bottom with parchment paper. Grease the parchment, and coat inside of the pan with flour; set aside.
2. Place the butter and sugar in the bowl of an electric mixer fitted with the paddle attachment. Beat the mixture on medium-high until fluffy, about 2 minutes. Add eggs and peanut butter; beat on medium until well-combined (this took me about 3-4 minutes; the original recipe estimates 2).
3. Whisk together the salt, baking powder, and flour. Add dry ingredients to mixture and beat on low-medium speed until well-combined (this took me another 3-4 minutes, alternating between speeds).
4. Add vanilla and mix until incorporated.
5. Transfer 2/3 of the mixture to your prepared pan, and spread evenly.
6. With a spatula, spread jam on top of peanut-butter mixture. **
7. Crumble remaining peanut butter mixture on top of the jam layer, and sprinkle with peanuts.
8. Bake until the tops turn golden, about 45-55 minutes. (The inserted toothpick test doesn’t really work here because the jelly layer is always going to be gooey.)
9. Transfer to a wire rack and make sure to cool these completely before cutting into them. I stuck them in the fridge to set for about an hour and then left them out on my counter for another hour before slicing them up—and that totally did the trick.

**I wanted to see what these would taste like with both strawberry and grape jelly, so I decided to put strawberry over half of the base and grape over the other half. While I don’t think the two versions taste remarkably different from one another, I do like the way the strawberry version gives you a touch of tanginess while the grape bars really take you back to that classic old-school flavor. I also wound up with a few hybrid bars as a result of the strawberry and grape jellies melting into each other in the middle of the pan during the baking process, but happily, those tasted just as good as their individual strawberry or grape counterparts.