Apple Walnut Date Bread

So here we go again…my love affair with apples continues. In fact, I actually went apple picking yet again this past weekend and gathered up a bunch of awesome varieties to add to my collection.

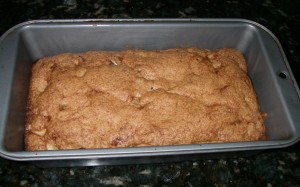
It’s a good thing there are so many great ways to incorporate apples into baking. This time, I decided to whip up some apple walnut date bread. This recipe is actually based on the one I used for the pear bread I recently made (in other words, it’s super easy).

What I like about this bread is that it’s just sweet enough to border on cake, but not too sweet. You can have it for breakfast or serve it as a side dish for dinner, and you won’t go wrong either way. Personally, I could eat this stuff any time of day, but I especially like it alongside a nice cup of coffee.

appledatebread

Apple Walnut Date Bread
Recipe adapted from Bake or Break

Ingredients:

3 cups AP flour
3/4 teaspoon baking soda
1/4 teaspoon baking powder
1 teaspoon salt
1 and 1/2 tablespoons ground cinnamon
1 cup chopped walnuts
3/4 cup vegetable oil
3 large eggs
2 cups granulated sugar
2 cups peeled and diced apples
1 cup chopped dates
2 teaspoons vanilla

Method:

  1. Preheat your oven to 350 degrees. Lightly grease and flour a two 9×5 loaf pans.
  2. Mix together the flour, baking soda, baking powder, salt, and cinnamon.
  3. In a separate bowl, whisk together the oil, eggs, sugar, apples, dates, walnuts, and vanilla. Add the wet mixture to the flour mixture until well-incorporated.
  4. Pour the batter into your prepared pans and bake for 60-65 minutes, or until an inserted toothpick comes out clean.
  5. Cool completely before cutting and serving.

Caramel Apple Toffee Bars

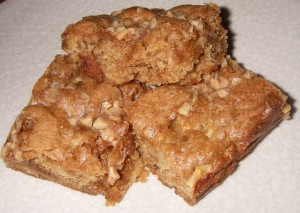
I just love caramel apples. I don’t have them often, but they’re definitely one of my all-time favorites fall treats. The problem with caramel apples, however, is that every time I eat one, I spend way too much worrying that I’m about to lose a tooth or three just by biting in. That’s why I think these caramel apple toffee bars are such a wonderful idea. They basically offer the same delicious taste of caramel apples without the potential dental repercussions. And while they do lack the crunch and texture that only an actual apple could offer, the toffee bits help make up for that slightly, especially when sprinkled generously on top.

Best of all, these bars are really easy to make, and they taste even better when warmed up and served with a bit of vanilla ice cream. If you’re a fan of caramel apples, be sure to add these to your to-do list.

appletoffeeblond

Caramel Apple Toffee Bars

Ingredients:

2 cups AP flour
2 tsp baking powder
1/4 tsp salt
2 tsp cinnamon
1/4 tsp nutmeg
1/2 cup butter, melted and cooled to room temp
3/4 cup packed dark brown sugar
3/4 cup white sugar
2 eggs
1 tbsp vanilla
2 cups diced and peeled apples
1 cup toffee bits, divided into 3/4 cup and 1/4 cup
1 cup caramel sauce (store-bought is fine, or you can make your own by combining about 15 Kraft caramels with two tablespoons of milk and melting in the microwave)

Method:

1. Preheat your oven to 350 degrees. Grease a 9×13 baking pan and set aside.
2. In medium bowl, whisk together the flour, baking powder, salt, and spices.
3. In a large bowl, combine the sugars and butter. Whisk thoroughly until well-combined.
4. Add eggs, one at a time, beating or whisking well to combine. Add vanilla extract and mix thoroughly.
5. Fold in the flour mixture a little bit at a time until just combined. Stir in apples, caramel sauce, and 3/4 cup toffee bits.
6. Pour the batter into your prepared pan. Sprinkle remaining 1/4 cup of toffee bits on top.
7. Bake for 30 minutes, or until an inserted toothpick comes out clean. The bars will/should be soft.
8. Remove the bars from the oven and let them cool completely (at least two hours) before slicing and serving.

Pear Bread

As excited as I am about the abundance of apples this time of year, there’s another fruit that I’ve also gotten pretty stoked about lately: the pear. I wasn’t always a huge fan of pears, but over the past year I’ve grown to really like them. And now that pears are in season, I’ve been trying to take advantage by incorporating them into my fall baking routine. To that end, I recently whipped up this wonderfully delicious pear bread.

If you enjoy pears, I highly recommend making this pear bread, which, really, might as well be called pear cake. The recipe couldn’t be easier to follow and the end result is a moist, light bread (er, cake) that’s perfect for breakfast or an afternoon snack. Actually, you could eat this anytime of the day. Have it for dinner, in fact. I won’t judge you…especially since that’s what I did a few nights ago.

pearbread

Pear Bread
Recipe from Bake or Break

Ingredients:

3 cups AP flour
1 teaspoon baking soda
1/4 teaspoon baking powder
1 teaspoon salt
1 tablespoon ground cinnamon
1 cup chopped pecans
3/4 cup vegetable oil
3 large eggs, lightly beaten
2 cups granulated sugar
2 cups peeled and finely grated ripe, firm pears
2 teaspoons vanilla extract

Method:

  1. Preheat your oven to 350 degrees. Lightly grease and flour a two 9×5 loaf pans.
  2. Mix together the flour, baking soda, baking powder, salt, and cinnamon. Scoop out about 1/4 cup of this mixture and combine it with the pecans to coat, and then stir back into the flour mixture.
  3. In a separate bowl, combine the oil, eggs, sugar, pears, and vanilla. Add the pear mixture to the flour mixture, stirring just until the flour disappears and the batter is evenly moistened.
  4. Pour the batter into your prepared pans and bake for 60-70 minutes, or until the bread is browned and firm on top and an inserted toothpick comes out clean.
  5. Cool completely before cutting and serving.

Oatmeal Chocolate Chip Bread

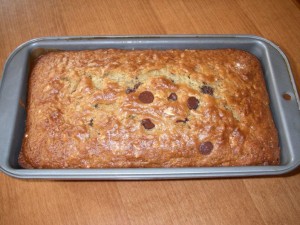
I’ll admit it: Sometimes I like eating sweets for breakfast. I think that’s called being human. At the same time, I don’t like my breakfast sweets to be too sweet (in other words, you usually won’t find me chowing down on a heavily iced chocolate fudge cupcake along with my morning coffee). So when I found myself craving a breakfast treat the other day, I decided to try a recipe that I’d recently seen on one of my favorite baking blogs.

Although you could serve this oatmeal chocolate chip bread after dinner or as an afternoon snack, to me, it’s just perfect for breakfast. The chocolate chips add just the right amount of sweetness, and the dense yet moist nature of the bread makes it perfect for dipping in coffee (confession: I’m a bit of a serial dunker). Best of all, it’s really a cinch to make, and if you have any left over, it’ll probably keep for the better part of a week as long as you keep it tightly wrapped.

oatmealccbread

Oatmeal Chocolate Chip Bread
Recipe from Bake or Break

Ingredients:

2 cups AP flour
1 cup rolled oats
1/2 cup granulated sugar
1/2 cup packed light brown sugar
2 teaspoons baking powder
1 teaspoon baking soda
1/2 teaspoon ground cinnamon
1/2 teaspoon salt
1/2 cup chopped pecans
1/2 cup semisweet chocolate chips
1 and 1/2 cups buttermilk
2 large eggs
1/4 cup butter, melted and cooled to room temp

Method:

  1. Preheat your oven to 350 degrees. Generously grease a 9×5 loaf pan with cooking spray.
  2. In a large bowl, mix together the flour, oats, sugars, baking powder, baking soda, cinnamon, and salt. Stir in pecans and chocolate chips.
  3. In a separate bowl, whisk together the buttermilk, eggs, and butter. Stir into dry ingredients just until-combined. Your batter may be a little lumpy, and that’s fine.
  4. Pour your batter into the prepared pan and bake for 50-55 minutes, or until an inserted toothpick comes out clean.
  5. Let the bread cool in its pan for at least an hour before slicing and serving.

White Chocolate Toffee Toasted Pecan Blondies

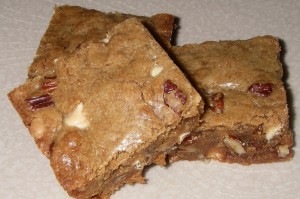
I’ve talked about my sweet tooth many times before, but let’s discuss my obsession with sweet things one more time for the purpose of sharing my latest sugar-infused creation. This concoction is actually based on the white chocolate cranberry blondies I made over the summer. But whereas the dried cranberries in that recipe cut the sweetness factor a little, the toffee and toasted pecans in this one serve the opposite purpose. In other words, you’ve been warned: These blondies are sweet. Very sweet. But if you’re like me, that’s not such a bad thing.

toastedpecanblond

White Chocolate Toffee Toasted Pecan Blondies

Ingredients:

3/4 cup butter, melted and cooled to room temp
1 and 1/2 cups packed dark brown sugar
2 large eggs
3/4 teaspoon vanilla extract
2 and 1/4 cups AP flour
1 and 1/2 teaspoons baking powder
1/4 teaspoon salt
1/4 teaspoon ground cinnamon
3/4 cup white chocolate chips
3/4 cup toffee bits
3/4 cup chopped toasted pecans

Method:

1. Preheat your oven to 350 degrees. Spray a 13×9-inch baking pan with nonstick spray and set aside.
2. In a large bowl, whisk together the butter and brown sugar until well-combined.
3. Beat or whisk in the eggs and vanilla.
4. In a separate bowl, whisk together the flour, baking powder, salt, and cinnamon.
5. Gradually add the dry mixture to the butter mixture.
6. Stir in the white chocolate chips, toffee bits, and pecans. The batter will be thick.
7. Spread your batter into the prepared pan and bake for 27-32 minutes, or until an inserted toothpick comes out clean.
8. Let the blondies cool in their pan completely before cutting and serving.

Apple Walnut Coffee Cake a/k/a Apple Disaster Cake

Last week, I discovered why it can sometimes be a problem to bake in somebody else’s kitchen. I was visiting my mom and decided that in honor of September and the fact that she’s awesome, I’d make one of her favorite cakes.

I stumbled upon this recipe several years ago and have been making it every September since then. The cake itself is moist, sweet but not too sweet, and full of so many of the fall flavors I absolutely love. And as an added bonus, when made correctly, it looks absolutely beautiful, especially with the baked apple pieces and walnuts adorning the top.

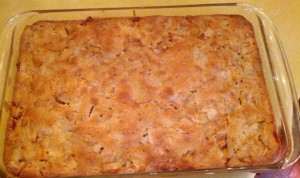
But as you can see, my most recent version of this cake didn’t turn out quite as lovely. And here’s why: When you use somebody else’s kitchen, you don’t always stop to think about how to handle equipment that’s different than yours. And whereas I have a tube pan that can be easily lifted from the top, my mom’s tube pan is the type where you insert the top into the bottom as sort of a separate, unattached piece.

Do you see where I’m going with this?

No sooner had I assembled a gorgeous, layered version of this fabulous cake when I foolishly decided to grab the tube pan from the top and bring it over to the oven. By doing so, I immediately managed to dislodge the top from the bottom, causing cake batter to spill rapidly out of the bottom of the pan and all over my mom’s countertop.

As you can imagine, I was not happy. But my mom, who’s a much sport than I am about these things, had a great idea: Instead of throwing out the spilled batter (which, by the way, constituted at least half the cake), wasting all those ingredients, and starting over from scratch, why not scoop it up, throw it into a 9×13 pan, and bake it as a non-layered, less pretty apple coffee cake?

The stubborn part of me initially tried to protest. After all, I wanted my cake in its original form, and I wanted to serve it to my mom the way she was used to having it. But not only is my mom a much better sport than I am, she can also be far more practical. And after spending several minutes consoling me (you know, her adult daughter who’s a mama herself and who was basically bordering on crying over spilled batter) and assuring me that this less spectacular version of the cake would no doubt turn out equally delicious, I agreed to proceed with Operation Cake Salvage.

And so we scooped up the spilled batter, dumped everything into a rectangular cake pan, and hoped for the best. And sure enough, the cake tasted incredible—moist, sweet but not too sweet, and full of the fall flavors that make it a winner, even when disaster strikes. And although I still recommend baking it in a tube pan as the original recipe suggests, if you don’t have one, you could always do what I did and make a less pretty but equally yummy version.
disaster

Apple Walnut Coffee Cake
Original recipe from Smitten Kitchen

Ingredients:
6 apples (the original recipe calls for McIntosh apples; I used Cortland and Gala this time around but have used McIntosh in the past)
1 tablespoon cinnamon
5 tablespoons sugar
2 3/4 cups flour, sifted
1 tablespoon baking powder
1 teaspoon salt
1 cup vegetable oil
2 cups sugar
1/4 cup orange juice
2 1/2 teaspoons vanilla
4 eggs
1 cup walnuts, chopped

Method:

1. Preheat oven to 350 degrees. Grease a tube (or 9 x 13 baking) pan. Peel, core and chop apples into chunks. Toss with cinnamon and sugar and set aside.
2. Stir together flour, baking powder and salt in a large mixing bowl. In a separate bowl, whisk together oil, orange juice, sugar and vanilla. Mix wet ingredients into the dry ones, then add eggs, one at a time. Scrape down the bowl to ensure all ingredients are incorporated.
3. Pour half of batter into prepared pan. Spread half of apples over it. Pour the remaining batter over the apples and arrange the remaining apples on top. Bake for about 1 1/2 hours, or until a tester comes out clean.



Coconut Chocolate Chip Blondies

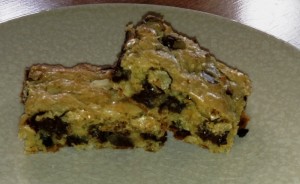
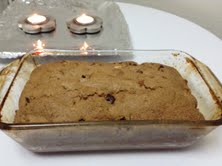
When it comes to fall (or early/pre-fall) baking, I’m usually all about the apples. But at the same time, I also like to mix it up a little. Since I hadn’t done anything with coconut for awhile, I decided to whip up a batch of coconut chocolate chip blondies.

This recipe is incredibly tasty and incredibly easy. You don’t need to bust out any fancy tools or spend more than 10-15 minutes putting these blondies together. Just have a couple of mixing bowls and spoons on hand, and you’ll be all set.

cocccblondies

Coconut Chocolate Chip Blondies
Recipe from Brown Eyed Baker

Ingredients:

1 cup AP flour
1/8 tsp salt
4 ounces unsalted butter, melted and cooled to room temperature
1 cup light brown sugar
1 large egg
1 and 1/2 tsp vanilla
1 cup sweetened flaked coconut
1 cup chocolate chips

Method:

1. Preheat your oven to 350°F. Grease and flour an 8×8 baking pan.
2. Combine the flour and salt; set aside.
3. Stir together the melted butter and brown sugar until smooth; beat in the egg and vanilla extract until well-blended.
4. Slowly beat in the flour mixture until blended; then stir in the coconut and chocolate chips.
5. Pour the batter into the prepared pan; use a rubber spatula (or the back of a spoon you’re already using if you’re feeling lazy, which is perfectly okay) to smooth the top.
6. Bake for 25-30 minutes, or until set in the center but still soft. Cool completely (at least one hour, but two would be better) before cutting and serving.

Chocolate Peanut Butter Pretzel Brownies

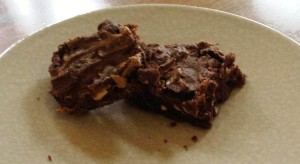
Wowsa. It’s been over a month since I’ve posted on here, so now that the weather is cooling down, I’ll have to get myself back into the swing of baking. I know I’ve mentioned before that I tend to bake less frequently during the summer, and I basically spent most of August avoiding the oven and indulging in frozen desserts instead. But just this past week, the weather suddenly turned cooler, and in a really nice way. And it was just enough motivation to get myself back into the kitchen and do a nice amount of baking.

While I tackled several different recipes over the past week, the first one I’d like to share is something simple yet tasty. These brownies are really a cinch to whip up. As is the case with most of the brownie recipes I like to make, this batch requires nothing more than a couple of mixing bowls and some basic ingredients. There’s no need to bust out the fancy tools or spend more than 15-20 minutes putting everything together. Plus, these brownies are really adaptable to a variety of mix-ins, so if peanuts and pretzels aren’t your thing, feel free to substitute something else.

Here’s to what will hopefully be a busy month of baking and a glorious start to fall.

pbpretzbrowniepic

Chocolate Peanut Butter Pretzel Brownies

Ingredients:
1 cup AP flour
1 stick of butter, melted and cooled to room temperature
½ cup light brown sugar
½ cup granulated sugar
½ cup unsweetened cocoa powder
1 egg
¼ cup peanut butter, plus more for topping
½ cup crushed pretzels
½ cup chopped peanuts

Method:
1. Preheat your oven to 350 degrees. Grease an 8×8 baking pan and set aside.
2. In a small bowl, whisk together the flour, cocoa powder, and salt. Set aside.
3. In a medium-sized bowl, whisk together the cooled melted butter and sugars until smooth. Beat in egg.
4. Mix in ¼ cup peanut butter, then slowly incorporate the flour and cocoa mixture, mixing well until fully blended into the wet ingredients.
5. Stir in the pretzels and peanuts.
6. Pour the batter into the prepared pan (it will be thick). Using the back of a spoon, swirl additional peanut butter on top of the brownie batter as desired.
7. Bake for 27-32 minutes, or until an inserted toothpick comes out clean. Let the brownies cool completely in their pan (at least 60 minutes but better to wait two hours to be safe) before cutting into them.


Chocolate Chip Muffins

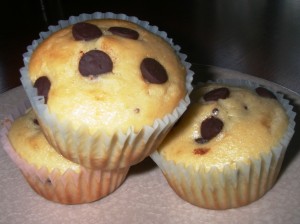
Delicious things don’t have to be complicated. Case in point: these moist, yummy chocolate chip muffins. I was given about an hour’s notice that we were having company this past weekend (that’s what happens when you let your husband make the plans), so I needed something quick and insanely easy to offer up to our guests. This recipe totally did the trick, and by the time our company arrived, I had these wonderful little muffins all nice and ready to serve.

chocchipmuff

Chocolate Chip Muffins
Recipe from Bakerella

Ingredients:

1 and 1/2 cups AP flour
1/2 cup granulated sugar
1 and 1/2 teaspoons baking powder
1/2 teaspoon salt
3/4 cup sour cream
1/4 cup milk (whole is best, but others work)
2 eggs
2 teaspoons vanilla
1/4 cup melted butter, cooled slightly
6 ounces semisweet chocolate chips

Method:

1. Preheat your oven to 350 degrees.
2. Line a muffin tray with 12 regular baking cups.
3. In a medium bowl, whisk together the flour, sugar, baking powder, and salt.
4. In another bowl, stir together the sour cream, milk, eggs, vanilla, and melted butter.
5. Incorporate the wet ingredients into the dry ingredients, mixing well.
6. Stir the in chocolate chips and divide the batter evenly into your baking cups.
7. Bake for about 22 minutes, or until an inserted toothpick comes out clean. (If you want your muffins to get a little crispier on top, leave them in the oven for an extra couple of minutes.)
8. Let the muffins cool in the pan for 1-2 minutes, then transfer to a wire rack to cool completely.

White Chocolate Cranberry Blondies

I have something shocking to admit: I haven’t been in much of a baking mood lately. I know—blasphemy, but this tends to happen to me during the summer. Still, I did decide this week to whip up a batch of blondies, and I’m glad I did, because they were the perfect accompaniment to the raspberry swirl ice cream I’ve been devouring like a madwoman.

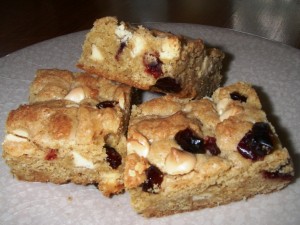
These blondies are basically your classic Cranberry Bliss Bar without the frosting. If you want to add frosting, you can find the recipe here. But I felt that these were more than sweet enough without it (thank you, white chocolate).

These blondies strike that perfect balance of being chewy yet light; and the cranberries add a nice touch of tartness to a sweet white chocolate-infused batter. Best of all, they’re really easy to throw together. My batch took less than 15 minutes from start to finish, including cleanup. And aside from tasting great, they’re also pretty to look at. If you’re in the mood for a quick summertime treat, these blondies will be sure to hit the spot.

cranblondies

White Chocolate Cranberry Blondies
Recipe from RecipeGirl

Ingredients:

3/4 cup butter
1 and 1/2 cups packed light brown sugar
2 large eggs
3/4 teaspoon vanilla extract
2 and 1/4 cups AP flour
1 and 1/2 teaspoons baking powder
1/4 teaspoon salt
1/4 teaspoon ground cinnamon (the original recipe said 1/8 of a teaspoon, but I like a slightly stronger cinnamon essence; you can also add a pinch of nutmeg if you enjoy that flavor profile)
1/2 cup dried cranberries
6 ounces white chocolate, coarsely chopped (or you can use white chocolate chips)

Method:

1. Preheat your oven to 350 degrees. Spray a 13×9-inch baking pan with nonstick spray and set aside.
2. Melt the butter for one minute in the microwave; stir in brown sugar and then cool to room temperature.
3. Beat or whisk in the eggs and vanilla.
4. In a separate bowl, whisk together the flour, baking powder, salt and cinnamon.
5. Gradually add the dry mixture to the butter mixture.
6. Stir in the cranberries and chopped chocolate. Note that your batter will be thick.
7. Spread your batter into the prepared pan and bake for 20-25 minutes, or until an inserted toothpick comes out clean.
8. Let the blondies cool in their pan completely before cutting and serving.