White Chocolate Blondies

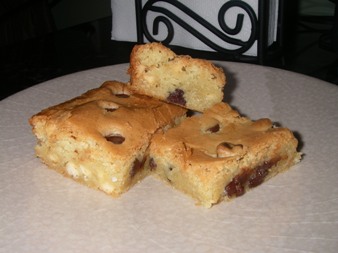
Some people aren’t fans of white chocolate. But I am—big time. And since I hadn’t baked with white chocolate in awhile, I decided to whip up some easy blondies.

These bars really are a cinch to make. The only tricky part is keeping an eye on the white chocolate while it’s melting. Of course, the best way to melt white chocolate is to use a double boiler, but I got lazy/was in a bit of a hurry and chose the microwave method instead. And you know what? These blondies didn’t suffer one bit.

whitechocblondies

White Chocolate Blondies

Ingredients:
1 cup AP flour
½ teaspoon baking powder
½ teaspoon salt
5 tablespoons butter
2 eggs
1 cup granulated sugar
3 teaspoons vanilla
1 cup white chocolate chips or chopped white chocolate plus another 1/4 cup
½ cup bittersweet or semisweet chocolate chips

Method:
1. Preheat your oven to 350 degrees and lightly grease an 8×8 baking pan.
2. In a small bowl, whisk together the flour, baking powder, and salt. Set aside.
3. Using either your stovetop or microwave, combine the butter and 1 cup of white chocolate to melt. If using your stovetop, put butter and white chocolate in either a double boiler or heavy duty saucepan and melt on low heat while stirring frequently. If using the microwave, put butter and white chocolate in a small bowl and melt on 50% power for 30-second increments until butter is melted and white chocolate is mostly melted. Use a fork or whisk to get the chocolate nice and smooth.
4. In a large bowl, whisk together your eggs, sugar, and vanilla. Add in the white chocolate mixture and whisk until smooth and well-combined.
5. Whisk or stir in the flour mixture until incorporated.
6. Stir in 1/4 cup white chocolate and bittersweet or semisweet chocolate chips.
7. Pour batter into prepared pan. If desired, sprinkle some more of the dark chocolate chips on top.
8. Bake for 25-30 minutes, or until an inserted toothpick comes out clean. Let the blondies cool completely in the pan before cutting into bars.

Blueberry and Peach Crumble

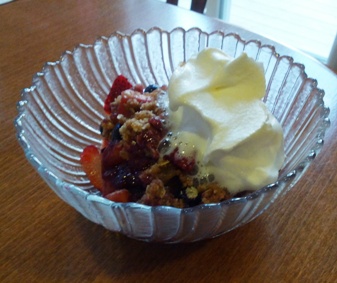
Now that the warm weather seems to be sticking around, I’ve been less and less in the mood for brownies (I know, blasphemy) and more and more in the mood for all things fruit-related. I just love the selection of fresh fruit we get this time of year, and I find myself constantly stocking up and chowing down on melons, peaches, plums, and berries. And while I can easily enjoy my fruit as-is, for me, there’s almost nothing better than a warm, fresh-from-the-oven fruit crumble.

The great thing about crumbles like this one is that they’re super easy to make. Just slice up your favorite fruit and toss it in a little sugar and lemon juice. Then whip up a crumble mixture using your hands, toss it in the oven, and you’re done.

For my latest concoction, I decided to feature blueberries and peaches in the crumble itself, but what I actually did was cut up a bunch of strawberries and plums to use as a cold, fresh bottom layer. You don’t have to take that extra step, but I like the contrast of cold fruit on the bottom, warm crumble in the middle, and cool whipped cream on top. Vanilla ice cream also works wonderfully if you have some on hand. Or, you can forego the extras and enjoy this crumble on its own.

Here’s to a summer full of fresh fruit and delicious fruit-centric recipes.

blupeachcrumble

Blueberry and Peach Crumble

Ingredients:

For the fruit mixture:
1 cups blueberries
1 cup peaches, peeled and sliced (about 2 large or 3 medium peaches)
1 tablespoon lemon juice
1/2 cup granulated sugar
1 and 1/2 tablespoons AP flour

For the topping:
1/4 cup AP flour
1/4 cup oats (instant should work just fine)
1/4 cup dark brown sugar
2 tablespoons granulated sugar
1/2 teaspoon cinnamon, or 1/4 teaspoon cinnamon and 1/4 teaspoon nutmeg – whichever flavor profile you prefer
Pinch of salt to taste
1 teaspoon ground cinnamon
3 tablespoons room temperature butter cut into small pieces

Method:
1. Preheat your oven to 350 degrees.
2. To make the fruit mixture, combine the blueberries and peaches in a medium-sized oven-safe bowl (Pyrex works well). Toss with lemon juice, sugar, and flour until the fruit is well-coated. Let the mixture sit for about 20-30 minutes before topping.
3. To make the topping, whisk together the flour, oats, sugars, salt, and cinnamon in a medium bowl. Using your fingers, mix in the pieces of butter until the mixture comes together and takes on a crumbly consistency. To make this step easier, before you get started handling the butter, try coating your fingers with a little cooking spray. You’ll have less trouble working with the mixture once it gets sticky. Once the crumble comes together, sprinkle it evenly over the fruit.
4. Place the bowl with the now-assembled fruit crisp on a larger baking sheet. Bake for 35-45 minutes, or until the top starts to brown and you can see the fruit mixture bubbling on the sides. Serve warm with whatever accompaniments you prefer.
5. Store leftovers, if any, in the fridge, and eat within a day or two. This recipe is designed to serve four people, but you can easily double or triple it if you’re looking to feed a larger crowd.

Chocolate Butterscotch Crumb Bars

I like my job. I really do. But what I don’t like about my job is the fact that people tend to wait till the very last possible minute to ask me for things.

Now normally I pride myself on having a pretty good work ethic and going out of my way to be helpful. And I’m definitely not the type of person to put things off till the following day if there’s any chance of getting the job done on the spot. But when you email me at the very last second asking for something that will take at least 30 minutes of my time, you’re putting me in a position where I might be late picking up my child from daycare. And being late to daycare is bad for a lot of reasons, not the least of which is the fact that you actually get charged by the minute for not showing up on time.

A few weeks ago, I almost didn’t make it to the center on time. In fact, the only reason I got there about a minute shy of closing is that I was more than a little bit liberal with some of our local traffic laws. And why was I rushing in the first place? Oh yeah, because someone needed something from me at the very last possible minute, kind of like what happened last night.

Okay, rant over. I’m sure I’m not the only working person who goes through this, right?

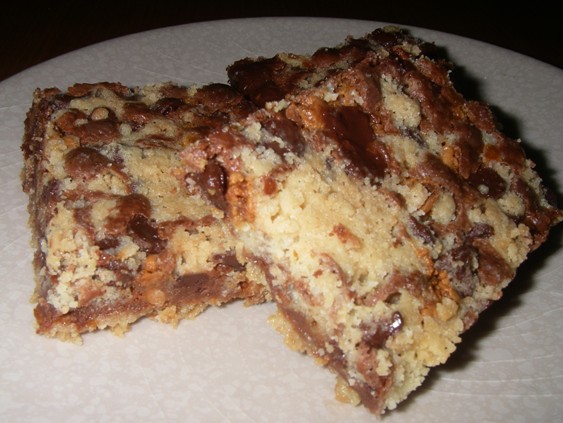
Anyway, moving on…let’s talk about these yummy chocolate crumb bars. I decided to bake something for my coworkers—not the ones who cause me stress and aggravation by demanding things at the last minute, but rather the ones I actually like. These bars are really tasty and relatively simple to whip up. The original recipe didn’t include butterscotch chips, but I’m a big fan of the chocolate-butterscotch flavor combo and decided to mix things up a bit. I like the fact that these bars get nice and gooey in the center. They’re a great snack to have on hand or share with people you like. You can also keep some in your car in case you get pulled over by a local police officer wanting to know why you were going 50 in a 30 mile per hour zone and you need some sort of impromptu bribe. (For the record, I didn’t actually get pulled over en route to daycare. But it could’ve happened. Multiple times over. Thank you, procrastinating coworkers. Okay, maybe my rant wasn’t quite over.)

crumbbars

Chocolate Butterscotch Crumb Bars
Original recipe can be found here

Ingredients:
1 cup (2 sticks) of butter, softened
1 and 3/4 cups AP flour
1/2 cup granulated sugar
1/4 teaspoon salt
1 cup of semisweet chocolate chips, divided
1 cup of butterscotch chips, divided
1 can (14 oz) of sweetened condensed milk
1 teaspoon vanilla extract

Method:
1. Preheat your oven to 350 degrees. Grease a 13 x 9-inch baking pan.
2. Beat the butter in a large mixing bowl or in a stand mixer until creamy. Mix in the flour, sugar, and salt until crumbly.
3. With or floured or greased fingers (I sometimes spray a bit of cooking spray onto my fingers), press 2 cups of the crumb mixture into the bottom of your prepared baking pan; reserve remaining mixture for topping.
4. Bake for 10-12 minutes, or until the edges are golden brown.
5. While the mixture is baking, combine 1/2 cup semisweet chips, 1/2 cup butterscotch chips, and condensed milk in a small saucepan.
6. Warm over low heat, stirring until smooth. Stir in vanilla extract. Spread over hot crust.
7. Stir remaining chips into reserved crumb mixture and use your hands to sprinkle over chocolate filling.
8. Bake for 25-30 minutes, or until center is set.
9. Cool in pan on wire rack before cutting into bars.

White Chocolate Coconut Butterscotch Bark

Ever meet one of those people who claims he or she doesn’t like sweets? That’s exactly the type of story a friend of mine tried to stick to recently when I offered her a piece of my latest concoction.

“No thanks,” she had answered. “You know me; I don’t really go for sweets.”

My response? “Um, okay, more for me then.”

And so I proceeded to help myself to a piece (or three) of candy as we sat in my living room chatting, and at some point during the conversation, she suddenly had a change of heart and decided she wanted a taste. I of course obliged, and 10 minutes later, I found myself prying the plate of confections out of her hands for fear that Miss I Don’t Like Sweets would singlehandedly devour my entire supply in a single sitting (or at least that’s the scenario that played out in my head…in reality, all I could do was sit there and watch in horror as she took down piece after piece).

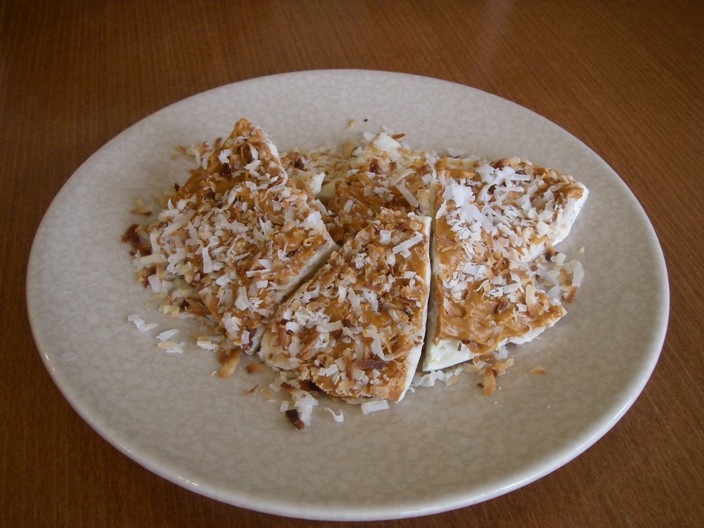
Anyway, the fact that my adamantly anti-sweets visitor couldn’t stop herself from eating this candy is a testament to how good it is. And the best part about this concoction is that it’s so incredibly easy to make. Just toast some coconut, mix in some melted chocolate, and wait (not so) patiently as it sets in the fridge. Then bust it out and get ready to convert even the biggest non-believers in all things sugary sweet.

cocobark

White Chocolate Coconut Butterscotch Bark

Ingredients:
2 cups sweetened coconut, toasted and divided into 4 equal parts
1 and ½ cups white chocolate
1 cup butterscotch chips

Method:
1. Line a baking sheet with parchment paper; set aside.
2. Toast coconut in the oven or microwave; set aside.
3. Heat the white chocolate in the microwave at 50% power for 30-second intervals, stirring in between. Once melted, stir ¼ of the toasted coconut into the chocolate. Pour the mixture onto the prepared baking sheet and use an offset spatula to spread it around. Top with ¼ of the coconut.
4. Heat the butterscotch chips in the microwave using the method described above. Once melted, stir in ¼ of the coconut. Pour over the white chocolate and coconut layers and use a spoon to swirl it around. Top with remaining coconut and let set in the fridge for 1-2 hours. Once set, use a sharp knife or your hands to break into pieces.
5. Be careful when offering to friends—your supply may start to dwindle too rapidly for comfort.

Crazy Bark

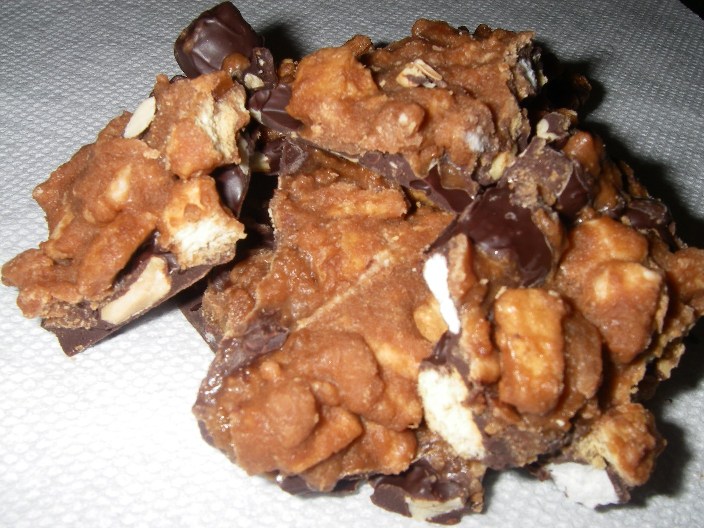
Sometimes I like to get a little nutty in the kitchen, especially when said nuttiness can be achieved without investing a significant amount of time. I invented this concoction awhile back and decided to whip up a batch recently. I call it Crazy Bark, ‘cause, well, it’s a little insane.

How do I describe what this is? In a nutshell, it’s like a s’more and a peanut chew collided to make one supremely indulgent concoction. I mean, take a look at the ingredients. You’ve got chocolate and peanut butter. You’ve got caramel. You’ve got graham crackers and marshmallows. What more could you ask for?

crazybrk

Crazy Bark

Ingredients:

For the bottom layer:
1 cup semisweet chocolate, chopped
1/2 cup dark chocolate
1/3 cup lightly salted peanuts
1/4 cup peanut butter
1/3 cup chopped marshmallows (not mini marshmallows—you want smaller pieces here)
1 graham cracker, chopped

For the top layer:
1/2 cup caramel chips (if you can’t find these, feel free to use butterscotch or peanut butter chips instead; or, just double the amount of caramel and milk indicated below)
6-8 Kraft caramels, unwrapped
1 tbsp whole milk (you can use another type of milk if you don’t typically have whole milk on hand)
1/3 cup chopped marshmallows
1/3 cup chopped graham crackers

Method:

1. Line a baking sheet with parchment paper and set aside.
2. Melt the semisweet chocolate, dark chocolate, and peanut butter in the microwave on 50% power at 30-second intervals, stirring in between. Once melted, stir in the peanuts, marshmallows, and graham cracker. Pour the mixture into your prepared baking sheet and refrigerate until set (1-2 hours).
3. Once the bottom layer has set, combine the caramel chips, caramels, and milk in a bowl and melt the mixture in the microwave. Once melted, stir in the marshmallows and graham crackers. Pour the mixture over the bottom layer and return to the fridge to set (another 1-2 hours).
4. Once the bark has set, use a sharp knife (or your hands) to break into pieces. Try not to eat entire batch all at once.

Chocolate Cinnamon Oatmeal Bars

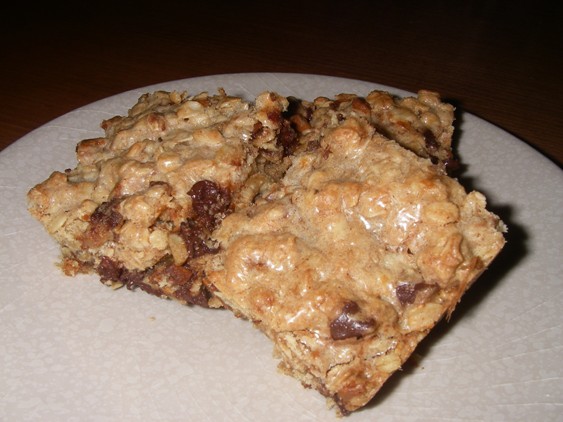
Oops. I realized I made these awhile ago but never got around to posting the recipe. Luckily I remembered to take a picture, so better late than never I suppose.

Anyway, I’m a big fan of repurposing easy recipes, especially when they come out tasting delicious. So when I needed something to throw together for an impromptu neighborhood gathering, I decided to revisit the oatmeal raisin bars I made a little while back. This time, however, I decided to forego the raisins in favor of chocolate and cinnamon chips. The end result? Pure magic in every bite.

oatmealchoccin

Chocolate Cinnamon Oatmeal Bars
Recipe slightly adapted from Martha Stewart

Ingredients:
3/4 cup (1 1/2 sticks) unsalted butter, melted, plus more for pan
3/4 cup packed light-brown sugar
1/4 cup granulated sugar
1 large egg
1/2 teaspoon salt
1/2 teaspoon ground cinnamon
1 cup AP flour
2 cups old-fashioned rolled oats
1/2 cup semisweet chocolate chips
1/2 cup cinnamon chips

Method:
1. Preheat your oven to 350 degrees.
2. Butter an 8×8 square baking pan. Line the bottom with parchment paper, leaving an overhang on two sides, and butter the paper.
3. In a large bowl, whisk together the butter, sugars, egg, salt, and cinnamon until smooth. Add flour, oats, and chips; fold in just until combined.
4. Spread batter in prepared pan, and bake for 25 to 30 minutes, or until an inserted toothpick comes out clean. Cool completely in pan.
5. Once cool, use the parchment paper to lift the bars onto a work surface for cutting.


Oatmeal Chocolate Peanut Butter Bars

We’ve had a bit of a heat wave lately here in New Jersey. And for the record, I knew this was going to happen. See, most years we get at least a little taste of that wonderful season called “spring.” You know, when the sun comes out and the temps are warm enough for you to walk around outside in a t-shirt without being too hot or too cold. Well, this year we basically had cold, often-rainy weather up until a couple of days ago. Then it turned hot. Really hot. I’m talking 85-degree, smog in the air hot. It’s the type of weather where my naturally curly hair doesn’t stand a chance (not that I’m above pulling it back into a bun or slapping a baseball cap on top of my head, but there’s just something about massive, uncontrollable humidity-induced frizz that makes my self-esteem take a bit of a hit) and the simple act of walking down the street is enough to make you reach for a Gatorade.

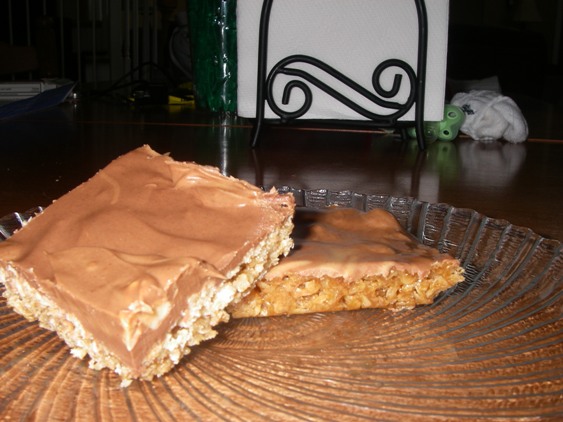
In weather like this, all I ever really want to eat is yogurt, cereal, and ice cream. And the last thing I want to do is slave over a hot stove or even contemplate turning on my oven. But alas, my desire to put something in my stomach other than pure dairy got the better of me, and so I decided to bake up some quick oatmeal bars.

The good thing about this recipe is that it’s just about the easiest thing ever. You don’t need fancy equipment or a ton of ingredients, and your oven stays on for only a short amount of time. While some people might refer to these babies as oatmeal cookie bars, to me, they’re more like candy bars. The only downside to making them smack in the middle of a heat wave is that the tops have a tendency to melt if you’re cheap and stubborn like me and refuse to run your air conditioner (though I eventually caved). In fact, you’ll definitely want to store these in the fridge, no matter the season. But if you like chewy, chocolate peanut butter candy bars, you’ll definitely want to whip up a batch of these. Just be careful offering them up to neighbors, coworkers, and friends—you may be surprised at what little you have left for yourself.

oatmealcandybars

Oatmeal Chocolate Peanut Butter Bars

Ingredients:

For the base:
4 cups of quick-cooking oats
1 cup dark brown sugar
3/4 cup butter, melted
1/2 cup corn syrup

For the topping:
1 cup milk chocolate, chopped (it’s okay to use chocolate chips)
1 cup peanut butter
1/2 cup peanuts, chopped

Method:

For the base:
1. Preheat your oven to 350 degrees. Grease a 9×13 pan and set aside. Using a wooden spoon, combine the oats, brown sugar, butter, and corn syrup.
2. Press the mixture into your prepared pan and bake for 10-12 minutes.
3. Allow the base to cool completely (at least 30 minutes) before adding the topping.

For the topping:
1. Combine the chocolate and peanut butter in a small bowl and melt in the microwave at 50% power for 30-second increments, stirring in between each. Once the mixture is smooth, immediately stir in the peanuts and then use an offset spatula to spread the topping over the base.
2. Place the bars in the fridge to set, at least one hour.
Keep these bars stored in the fridge, not at room temp. They happen to taste really good cold, but if you’d prefer them a little warmer and chewier, just take them out about 15-30 minutes before you want to eat them. I don’t recommend microwaving them to warm them up, as the topping has a tendency to melt quickly.


M&M Sugar Cookies

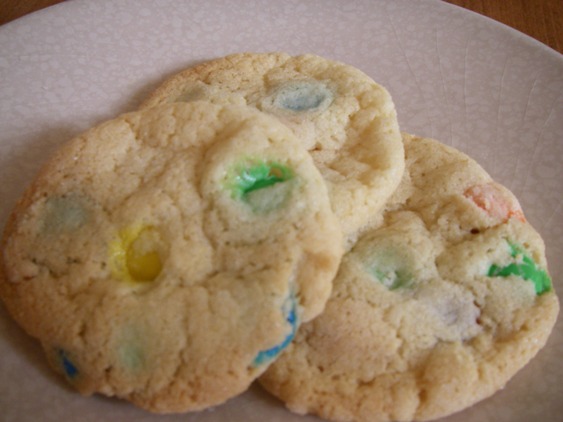
Do you like M&Ms? I do. In fact, I think they’re wonderful. And while I’m definitely happy to eat them on their own, there’s just something about the presence of M&Ms in baked goods that makes me feel like a kid again.

It had been awhile since I’d made cookies, so I decided to try this recipe for M&M cookies. The process was fairly quick and easy, and the cookies came out tasting really yummy in the end. My only gripe is that they didn’t wind up as soft and chewy as I would’ve liked—but I blame myself for that, not the recipe.

If you’re looking for a fun cookie recipe to try, give this one a shot. Even if your cookies end up a little more on the crispy side like mine did, you’ll probably still get plenty of takers when you offer them up. I even caved and let the baby have a bite of one. Not shockingly, he loved it.

mandmcook

M&M Sugar Cookies
Recipe from Tracey’s Culinary Adventures

Ingredients:
2 and 1/4 cups AP flour
1 teaspoon baking powder
1/2 teaspoon baking soda
1/2 teaspoon salt
1 and 1/2 cups sugar, plus 1/3 cup for rolling
2 oz cream cheese, cut into 8 pieces
6 tablespoons unsalted butter, melted and still warm
1/3 cup vegetable (or canola) oil
1 large egg, at room temperature
1 tablespoon milk
2 teaspoons vanilla extract
1 and 1/4 cup M&Ms

Method:
1. Preheat your oven to 350 degrees. Line 2 or 3 baking sheets with parchment paper (see note below).
2. In a medium bowl, whisk together the flour, baking powder, baking soda, and salt.
3. Combine 1 1/2 cups of sugar and cream cheese in a large bowl (no need to stir them together yet).
4. Put the remaining 1/3 cup sugar in a pie plate and set aside.
5. Pour the warm butter over the cream cheese mixture and whisk to combine. The mixture won’t be completely smooth yet, and that’s okay.
6. Whisk in the oil, and then whisk in the egg, milk, and vanilla extract. Mix until smooth.
7. Use a rubber spatula to start folding the dry ingredients into the wet. When the dry ingredients are partially incorporated, add 3/4 cup of the M&Ms to the dough. Continue mixing until a soft dough comes together. (Don’t wait to add the M&Ms until the dry ingredients are completely incorporated, or you’ll end up over-mixing.)
8. Portion the dough onto the prepared baking sheets with a cookie scoop. Working quickly (if you handle the dough too much, you’re more likely to wind up with flat cookies—which is what happened to me), roll the dough into a ball with your hands, and then roll in the sugar set aside in the pie plate. Repeat until you’ve used all of the dough, placing 12 cookies on each baking sheet. Use the bottom of a glass to flatten the dough balls into discs that are about 2 inches in diameter (or don’t, and see if this helps your cookies come out softer and fluffier). Gently press 2 or 3 more M&M’s into the top of each cookie.
9. Bake the cookies for 11-13 minutes, or until the edges are set. The tops will be puffy and slightly cracked.
10. Transfer the baking sheet to a wire rack and let the cookies cool on the sheet for 5 minutes; then transfer them to the rack to cool completely.

Note: The original recipe says it’ll yield about 24 cookies, but I easily got 36 decent-sized cookies out of this batch.

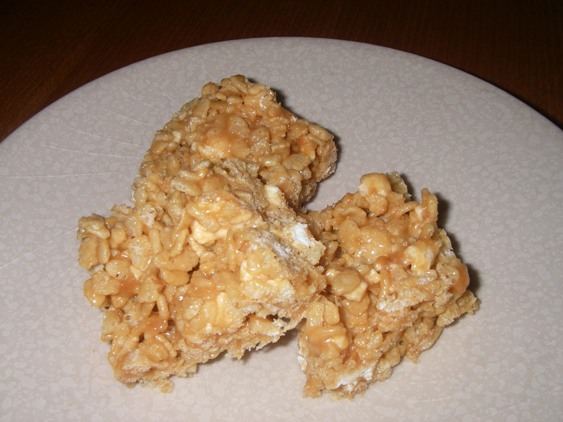
Caramel Tres Leches Rice Krispies Treats, or What to Do With Leftover Tres Leches Mix

Remember that delicious tres leches cake I made recently? Well, the one annoying thing about the recipe is that it calls for about a cup of that yummy milk mixture to be discarded. Since I don’t like letting any type of food go to waste, I decided to get creative in finding a way to repurpose some of what I had leftover. And hence these caramel tres leches Rice Krispies treats were born.

This recipe is incredibly easy to whip up. It only takes a few minutes, and there’s no actual baking involved. The only thing is that the cleanup can be a little messy…and the bars themselves, though wonderfully tasty, did end up coming out a little sticky. But if you do what I did and cover them individually with plastic wrap, you’ll have a nice little snack supply on hand.

Incidentally, I still have some more of that milk mixture left over, so if anyone has any ideas on what to do with it before it goes bad in my fridge, I’m all ears.

rktreats

Caramel Tres Leches Rice Krispies Treat

Ingredients:
1 and ½ cups Rice Krispies cereal
1 cup miniature marshmallows
About 20 Kraft caramel candies, unwrapped
3 tablespoons tres leches mix (heavy cream, evaporated milk, and condensed milk combined)

Method:
1. Line an 8×8 baking pan with parchment paper.
2. Combine the caramel candies and tres leches mix and heat in the microwave or on the stovetop until the caramels have melted and the mixture starts to bubble slightly.
3. Stir in marshmallows and cereal, making sure to coat the cereal well.
4. Pour the mixture into your prepared pan and refrigerate until set, about one hour. Cut into squares and enjoy.

Chocolate Blackout Cake

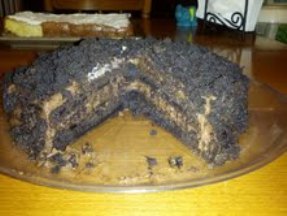
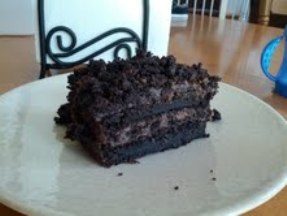
As I mentioned in my previous post, this past weekend was my husband’s birthday, and I went a little crazy and decided to make him two cakes to celebrate the occasion. The first was a yummy tres leches cake, and the second was this insanely, intensely delicious chocolate blackout cake.

To give you the back story (it’s a quick one): Before my husband and I had our baby, we used to actually leave the house for dinner every so often. And when we did, we’d often hit up a local diner that served this awesome chocolate cake. My husband, who’s definitely not a big cake person, would order it and devour it every time. So since it was his birthday, and since it’s been well over a year since we’ve gone out and had that cake, I decided I would try to make something similar.

I started searching for a blackout cake recipe online and stumbled across this classic Brooklyn recipe from the famed and long-gone Ebinger’s bakery. Being a Brooklyn girl at heart (I grew up there), I just had to give it a go. And it’s a good thing I did, because I think this is one of the best cakes I’ve ever made. The cake itself is rich and moist, and combined with the chocolate pudding filling, the end result is absolutely amazing. If you’re a chocolate-lover, you must try this cake. And when you do, having a tall glass of milk on hand and is practically a must.

The recipe itself isn’t complicated, but you do need to leave yourself enough time to allow the pudding to set up. I actually made the pudding the day before and left it in the fridge overnight; but if you start early enough, you can definitely pull off this cake in a single day. And if you’re like me and my husband, you can definitely take down half this cake in a single sitting. But you probably shouldn’t. No judgment either way.
blackout

Chocolate Blackout Cake
Original recipe can be found here

Ingredients:

For the cake:
1 stick unsalted butter, plus extra for greasing pans
1 and 1/2 cups AP flour, plus extra for dusting pans
2 tsp baking powder
1/2 tsp baking soda
1/2 tsp salt
3/4 cup cocoa powder
1 cup strong black coffee
1 cup buttermilk
1 cup packed light brown sugar
1 cup granulated sugar
2 large eggs
1 tsp vanilla extract

For the chocolate pudding/filling:
1 and 1/4 cups granulated sugar
1/4 cup cornstarch
1/2 teaspoon salt
2 cups half and half
1 cup whole milk
6 oz unsweetened chocolate, chopped
2 tsp vanilla

Method:

For the cake:
1. Preheat your heat oven to 325 degrees.
2. Butter and flour two 8-inch cake pans, plus a mini loaf tin (you’ll want to have an extra “mini cake” on hand for the crumb topping).
3. Whisk together the flour, baking powder, baking soda, and salt. Set aside.
4. Melt the butter in a large saucepan over medium heat. Stir in the cocoa and cook until fragrant, about 1 minute.
5. Take the mixture off the heat and whisk in your coffee, buttermilk, and sugars until dissolved.
6. Whisk in your eggs and vanilla, and then slowly whisk in the flour mixture.
7. Pour some batter into the mini loaf pan until it’s about half-full. Then divide the remaining batter evenly between your 8-inch pans and bake for 30-35 minutes, or until an inserted toothpick comes out clean.
8. Let the cakes cool in their pans for about 15 minutes and then invert onto a wire rack to cool completely (at least one hour).

For the chocolate pudding/filling:
1. Whisk together your sugar, cornstarch, salt, half and half, and milk in a large saucepan.
2. Set the pan over medium heat. Add the chocolate and whisk constantly until the chocolate melts and the mixture begins to bubble. (The original recipe said this would take 2 to 4 minutes, but I let mine go for about double that time. You want the mixture bubbling pretty consistently; otherwise your pudding may not set up.)
3. Stir in your vanilla and transfer the pudding to large bowl.
4. Place plastic wrap directly on the surface of the pudding and refrigerate until cold, at least 4 hours and up to a full day. The plastic wrap is supposed to prevent a skin from forming. If you get one anyway, just scrape it off.

To assemble the cake:
1. Take the cake from the mini loaf pan and use your hands to crumble it into crumbs. Set aside.
2. Place the first cake layer on a platter and top with pudding. Sprinkle on crumbs.
3. Place the second cake layer on top of the filling and spread your remaining pudding evenly over the top and sides of the cake. Then sprinkle your remaining cake crumbs evenly over the top and sides of the cake, pressing lightly so that the crumbs stick.
4. Store the cake in the refrigerator. The recipe says it’ll keep for two days, but that depends on the speed at which you devour it. Again, no judgment either way.
blackoutslicejpg